How to Boot a Mac in Target Disk Mode
Apr 7, 2010 - 13 Comments
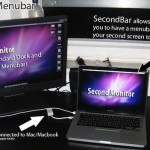
Target Disk Mode is a very handy feature available to use with Mac’s that have Thunderbolt or Firewire ports, and it allows you to use one Mac as an external drive on another host machine. This incredibly useful feature makes troubleshooting, installations, large file transfers, and critical backups extremely easy and very fast. Before beginning, … Read More