8 Simple iPhone Security Tips
An iPhone contains huge amounts of detailed personal information about the owner, including emails, contact lists, banking information, personal notes, pictures, and much more, all of which most users want to keep private and secure. Fortunately the iPhone makes having a secured device pretty user friendly, and even novice users can take a few fairly simple precautions to make sure their devices are secure and locked down.
The approaches we’ll cover here will help keep prying eyes away from your personal data, even if someone was to gain access to your iPhone by theft or otherwise.
iPhone Security Tips
Ready to have your iPhone be a bit more secure? Then check out some of these security tips that can beef up your privacy and device security.
1: Use a Passcode, the Longer the Better
Almost everyone knows they should enable the passcode on iPhone or iPad, and this needs to be the first tip because many people skip this. Always use a passcode!
Perhaps lesser known is that users should aim to have a longer passcode whenever possible as well.
Newer versions of iOS default to wanting to use six digit passcodes versus the four digit passcode from prior releases, and you should absolutely take advantage of that.
- Open “Settings” and go to “Face ID and Passcode” or “Touch ID and Passcode”
- Choose “Turn Passcode On” if you haven’t done so already, otherwise choose “Change Passcode” and pick a six digit or longer passcode (or use an alphanumeric if you want to get more complex and safer)
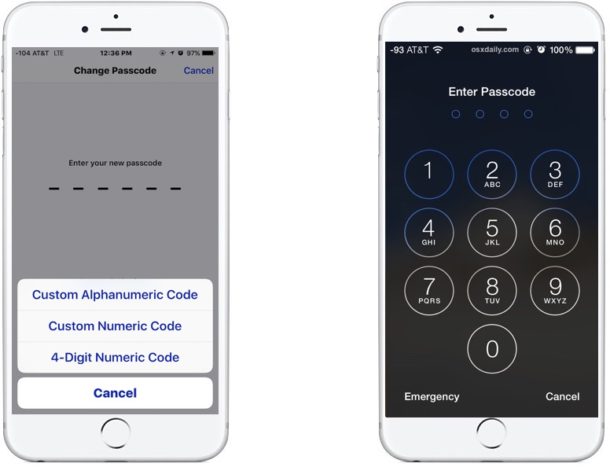
Even if you just elongate an existing four digit passcode into six digits or longer, that is better than nothing as it still makes the passcode much harder to guess.
The bottom line is that a longer passcode is more secure.
2: Disable Lock Screen Access to Notifications, Certain Features
It’s obviously useful to have lock screen access to notifications, Today view, Siri, Messages, and Apple Pay Wallet, but this can pose some potential security issues if someone was to get ahold of your device as it may reveal some important info from a text message or a notification. The easy way to avoid this is to turn off this stuff if you don’t use it enough to find it valuable:
- Open “Settings” and go to “Touch ID and Passcode”
- Under “Allow Access When Locked” section, toggle settings OFF for Today, Notifications View, Reply with Message, Wallet, and maybe Siri*
* Personally I leave Siri enabled because I find it very useful, but also because Siri from the lock screen allows users to ask “whose iPhone is this?” to see the owners contact info, which may help an honest person return a lost iPhone to you as the rightful owner.
3: Enable iCloud and Find My iPhone
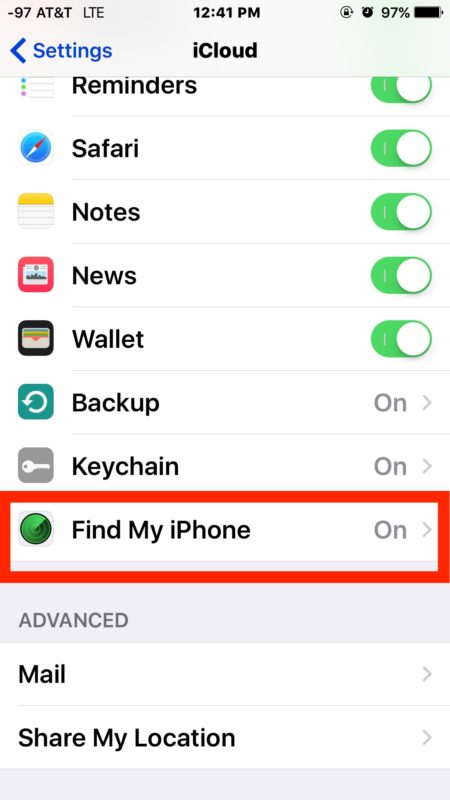
Find My iPhone is one of the most useful services offered by Apple through iCloud. It allows you to remotely track and remotely lock down an iPhone if it has been lost or misplaced, and if device recovery becomes hopeless, you can even remotely wipe the iPhone with the service too.
- Open “Settings” and go to “Your Name” or ‘iCloud’ (be sure you have enabled iCloud if you haven’t done so already)
- Check to be sure that “Find My iPhone” is set to ON
Don’t skip this one, it’s extremely useful. I know multiple people who have personally recovered lost or misplaced iPhones by using the Find My iPhone service, it works!
4: Use iCloud Backups
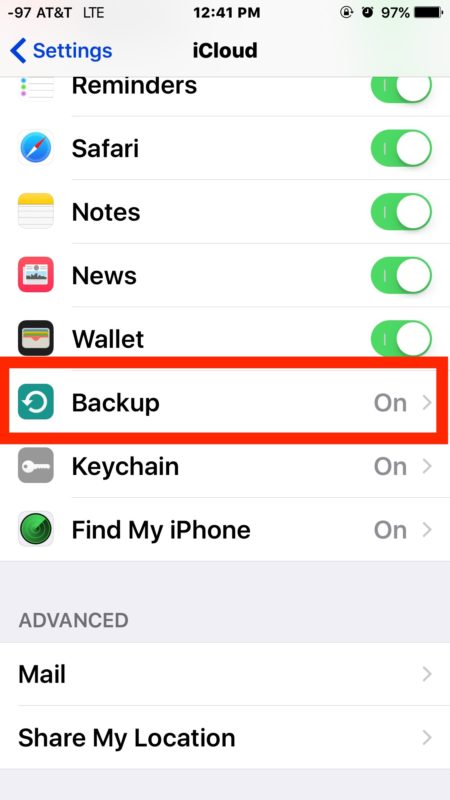
Having backups of an iPhone are essential, and iCloud makes it easy. With iCloud backups turned on, the device will back itself up every night when it’s connected to wi-fi and a power source. Plus, iCloud backups are encrypted and secure, meaning the data is safe.
- Open “Settings” and go to ‘iCloud’
- Insure that iCloud backups are set to “ON”
The other obvious benefit to iCloud backups is that it allows you to quickly recover your data, photos, notes, messages, contact details, and anything else on the device, in the odd event that you lose, misplace, or break an iPhone.
Having data backups are very important, and iCloud makes it easy. By the way, I generally recommend using both iCloud and iTunes for backups if possible simply for the redundancy, but if you do use iTunes (or exclusively use iTunes for backups) you will almost certainly want to encrypt iPhone backups in iTunes too.
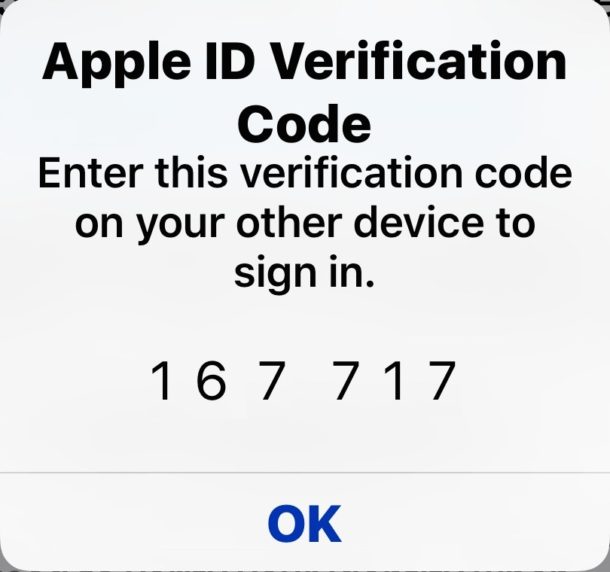
5: Consider Two-Factor Authentication for iCloud / Apple ID
Two-Factor Authentication makes it so that even if someone was to get ahold of your Apple ID password, they are not able to log in to the account or access the data without confirming the authentication from a secondary trusted device or phone number. This is a bit more advanced, but if you’re serious about keeping a device secure and locking down your data, it’s one of the better ways to do that. You can learn more about enabling two-factor authentication for an Apple ID here.
6: Perform a Privacy Check, & Be Mindful of What Apps Want Access To
Apple keeps the App Store locked fairly tight, but every once in a while a dubious app seeps through the cracks or performs a function you may not quite be expecting it to do.
Also, some apps may want more data than they actually need to perform their given functionality. For example, some apps may try to access your iPhone location, microphone, or iPhone Photos for no obvious reason. Ask yourself, why might an app need access to your iPhone microphone or pictures, unless they are clearly related to the apps function? For example, a picture editing app obviously needs access to your pictures, but does a picture editing app really need access to your location or your contacts? And would a simple game really need access to your microphone? There’s no need to be overly paranoid, but do be discerning about what apps you allow to access what functions and features.
Performing a simple app privacy check for existing apps is easy:
- Open the ‘Settings’ app and go to “Privacy”
- Browse through each section, focusing particularly on apps requiring “Location Services” access, Contacts, Photos, Microphone, and Camera
- Turn off access to specific features if something seems iffy or misplaced*
* Do keep in mind some apps stop working correctly if you disable their access to a necessary feature, for example Instagram can’t work without Camera or Photo access, but that’s an appropriate usage given that Instagram is a photography app.
7: Avoid Jailbreaking
Many advanced users like to jailbreak their devices for a variety of reasons, but if you are concerned about privacy and security, it’s generally a bad idea to jailbreak. The reason is quite simple, by jailbreaking you are intentionally bypassing security features on the iPhone so that other stuff can be installed, accessed, or adjusted – that means, at least in theory, that a bad actor could also attempt to install some junk onto your iPhone, or access something from your iPhone that you may not want to share. This is pretty rare, but there are examples of this happening in the real world with nefarious software from ill vetted sources. Additionally, Apple also may void warranty on a jailbroken device.
You can read 7 specific reasons not to jailbreak an iPhone here if you want more details on this issue. Basically, don’t do it, because it’s not without some risk.
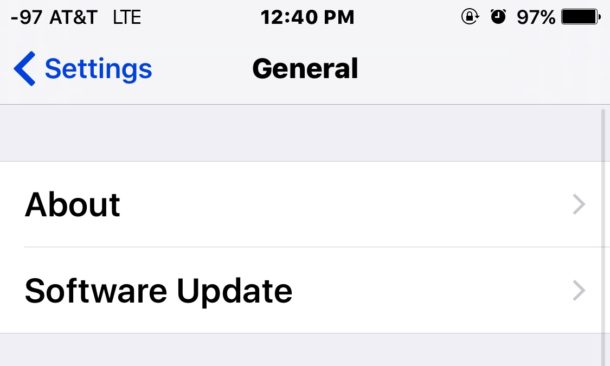
8: Update iOS Software Regularly
Just about every iOS update includes bug fixes and security fixes, so installing the latest versions of iOS onto an iPhone are an easy way to insure that you have better protection from the various potential threats out there. Apple is really good about patching security flaws, and the single most reliable way to insure that these patches help your device security is to install available iOS updates.
As always, backup a device before updating iOS software. The rest is easy:
- Go to “Settings” and to “Software Update”
- If a system update is available, install it
–
Do you have any other simple iPhone security tips? Let us know in the comments!

I’m planning to download another customized like screen app on my phone, and I like your suggestion on keenly checking dubious apps that may not be safe. It’s a good thing that I’m using an iPhone with tight security measures on app download. I will follow the other tips that you suggested in keeping your phone safe as well. Thanks!
iCloud backups are not safe. My phone was recently hacked by Chinese criminals that got private info from iCloud backups. IT professionals recommend only backup to computer.
**Settings> General > Siri > Raise to Speak**
Enabling this means you simply need to hold your unlocked phone up to your face to use Siri. I couldn’t find this on my 6s Plus?
iCloud backups are not encrypted nor secure. Apple can supply the data from iCloud to the FBI or others with a subpoena. This is why the FBI wanted the San Bernadino Terrorists’ iPhone to do an iCloud backup. But the police or DA reset the iCloud password preventing this from occurring.
In the future, Apple may encrypt your iCloud data so it won’t have access. I’m still waiting for this to occur.
For privacy, it is still far better to do an encrypted iPhone backup locally on your Mac. Then use Filevault to further encrypt your Mac using a different password.
Your post 4: Use iCloud Backups is contrary of any security concerned person. Apple today is not anymore what it was and the Tim Cook team cannot be trusted more than Google to yahoo.
The idea to backup your iPhone, iPad or iPod should be essential but not to any Cloud service (this include Apples iCloud). Use iTunes and backup to your computer. That is much more secure and convenient (and it cost anything).
We like your tips, but this one we strongly reject recommend to every of our user to use their own Mac/iTunes for backup. And of course back up their Macs as well every week minimum like with Carbon Copy Cloner or Super Duper, that backups the entire iTunes as well.
I was about to give EXACTLY the same advice, just with a more comprehensive (daily, weekly and monthly) approach to the Mac backups. Thanks, you saved me some typing.
Yeah, because Tim Cook is secretly trying to get his hands on your contacts and the photos of your son’s baseball game. You’ve figured him out, the secret is no more.
Cool Patrick.
Thanks for all the advices and the hard work typing it all for the benefit of the community (even those who think that Tim Cook is a spy…). They are great tips.
Cheers
No, just because restoring from a local backup is faster and if you have a good backup regimen, you’ll have more than one backup.
Gotta love the butthurt 😄
Great advice, Patrick.
Try not to take every comment so personally, huh?
Re:Disable Lock Screen Access to Notifications, Certain Features
I don’t see ”Touch ID and Passcode” in the Settings on my iPhone5, iOS 9.2.3!
The iPhone 5 doesn’t have Touch ID so look for something that just says “Passcode”. If you can’t find it, call tech support.
I disable most location services, don’t install most apps (avoid all social media if you care about privacy and security), strictly control photo access, and use a strong passcode with Find My iPhone on.
Frankly, if you do all this why do you even have a smartphone?
Here’s my list of security best practices:
**Settings> Control Center > Access on Lock Screen**
It’s good practice to turn this off, otherwise someone would be able to enable Airplane Mode on a lost/stolen phone, which would disable Find My iPhone.
**Settings> General > Siri > Raise to Speak**
Enabling this means you simply need to hold your unlocked phone up to your face to use Siri.
**Settings> General > Accessibility > Button Shapes**
This is very helpful to enable, it gives you outlines on your buttons, making them easier to see.
**Settings> General > Accessibility > Increase Contrast**
**Settings> General > Accessibility > Reduce Motion**
Enabling both of these makes the on-screen text slightly more pronounced, and it disables animations and the Parallax effect, which can help save battery life.
**Settings> General > Accessibility > LED Flash for Alerts**
This will blink the camera flash a few times when you have on-screen notifications, making them easier to identify. It’s worth noting, it can also inadvertently make people think you’re taking a picture of them when you get a text message.
**Settings> General > Usage > Battery Percentage**
Enabling this will display the battery percentage right next the battery icon in the upper right.
**Settings> General > Restrictions**
It’s highly advisable to enable Restrictions, it’s better explained a few items down.
**Settings> General > Restrictions > Require Password**
Setting this to 15 minutes will mean a passcode will be required to modify certain system services, such as Find My iPhone.
**Settings> General > Restrictions > Location Services**
With a password requirement in place, it’s also good practice to select Don’t Allow Changes. If there was wide open access, someone would be able to turn off Find My iPhone.
**Settings> Passcode**
On a mobile device which contains so much of your personal data, NOT having a passcode is just asking for trouble.
**Settings> Passcode > Erase Data**
Enabling this options means your phone will be completely wiped should someone attempt to enter the wrong pin 10 consecutive times.
**Settings> Privacy > Location Services > Find My iPhone > Status Bar Icon**
Disable this option. If you’re phone is lost/stolen, and you’re tracking it, it’s better not to advertise it.
**Settings> Privacy > Location Services > System Services > Diagnostics &Usage**
Disabling this will cut down on unnecessary network traffic. That said, this feature is used to send crash reports and error messages to Apple, it’s up to you as to whether or not you want to send this type of data.
**Settings> Privacy > Location Services > System Services > Location-Based iAds**
Disabling this will cut down on unnecessary network traffic.
**Settings> Privacy > Location Services > System Services > Popular Near Me**
Disabling this will cut down on unnecessary network traffic. It does have some perks, though, such as showing you apps which are used by others in your area.
**Settings> Privacy > Advertising > Limit Ad Tracking**
Enabling this will cut down on unnecessary network traffic.
This is excellent Patrick, thanks!
Nice points. A LOT of this has nothing to do with security, however.
So 5 out of 17 is “a lot”?
If the list is so worthless to you, then don’t use it and move on with your life.
I was unable to change my password to alphanumeric. The option could not be traced. I am using 6s with IOS 9.3
“**Settings> Control Center > Access on Lock Screen**
It’s good practice to turn this off, otherwise someone would be able to enable Airplane Mode on a lost/stolen phone, which would disable Find My iPhone.”
This wouldn’t prevent someone to turn the phone off and thus disconnect it from the internet.
“**Settings> General > Restrictions**
It’s highly advisable to enable Restrictions, it’s better explained a few items down.”
This is valid but, at least in older devices (like iPhone 4s, 5 and 5c), you can easily bypass the Restrictions passcode delay by just changing your phone’s date.
“**Settings> General > Restrictions > Require Password**
Setting this to 15 minutes will mean a passcode will be required to modify certain system services, such as Find My iPhone.”
Not true. Those settings are only used for the iTunes and App Stores.
“**Settings> General > Restrictions > Location Services**
With a password requirement in place, it’s also good practice to select Don’t Allow Changes. If there was wide open access, someone would be able to turn off Find My iPhone.”
Not true. Find My iPhone continues enabled even after Location Services have been turned off. All you have to do is enable Lost Mode to “temporarily restore” the phone’s Location Services settings and view its location.