
How to Disable Find My on iPhone / iPad
Need to disable Find My on iPhone or iPad? Are you being prompted to disable Find My to factory reset or erase your iPhone or iPad? This is something that a lot of iOS and iPadOS users run into, but no worries. It’s pretty easy to turn off this feature temporarily.
As most of you may know already, Apple’s Find My feature allows you to locate, lock, or erase your device remotely in case it’s lost or stolen. The functionality is available across Apple’s device line-up which includes the iPhone, iPad, Mac, and Apple Watch. As useful as Find My is, the feature can be an inconvenience in some instances where you want to restore your device and troubleshoot it. This is because Apple doesn’t allow you to wipe the data or restore factory settings while Find My is turned on due to security reasons. Not sure what you need to do when you see the Find My prompt? Read along and we’ll guide you on how to disable Find My on your iPhone and iPad.
How to Disable Find My on iPhone & iPad
The procedure to disable Find My remains the same for all modern versions of iOS and iPadOS:
- Go to “Settings” from the home screen of your iPhone or iPad.

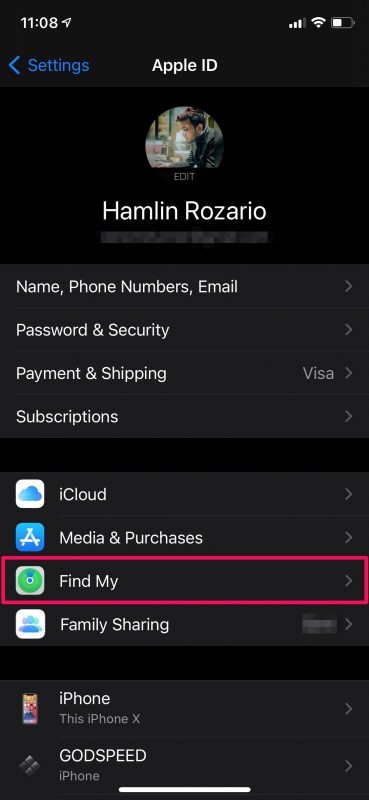
- In the settings menu, tap on your Apple ID name located right at the top.
- Next, select the Find My option located above the list of your devices as shown in the screenshot below.
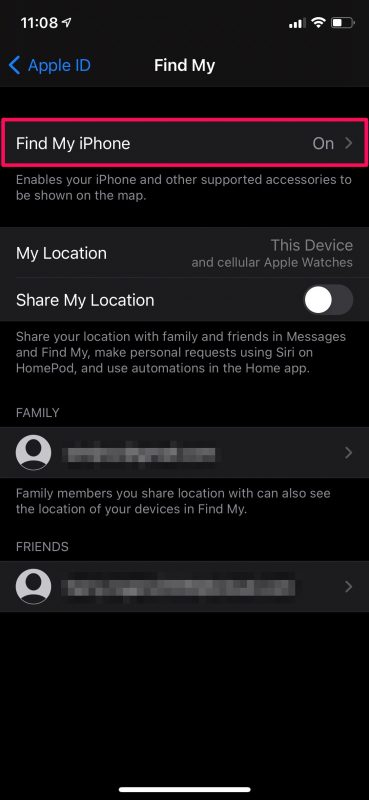
- Now, tap on the first option in the menu to proceed further.
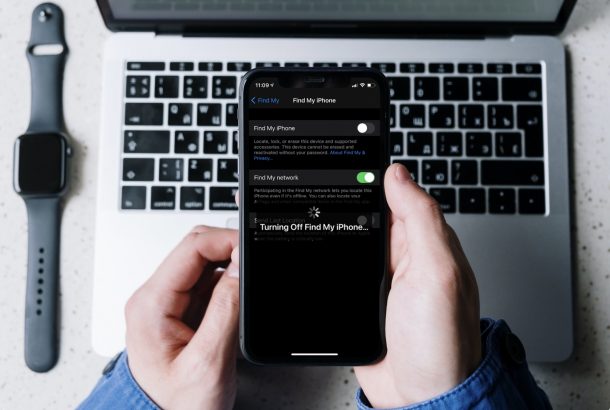
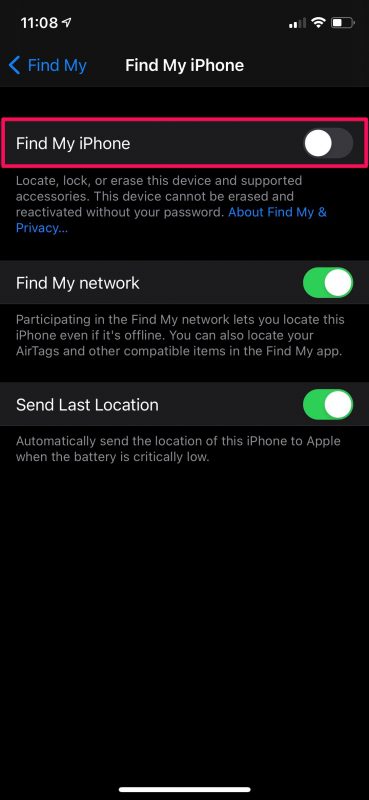
- Here, you’ll find the toggle to turn on or turn off Find My. Simply tap once on the toggle to disable the feature.
- You’ll be prompted to enter your Apple ID password for verification purposes. Type in the password and then tap on “Turn Off” as indicated below.


That was the last step. You’ve successfully disabled Find My on your iPhone and iPad. Pretty straightforward, right?
Now that you’re done, you can proceed to restoring or resetting your device without any additional trouble. Upon restoration, Find My will automatically be re-enabled on your device since that’s the default setting.
In some instances, you may be unable to turn off the Find My feature since your device is unresponsive or facing any other functional issues. At this point, you have two options. You can either disable Find My from iCloud.com or avoid the prompt by restoring your iPhone from recovery mode.
Similarly, you can turn off Find My on your Mac too, if you own one. All you need to do is go to System Preferences -> Apple ID -> iCloud and uncheck the box next to Find My Mac. You’ll need to enter your Apple ID password as well as your Mac user password to disable it.
We hope you were able to figure out how to disable Find My, whether to proceed with the restoration process of a device, or for whatever other purpose you have to disable the feature.