
How to Download iCloud Photos to iPhone or iPad, the Easy Way
Do you want to download all the photos that are stored on iCloud and store it locally on your iPhone or iPad? There are many reasons you might want to download all photos from iCloud to your local device, whether you’re running out of iCloud storage or you just want them stored locally. Whatever the reason, you’ll be excited to know that there’s a super-easy way to download all your photos from iCloud, right to iPhone or iPad.
Apple’s iCloud service makes it extremely convenient to access your photos from multiple devices, but the service can be pricey to a lot of users, and not everyone wants to pay for a subscription fee. You also may want to download your iCloud photos and store them using your iPad or iPhone’s physical storage just to have easier access to them that is not internet dependent.
How to Download iCloud Photos to iPhone / iPad the Easy Way
The following steps are applicable regardless of the iOS version your iPhone is currently running, or iPadOS is on the iPad. Assuming you have enabled iCloud Photos on iPhone or iPad and now want to download all photos from the device, here’s what to do:
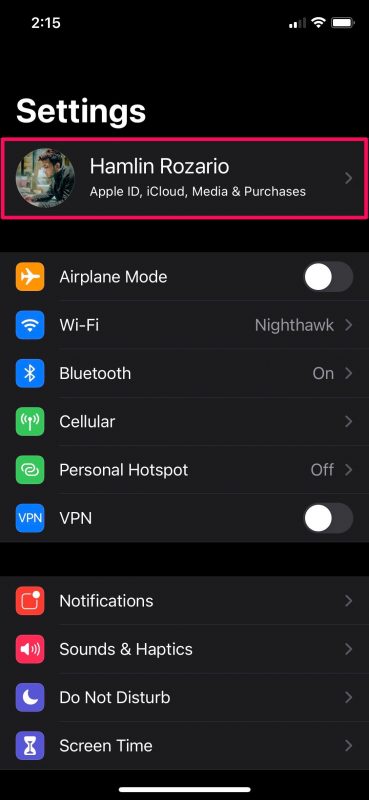
- Head over to “Settings” from the home screen of your iPhone.

- In the settings menu, tap on your Apple ID name located right at the top.
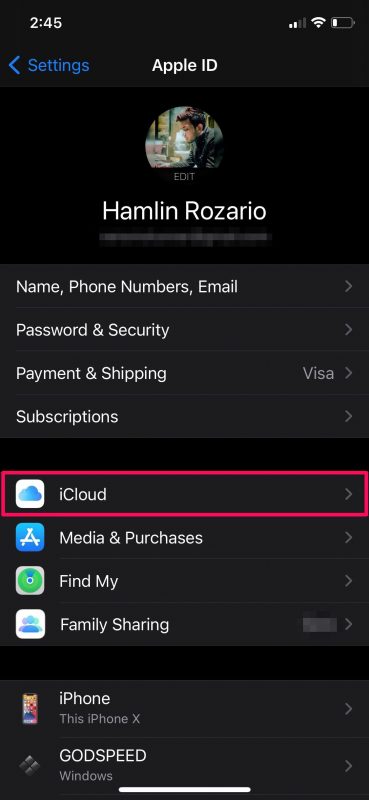
- Next, select the iCloud option located below Subscriptions as shown below.
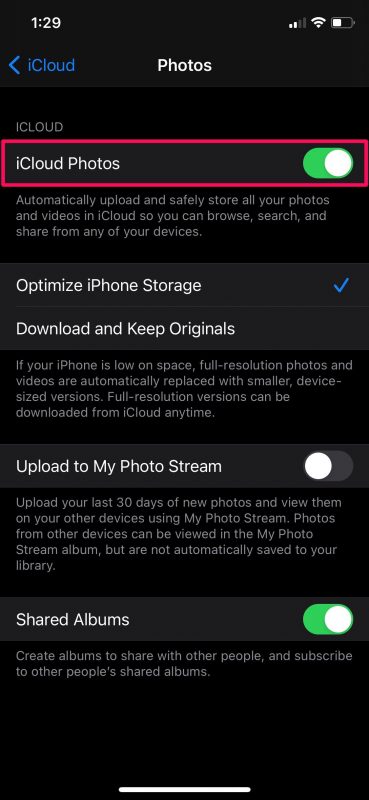
- Here, you’ll be able to view your iCloud storage details. Under Apps using iCloud, select the Photos app to proceed further.
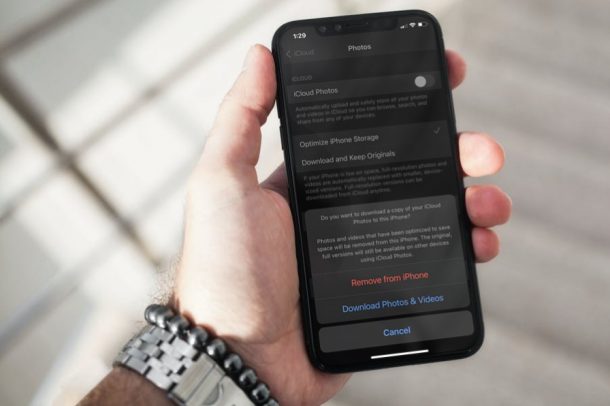
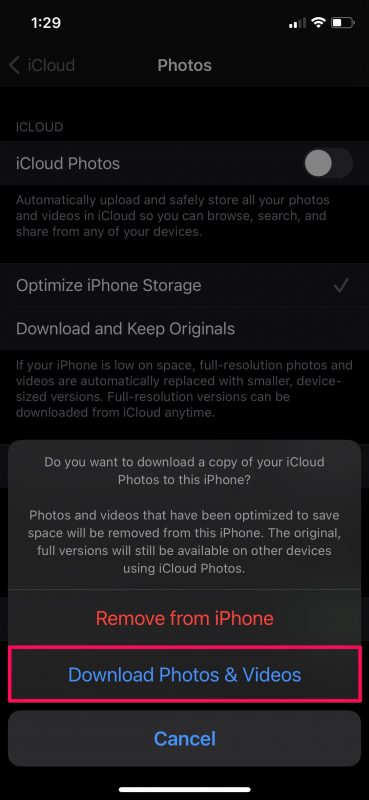
- Now, you’ll see that iCloud Photos is enabled. Simply use the toggle to disable iCloud Photos.
- You’ll now get a prompt on your screen with the option to download a copy of your iCloud photos. Select “Download Photos & Videos” to initiate the manual download.
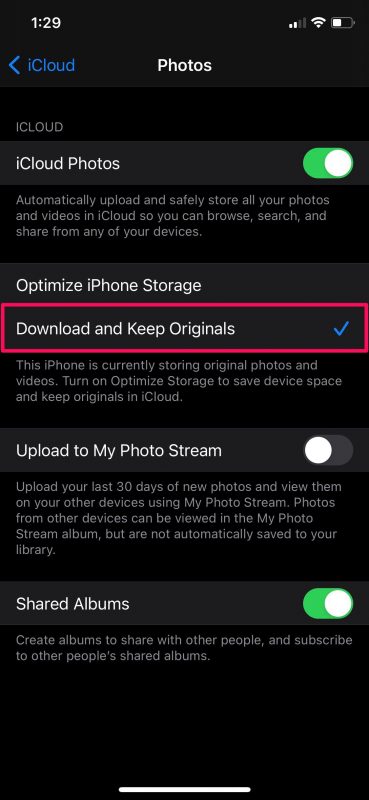
- The above step can be used if you’re no longer interested in using iCloud. But, if you want to keep using the service, you can select the option “Download and Keep Originals” from the same menu.

There you go. Now, you understand how easy it actually to download all your photos stored on iCloud, directly to your device. It may take a while to download all the photos, depending on your internet connection speed and the number of images you have stored in iCloud.
By default, when you use iCloud for storing your photos, lower-resolution versions of your images are stored on your iPhone for conveniently accessing them even when you’re not connected to the internet. By selecting the “Download and Keep Originals” option, iCloud will automatically download the full-sized versions of your photos to your device.
It’s worth pointing out that you’ll need to be connected to a Wi-Fi network rather than cellular to download all your photos from iCloud. This is understandable since an average photo library can be huge in overall size, and connection stability is important for this kind of mass download.
If you own a Mac as your primary computing device, you may also be interested in learning the easy way to download all your iCloud photos on to your Mac. The steps you need to follow are pretty much identical, except for the fact that you’ll be using the macOS interface.
And yes, you can continue to use iCloud.com to download all iCloud photos if you’d like to, but this is much easier for most users.
What’s your take on this neat workaround? Have any other tips or approaches to mass download all iCloud photos to your device? Let us know!