
How to Download iCloud Photos to Mac, the Easy Way

Want to easily download all photos from iCloud to your Mac? You can do that with just a single click, though how it works may not be quite how you’d expect. While one commonly used approach is to download all your photos from iCloud via the web, that may not be ideal for some users. So, what if we told you there’s a much easier way to go about it?
You may be accustomed to using iCloud.com to download your photos onto your computer. Sure, it may not be difficult, but it requires you to go through multiple steps to get all these photos downloaded. You’ll be surprised to know that the easiest way to download all the photos to your computer is by simply disabling the Photos feature for iCloud in macOS. Doing this will give you an additional option to save all your iCloud Photos locally. Yup, it’s really that simple, so let’s take a look at the easy way to download all your iCloud photos directly to your Mac.
How to Download All iCloud Photos to Mac
The following steps can be used regardless of the macOS version your system is currently running, as long as it supports iCloud Photos and you have the feature enabled in the first place of course.
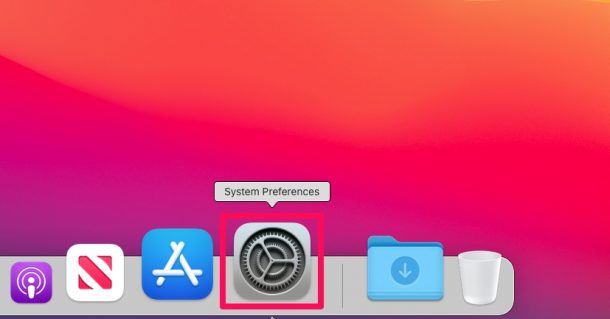
- Head over to “System Preferences” on your Mac from the Dock. Alternatively, you can click on the Apple menu and choose “System Preferences” from the dropdown menu.

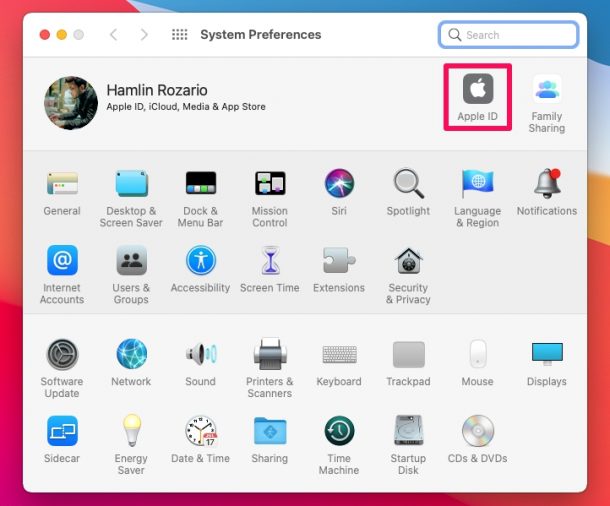
- In the System Preferences panel, click on the “Apple ID” option located at the top next to the Family Sharing settings.
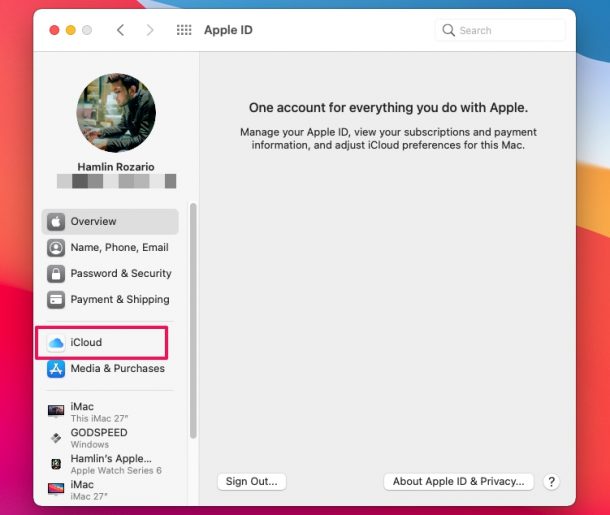
- Next, select the “iCloud” option from the left pane to get access to all your iCloud settings.
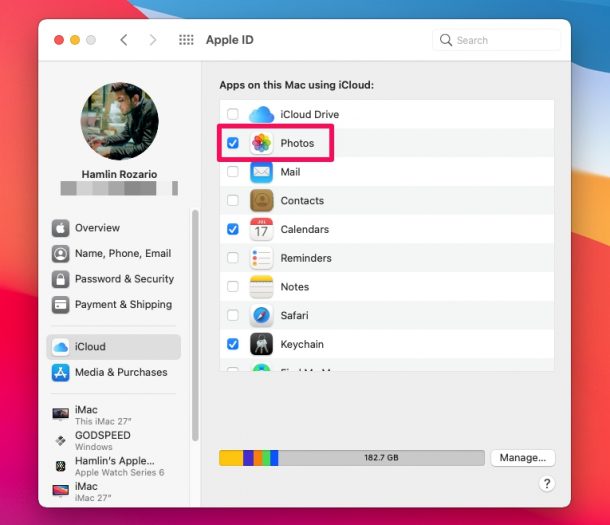
- Now, uncheck the “Photos” option under the list of apps that are using iCloud to proceed further.
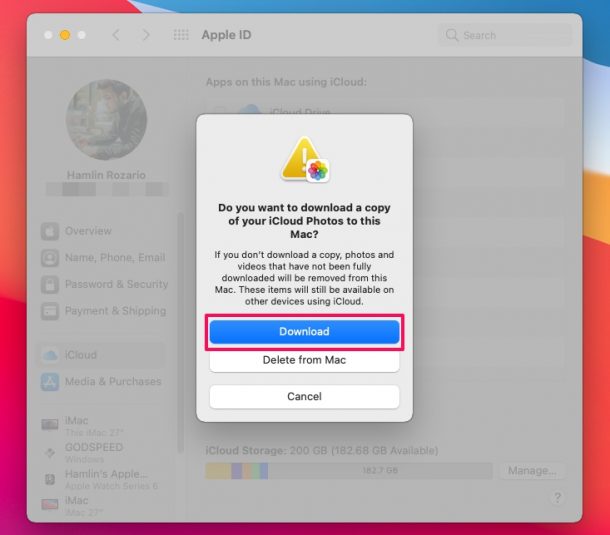
- You’ll now get a dialog box on your screen with a couple of options. You can either choose to delete all the photos from your Mac or download a copy of all your iCloud Photos and store it locally on your computer. Choose the “Download” option to save all your photos locally.
- This will now launch the Photos app on your Mac where you’ll be able to see the progress of the download.
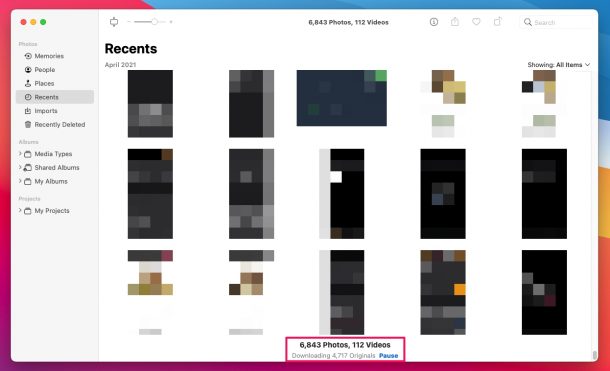
That’s it. At this point, all you need to do is just wait for iCloud to finish downloading all your photos. Depending on how many photos you have in iCloud, and the speed of your internet connection, this download process may take quite a while.
During this process, you may notice that the Photos option for iCloud is still checked. Don’t worry, it will only remain enabled until all your photos are downloaded. If you try to uncheck it again, the iCloud photos that haven’t been downloaded may be removed from your Mac.
As you can probably see, this method is way easier than signing in to iCloud.com with your Apple account and then downloading all the photos to your Mac’s Downloads folder. This way, you don’t have to move around your photos using Finder just to access them in the stock Photos app.
Do you use an iPhone or iPad as well? In that case, we’d like to let you know that you can use a similar settings based approach in iOS/iPadOS to quickly download a copy of all photos onto your iPhone or iPad too.
And of course, users can also continue to download all iCloud photos from iCloud using the web as discussed here.
What do you think of this handy shortcut to quickly download all your iCloud Photos and store them locally on your Mac? Do you know any other easy tricks to download iCloud photos to your device? If so, feel free to share your knowledge in the comments, and chime in with any feedback, tips, or thoughts too.