
How to Reset Network Settings on Mac
IF you’re having persistent networking issues on a Mac, like constantly dropping from a wi-fi network, inability to join networks, inappropriately sluggish internet connections that only impact the particular Mac, or other networking related issues, it may be helpful to reset the network settings on MacOS.
Unlike the iPhone and iPad where you can reset network settings through the iOS/iPadOS Network Settings menu, on the Mac you have to manually remove some networking configuration files. Nonetheless it’s not too complicated, so follow along and you’ll have reset your network settings in no time at all.
By resetting network settings you will need to re-add and re-join any wi-fi networks, enter wi-fi passwords again, and set any customizations to DNS, TCP/IP, and other network settings again.
Resetting Wi-Fi Network Settings on Mac
This applies to all versions of macOS and Mac OS X, from Big Sur, Sierra, El Capitan, Mojave, Mavericks, Snow Leopard, and even much earlier versions.
It is a good idea to backup the Mac before modifying these files, just in case something goes wrong.
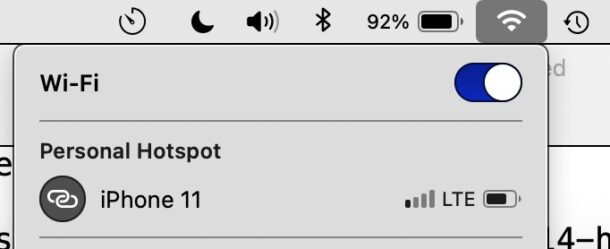
- First, disable wi-fi – the easiest way to do this is by pulling down the wi-fi menu and choosing to toggle the Wi-Fi switch OFF, or selecting “Turn Wi-Fi Off” from the menu options
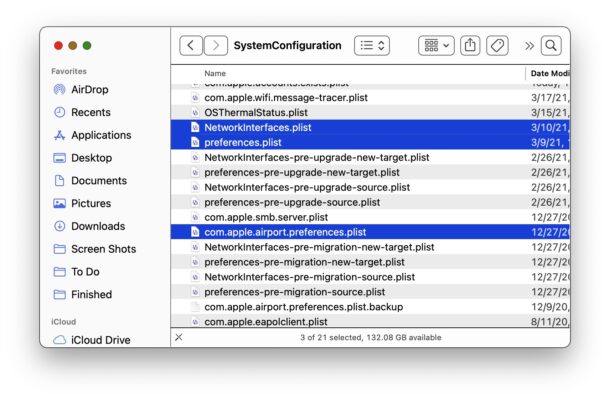
- Next go to the Finder on the Mac, then pull down the “Go” menu and choose “Go To Folder” (or hit Command+Shift+G from Finder) and enter the following path:
- Select the following files from this folder:
- Create a folder on the Desktop called “WiFiBackupSettings” and drag and drop these files to that folder, alternatively you can delete them if you’re comfortable doing so
- Restart the Mac by going to the Apple menu and choosing “Restart”
- When the Mac boots back up again, enable wi-fi again by going to the wi-fi menu and toggling ti back ON, select the wi-fi network you wish to join as usual
/Library/Preferences/SystemConfiguration/
NetworkInterfaces.plist

preferences.plist

com.apple.airport.preferences.plist

com.apple.network.identification.plist

com.apple.wifi.message-tracer.plist

com.apple.network.eapolclient.configuration.plist
Optionally, from the Apple menu, go to System Preferences and to Network so that you can reconfigure any settings and customizations to DNS on the Mac, static or manual IP address, custom DHCP information, and any other custom network settings configured on the Mac.
This approach will often resolve many wireless networking issues encountered on the Mac, and variations of this have been used repeatedly for various wi-fi problems with different system software updates over time.
Sometimes the wi-fi problem can be a constantly dropping signal, a refusal to join a wireless network, an abnormally slow wi-fi connection but only on the Mac in question, an inability to connect to the outside world, and much more.
If you’re still experiencing wi-fi networking issues on the Mac, you might want to reset the router and the modem itself, which typically involves unplugging those devices from power source for 10-15 seconds and then plugging them back in again, then waiting a few minutes for those to rejoin the appropriate networks.
Additionally, you can flush DNS cache on the Mac, which can resolve issues with DNS lookups and other domain lookup related issues.
Remember, you can also reset network settings on iPhone and iPad as well, where the process is even easier.