How to Use Reading List on iPhone, iPad, & Mac

Are you the kind of person who reads a lot of written content on the web, like our wonderful articles, general news, long-form content, personal blogs, or whatever else? If so, you may be interested in taking advantage of the Reading List feature that Safari has to offer, which is useful when you want to save webpages for reading later.
Reading List works on Mac, iPhone, and iPad, so regardless fo what device you’re using you can access the feature with Safari.
Reading List gives you the option to save web content and come back to it later when you have the time to read it. You can keep adding as many web pages that you want to this list and even read the content when you’re not connected to the internet, provided you’ve saved it offline. Safari’s reading list even syncs with iCloud, so even if you switch between your Apple devices, you’ll have access to all the saved webpages.
Let’s check out using Reading List, first on iOS/iPadOS, and then on MacOS.
How to Use Safari Reading List on iPhone & iPad
The following steps are similar regardless of what iOS/iPadOS version your device is currently running. So, let’s check it out.
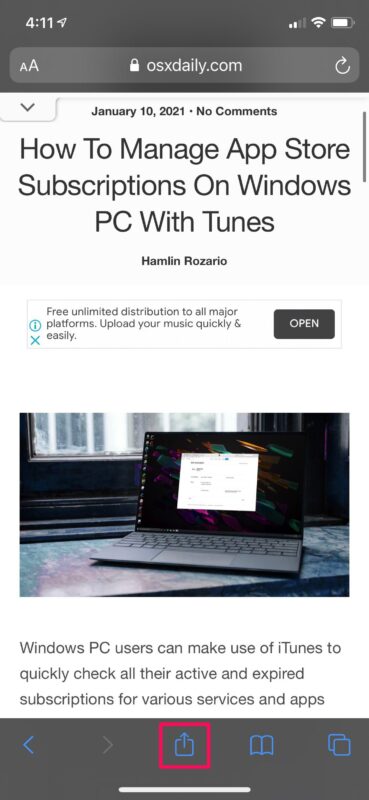
- Launch the built-in Safari app and head over to the webpage that you want to save or add to the reading list. Tap on the share icon located in the bottom menu.

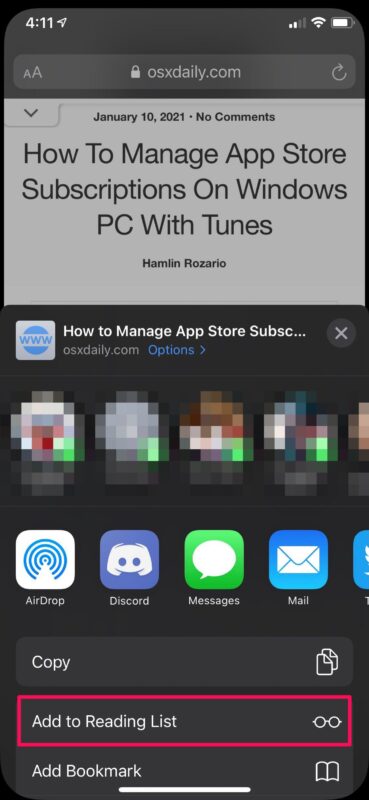
- Next, choose “Add to Reading List” which is located just below the Copy option to add the page to your reading list

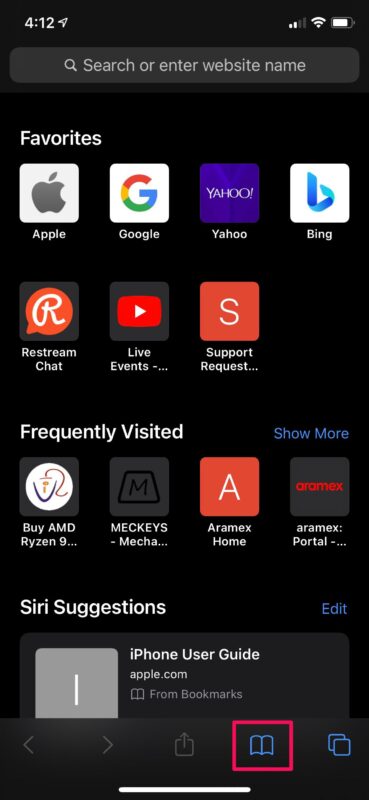
- To access the Safari Reading List, tap on the Bookmark icon from the bottom menu.

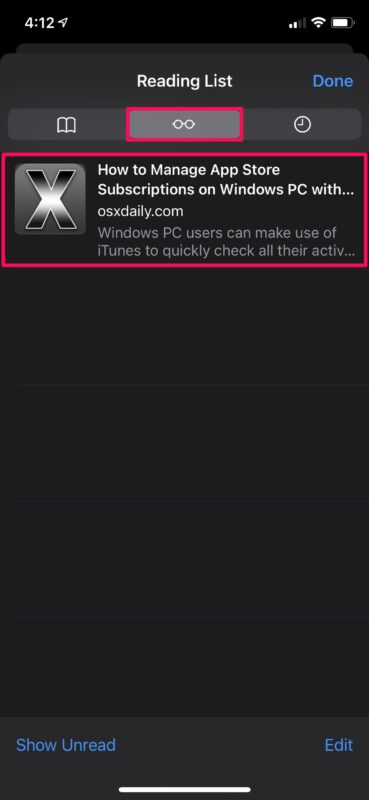
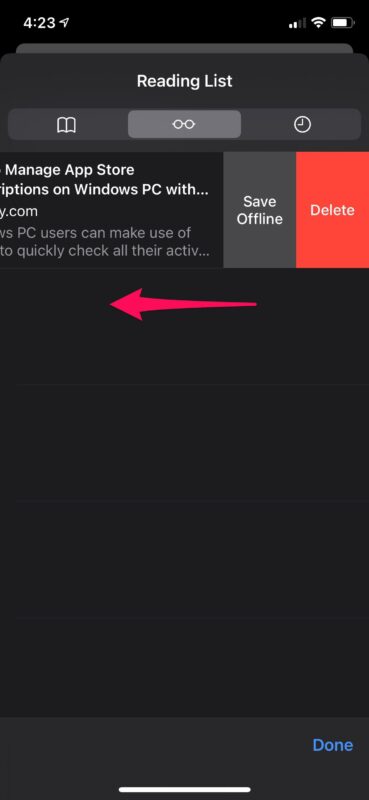
- Now, head over to the reading list section by tapping on the “glasses” icon. Here, you’ll find all the webpages you’ve saved.

- If you want to remove a webpage from the reading list, swipe left on the saved page to access the Delete option. You’ll also find the option to save it offline here.

Now, you have an idea regarding how you can properly take advantage of Safari Reading List on your iOS/iPadOS device.
How to Use Safari Reading List on Mac
The macOS version of Safari handles the Reading List feature in a very similar way, but the steps to access this feature and add webpages to the list slightly vary.
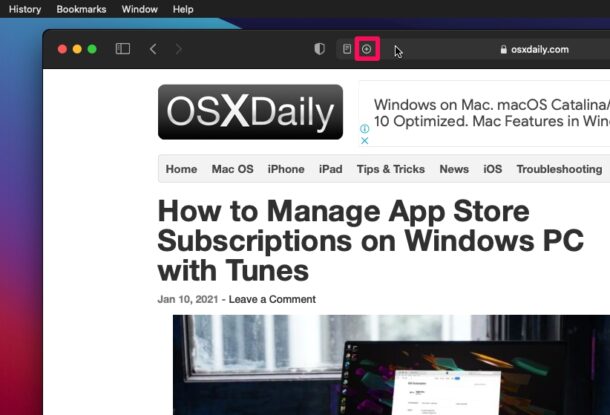
- Launch the Safari app from your Mac’s Dock and head over to the webpage that you want to save or add to the reading list. Now, hover the cursor over the address bar and click on the “+” icon that shows up to add the page to reading list.

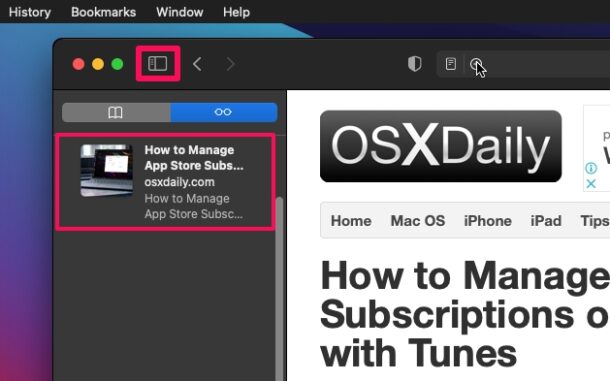
- To access all the webpages saved in the reading list, simply click on the reading list icon located at the top-left corner of the window.

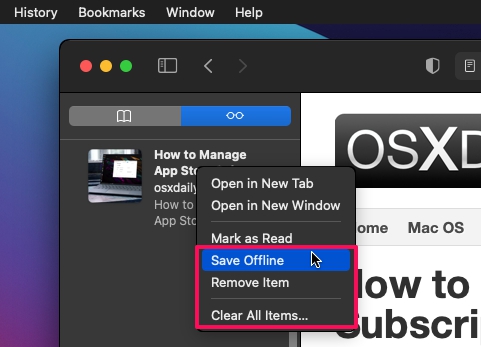
- To access more options for a particular page in the reading list, Control-click or Right-click on the saved webpage. This will give you multiple options to save offline, remove, or even clear all items in your reading list.

There you go. At this point, you just need to add a bunch of webpages to your reading list and fill it up.
As long as iCloud is enabled for Safari, all the content stored in your reading list will be synced across all your other devices along with your bookmarks and browsing history. The webpages that you’ve saved offline from the reading list will be accessible even if you’re not connected to the internet.
By default, you’ll need to manually save each webpage for offline use. However, there’s a setting that automatically saves all the reading list items for offline reading. You can find this option by going to Settings -> Safari on your iOS/iPadOS device. Or, if you’re on Mac, you can find it under Safari Preferences.
We’re glad that we could help you get started with the Safari Reading List on your iPhone, iPad, and Mac. How many articles or webpages have you added to the Reading List so far? Share your experiences and voice out your opinions in the comments section down below.


It would be nice if three additional features were incorporated.
1) create the ability to change the order in which the pages are displayed so you don’t have to scroll through a lot of pages to find the articles you want to read or re-read.
2) create a folder option so you can place all articles from one source (i.e. OSXDaily) in that folder instead of having a mix of subjects listed in date order (if that is the default)
3) create the ability to change the order in which they are displayed -I.e. date, alphabetically, etc.