How to Add Video Filters Using iMovie on iPhone

Are you looking to enhance the visuals of a video or movie you captured on your iPhone to make it more appealing? Apple’s iMovie app makes it pretty easy to add filters to videos and movies right on your device, even for beginners who have never edited a video before.
iMovie allows for even more filter options than what’s available in the built-in video editor, which you can use it to quickly add filters to videos right from the Photos app. But the Photos app editor has fewer options, plus it lacks the advanced set of features that iMovie can give its users like being able to speed up and slow down clips, adding transitions, cut and trim, combining multiple clips, and more. Hence, when you’re working on a montage or anything that requires slightly complicated editing, iMovie may do a much better job than the editor that’s baked into the Photos app.
So, let’s take a look at how you can use iMovie on your iPhone (or iPad) to add filters to a video, right on your device.
How to Add Video Filters Using iMovie on iPhone
Before you go ahead with the steps below, make sure you’ve installed the latest version of iMovie on your device, since it doesn’t come pre-installed. Once you’re done with that, here’s what you need to do:
- Launch the iMovie app on your iPhone or even iPad, since the app is available for iPadOS too.

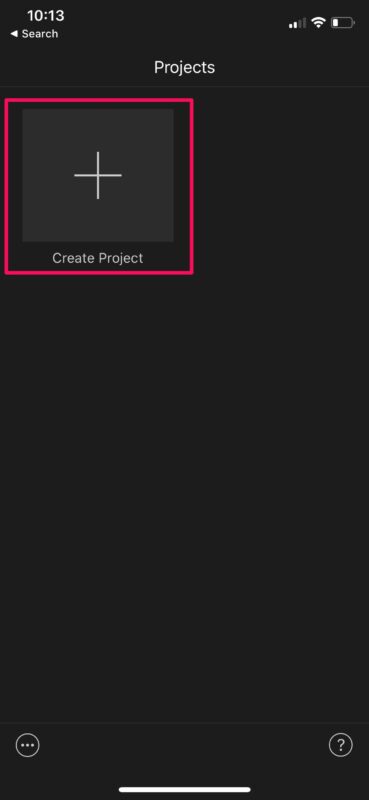
- Upon opening iMovie, tap on “Create Project” to start a new video editing project.

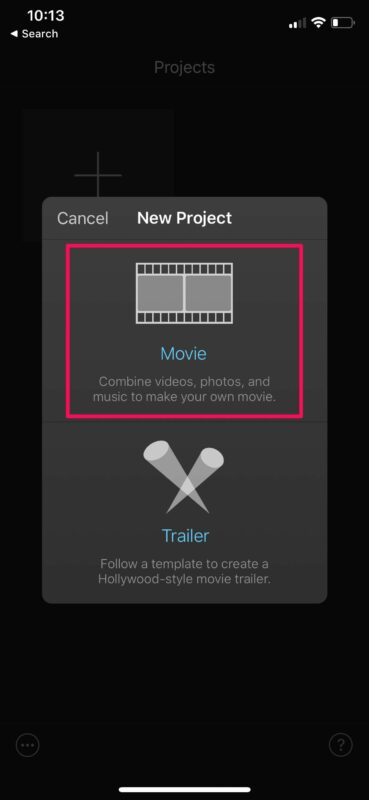
- Next, select “Movie” from the New Project screen as shown below.

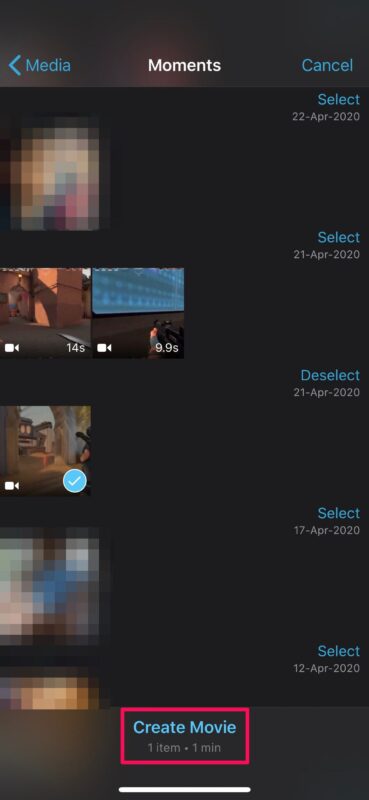
- This will take you to the video selection screen. Choose the video that you want to add filters to from your Photos library and tap on “Create Movie”.

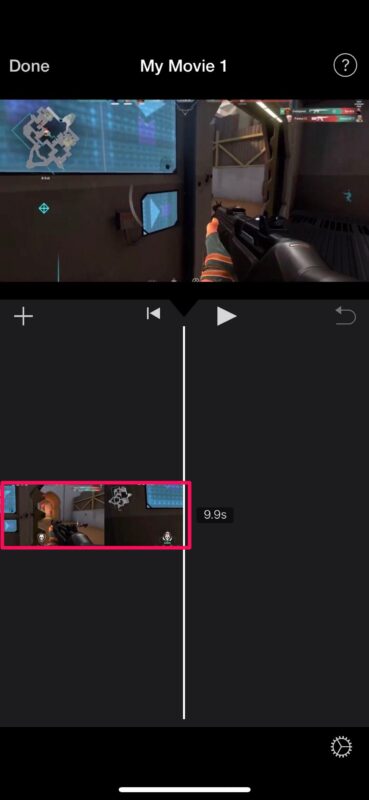
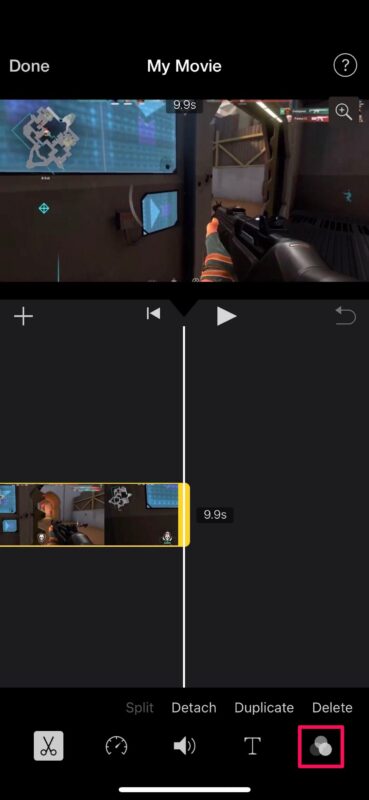
- You’ll now be shown your video timeline where you can start editing your video. Select the clip in your timeline to access all the tools that iMovie has to offer.

- Now, choose the Filters option which is located at the bottom-right corner of your screen, as shown in the screenshot below.

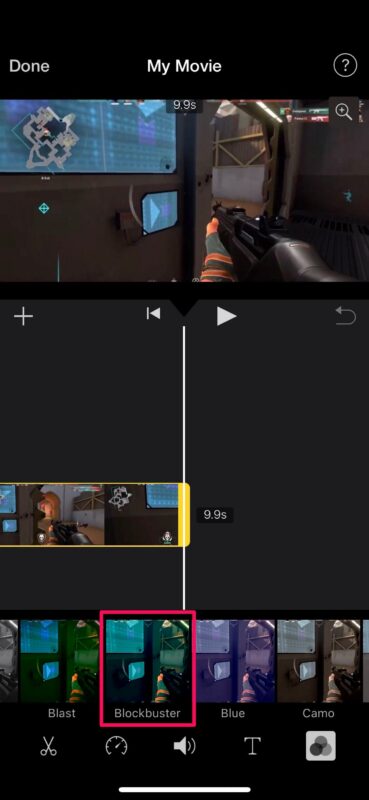
- The iMovie app will show a bunch of different filters that you can choose from. Simply select the filter that you want to use on your video to proceed further.

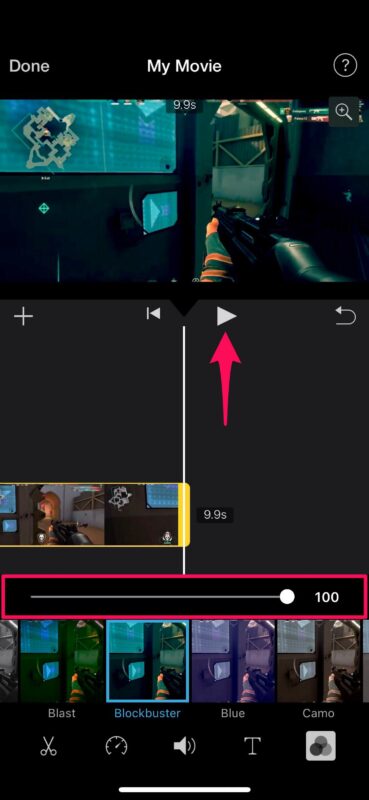
- Now, you’ll see a slider above the filters. You can use the slider to increase or decrease the intensity of the selected filter. You can tap on the play icon to preview the video clip and make sure the final video is close to your desired result.

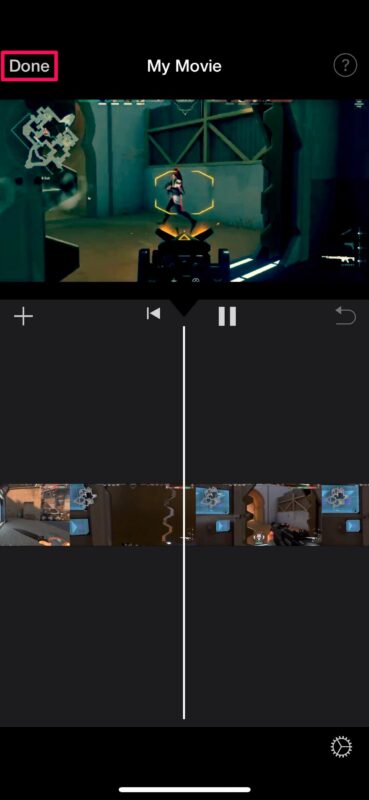
- Once you’re satisfied with the changes you’ve made, simply tap on “Done” to exit the timeline and finish the project.

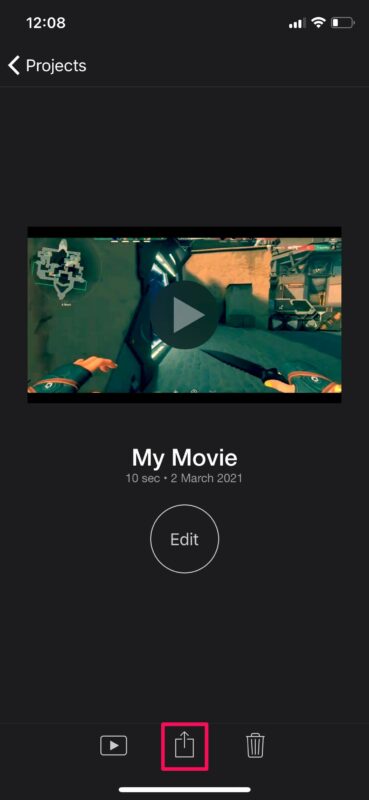
- Next, tap on the share icon from the bottom to bring up the iOS share sheet.

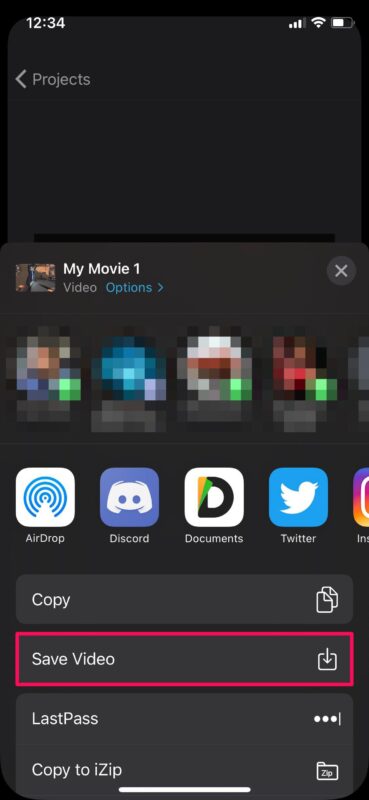
- Here, select the option “Save Video” to save the edited video to your Photos library.

That’s basically all you need to do in order to successfully added filters to your videos using iMovie.
It can take anywhere from a few seconds to a minute to finish the export depending on the video size and the iPhone model you’re using. It’s worth noting that the iMovie app must be actively running in the foreground to finish the export.
If you’re planning to make a montage with multiple videos, you may be interested in learning how to combine one or more clips together using iMovie too. Once multiple clips are added to your timeline, you can add filters to them separately using the steps that we just covered.
Video Filters are just one of the basic features that iMovie has to offer. The target audience for iMovie is intermediate video editors, so you’ll have access to more advanced tools like the ability to speed up/slow down videos, adding background music, removing unwanted portions of a video clip, and so on.
We hope you were able to learn how to add filters to your favorite videos using the iMovie app on your iPhone. Have you tried out any other advanced tools that iMovie offers? What other video editing apps have you used before? Do share your personal experiences and don’t forget to leave your valuable feedback in the comments section down below.


Must be me but I sure don’t see a slider above the filters… yes, using iMovie 3.0. Help? Thanks!