Why is There a Question Mark Icon in the Dock on Mac?
Jan 7, 2025 - 3 Comments
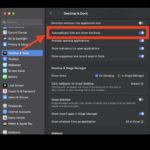
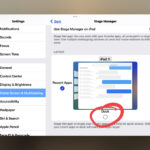
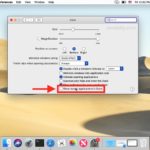
You may occasionally find a situation where a question mark icon appears in the Mac Dock, sometimes it’s even several question mark icons. If you click on the question mark icon in the Dock, nothing happens. What is the question mark? Why is there a question mark icon in the Dock? How do you remove … Read More