How to Turn On the Camera Grid in iOS 10, iOS 9, iOS 8
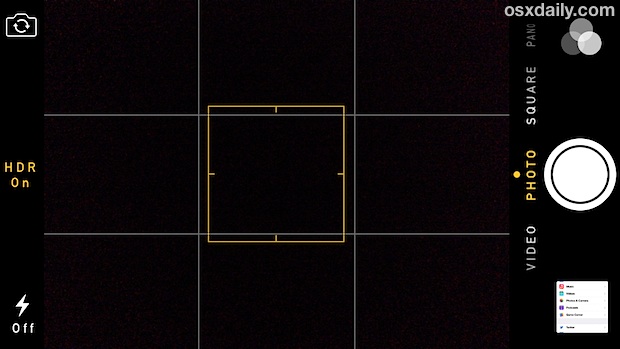
The optional Camera grid overlays lines atop the viewing screen when shooting pictures on an iPhone and iPad. Dividing the screen into equal parts, it helps to take better pictures by making it simple to follow the longstanding “rule of thirds”, with the basic idea being to align compositional elements to the grid, lining up things like the horizon or buildings to the lines in the grid.

Many users have discovered there is no longer a toggle in the Camera app for the grid, but rest assured the grid feature still does exist in Camera app for iOS and you can still turn it on, but for you now must do so from the Settings app instead.
How to Enable Grid Lines in Camera for iPhone & iPad
This applies to all versions of iOS that are new, including iOS 10, iOS 9, iOS 8, and iOS 7.
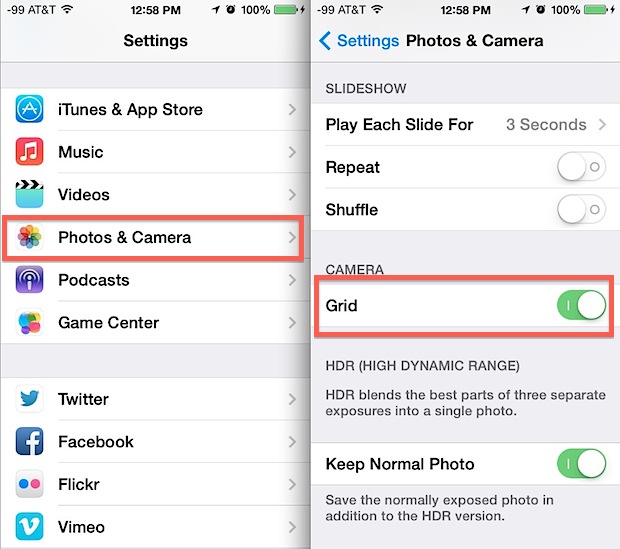
- Open Settings and go to “Photos & Camera”
- Look for the Camera section and switch the toggle for “Grid” to ON (or OFF if you want to disable it)

Going back to the Camera app you’ll find the grid has returned as a layover on the Camera app screen of iPhone or iPad. Recall that you can now get to Camera quickly from the Control Center by swiping up from the bottom of the screen.
Now that it’s contained within the Settings app of iOS 7, iOS 8, iOS 9, iOS 10 and presumably iOS 11 moving forward, it’s probably easier to just leave enabled all the time if you actually like to use it. Personally, I prefer the approach used in iOS 6 and before where the grid settings toggle was directly in the Camera app, making it easy to switch on and off as needed. Regardless, I now leave the grid on all the time, it’s such a useful feature for taking better pictures and better composition, it’s worth enabling and keeping on.
And no, the grid does not overlay itself on finished photos.

