How to Record a Movie Directly Into iMovie on Mac
![]()
Have you ever wanted to record a movie directly into iMovie on Mac? It’s easy to capture live video from a Mac built-in camera and have it instantly imported into iMovie, from there you can edit it with the iMovie tools, incorporate it into another video project, or export the recorded movie as a file or to various social media sites.
Note that recording a movie directly into iMovie is not necessarily the easiest way to capture a video recording on the Mac. If you just want to record a video and don’t have any reason to use iMovie for editing or creating a broader project, it’s easier to record a video on Mac with QuickTime, which has a much simpler interface for recording and saving.
How to Record a Movie in iMovie on Mac
As long as the Mac has a modern version of iMovie and a front-facing FaceTime or iSight camera, this method to directly capture video into iMovie will work fine. Here’s what you need to do:
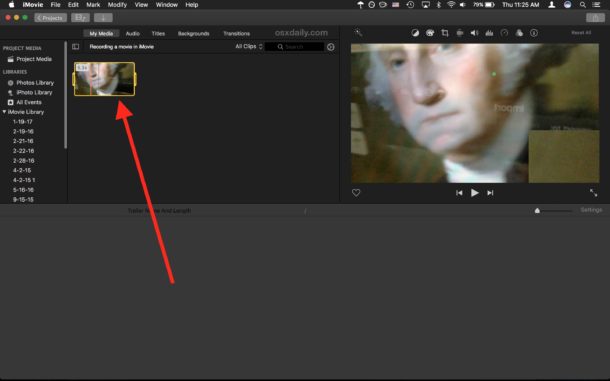
- Open iMovie if you have not done so already, you can then either be in an existing movie project or create a new one
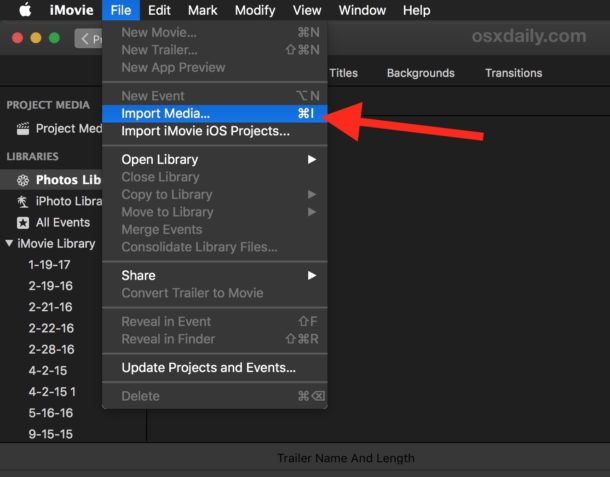
- Go to the “File” menu and choose “Import Media”
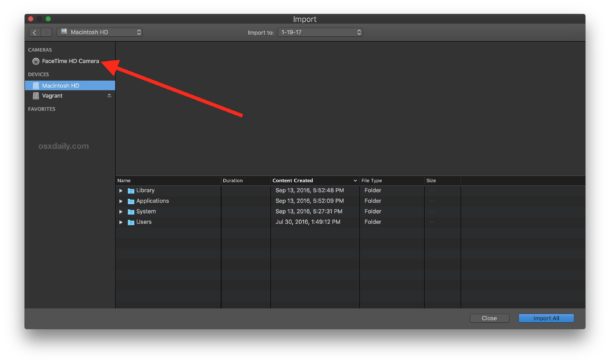
- At the “Import” screen choose “FaceTime HD Camera” from the left side menu option under ‘Cameras’
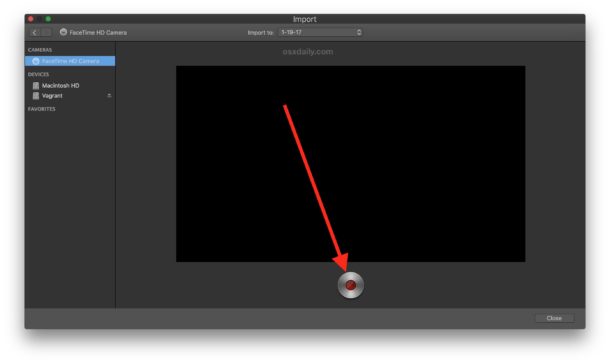
- At the the top of the import screen choose “Import To” and select which project or event you want to record the movie to, then click on the “Record” button to start recording a movie with the FaceTime camera
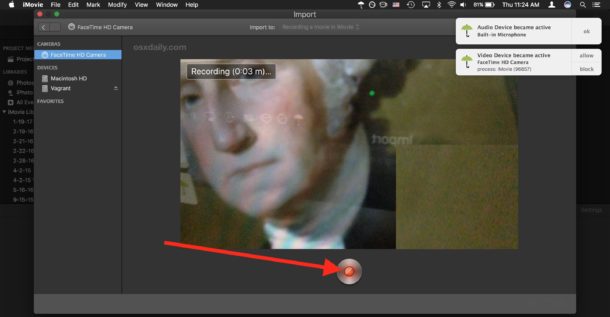
- When finished recording the movie, click on the Record button again to stop recording
- The captured video will now appear as a movie clip in the project event library you chose to import the movie into
From here you can place the recorded movie into an existing iMovie project, edit the video, crop it, add a text overlay, or save it.
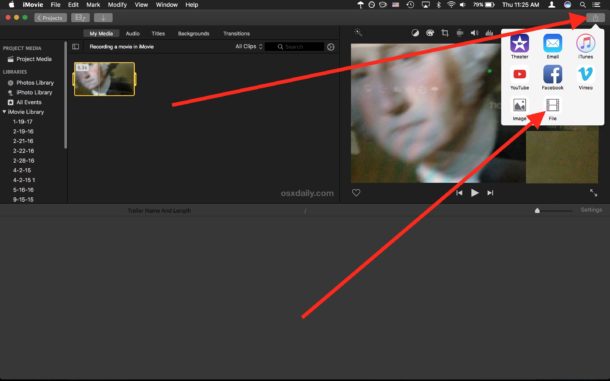
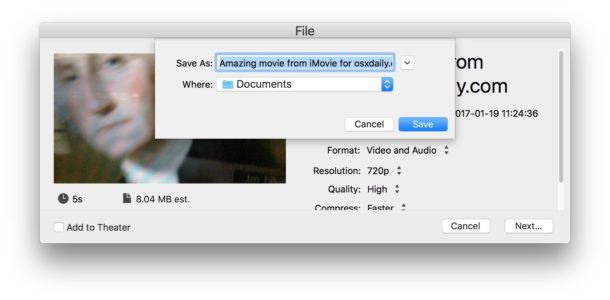
How to Save the Recorded iMovie as a Movie File
To save the recorded movie from iMovie directly as a file, to YouTube, to FaceBook, or to other options.
- Choose the Sharing button in the upper right corner of the iMovie window
- Select where or how you wish to save the movie (Email, Facebook, YouTube, File, etc)
As mentioned before, using iMovie to capture video directly is best if you’re aiming to place the movie into a broader video project or want to use the editing tools. If you have no need to edit the video, it’s probably quicker and easier to use this approach to record video with QuickTime instead, which is a much more barebones but faster solution.
Know of a better way to record movies directly into iMovie from a camera? Have any particularly great use for this feature? Let us know in the comments!

Thanks for sharing this amazing post! i can use this on my future recordings. Before, I am recording using record-screen.com because I don’t know what’s the best tool to record videos like movies and to take photos. A bad thing is that I don’t know how to use iMovie. But thanks to you, I will follow your instructions. thanks a lot!
How does one capture a YouTube movie and save it to a disk? Thank you for giving info on doing it the other way.