What Are Relocated Items in macOS Big Sur / Catalina & Can I Delete Them?
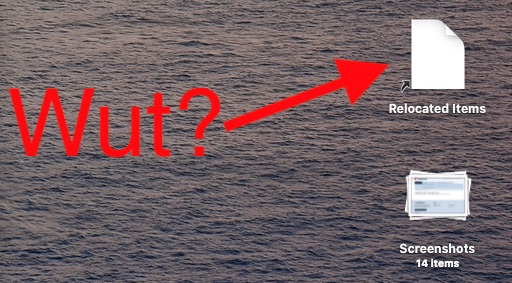
If you have updated to macOS Big Sur 11 or macOS 10.15 Catalina or later from an older version of Mac OS, you might find a new folder on your Desktop called “Relocated Items”. The Relocated Items folder can be confusing and look scary, especially if you aren’t expecting to see it. But you needn’t worry – the folder is a perfectly normal part of the MacOS upgrade process. Read on to learn what the Relocated Items folder on the Mac desktop or in the Shared folder of User folder is, and what you can do with it.
What is the “Relocated Items” Folder in MacOS?
Though it’s not completely obvious (Apple doesn’t make a great job of making it clear), but the Relocated Items folder is basically a home for anything that the macOS system software update process didn’t like. During the system update process your Mac checks files and data to make sure that everything is in its correct location, isn’t damaged in any way, and that it’s valid and authorized. Any file failing those checks is put into the Relocated Items folder.
It’s also worth remembering that the folder you can see on your Desktop isn’t actually a folder at all. Rather, it’s a shortcut (or alias) to a folder at “/Users/Shared/Relocated Items”.
Thus, you can safely remove the Relocated Items folder from the Mac desktop, because the original files are actually stored in /Users/Shared/Relocated Items/
Here’s what Apple has to say about the Relocated Items folder.
“When you upgrade your Mac to macOS Catalina, all your files and data are carefully reviewed to ensure they’re valid and authorised, undamaged, and in the correct locations. Some of your files couldn’t be moved to their new locations and were placed in a Relocated Items folder. You can find the Relocated Items folder in the Shared folder within the User folder.”
Can I Delete Everything in “Relocated Items” in MacOS?
That’s very much up to you, and it would be prudent to manually investigate the files contained within the Relocated Items directory to make sure you either don’t need them, or you don’t want them.
When you open the shortcut – or the original folder – you’ll see some files and a PDF document. That PDF is automatically generated during the macOS Catalina upgrade process and it will include information about each file.
Be sure to check that none of the files are important to you before deleting them.
It’s likely that you will see files and data that relate to apps that are not compatible with macOS 10.15 Catalina or later. Unfortunately, you’ll need the developers of those apps to issue updates for them and if the apps are old, that might be unlikely.
Our suggestion would be to simply delete the shortcut from your Desktop and leave the Relocated Items folder where it is. Especially if it isn’t taking up too much space. But if you really want it gone, that’s easy enough to do. Just head to “/Users/Shared” and drag the Relocated Items folder to the Trash.
Help, macOS Won’t Let Me Delete Everything in “Relocated Items”
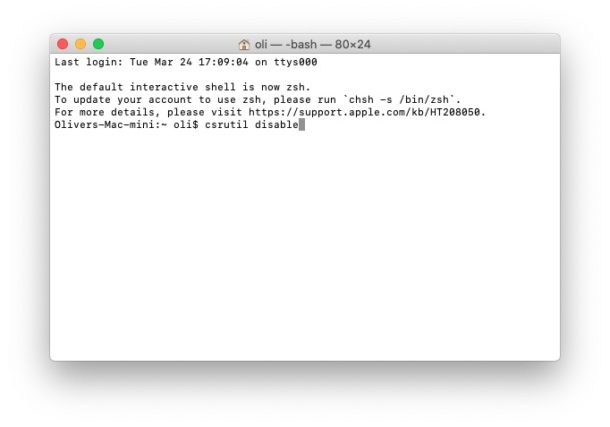
Sometimes you might find yourself unable to move this folder – or its contents – to the Trash. Error messages suggesting that the folder “can’t be modified or deleted” can be bypassed, but it’s going to take some work. We’re going to need to disable System Integrity Protection (SIP), restart and delete the folder, and then re-enable SIP.
- Restart your Mac and press and hold the Command+R keys to enter Recovery Mode.
- Click “Go” from the toolbar and then click “Utilities”.
- Click “Terminal”.
- With Terminal open, type “csrutil disable” without the quotes and press RETURN.

- Reboot your Mac and delete the folder. You shouldn’t have any problems this time.
Now you need to enable SIP again so that the Mac is protected as intended.
- Restart your Mac and press and hold the Command+R keys to enter Recovery Mode.
- Click “Go” from the toolbar and then click “Utilities”.
- Click “Terminal”.
- With Terminal open, type “csrutil enable” without the quotes and press RETURN.
- Reboot your Mac and you’re set!

Of course, if SIP was already disabled then you probably didn’t need to do any of this, but generally speaking only the most advanced Mac users are running without SIP enabled.
You can check whether SIP is enabled or not easily, too.
While you’re in Terminal, did you know that you can do tons of cool things? You can run your own web server and even adjust your Mac’s screen brightness, too. That one could be really useful for scripts and such, too.
Anyway, hopefully you now have a better understanding of the “Relocated Items” folder in MacOS. Let us know in the comments if you have any questions, experiences, or thoughts about the Relocated Items directory on the Mac!

Nice article but I want to make the macOS STOP making Relocated Item. I just found like 20 Relocated Items” folders”; that is ridiculous!
Instead of re-enabling SIP by “csrutil enable” in Recovery Mode, you can do this by “csrutil clear” in Normal Mode with following reboot. Thus you can save one reboot. Make sure by “csrutil status” afterwards.
At least this works from Mojave 10.14.6 (Jun-20).
I have been reading your stuff for years. I’m not a techie but enjoy all the material.
Is there any way to run old 32bit software on Catalina?
Sort of, but it’s not a great solution.
The easiest way to run 32-bit apps on MacOS Catalina and later is by creating a virtual machine and installing Mojave or earlier into the VM, then running the 32-bit apps through there, which runs on top of 10.15 or later. The performance won’t be as good as native, and there are other obvious trade-offs associated with running apps in a VM, but it will get the job done if it’s essential.
Personally I think if you need 32-bit apps and they are not yet supported for newer MacOS releases, it’s best to stay on Mojave or earlier until those apps are supported, or replacements are found. I use Mojave on my primary Mac still, it continues to work well, it has notably better performance (for me) compared to Catalina, and there is 32-bit app support which I also require. But the future is clearly 64-bit apps, so this is not a longterm strategy.