How to Screen Mirror iPhone or iPad to Windows PC
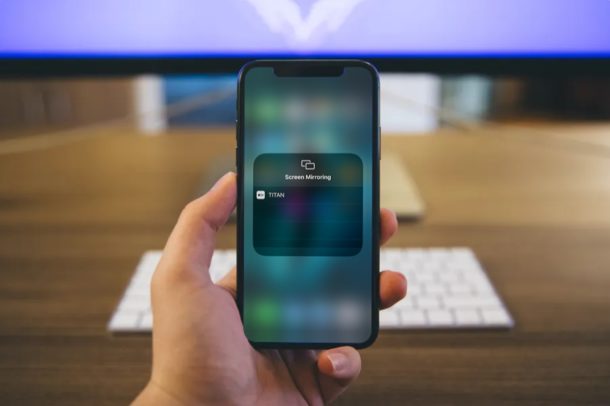
Apple AirPlay allows users to seamlessly mirror their iPhone or iPad screen to Apple TV or AirPlay 2-compatible smart TVs out of the box, but what if you want to use this feature on your Windows PC? You’ll be pleased to know that there are multiple software choices that you can make use of to accomplish mirroring an iPhone or iPad screen to a PC, like Reflector, ApowerMirror, LonelyScreen, and more.
These software applications essentially turn your Windows PC into an AirPlay receiver and allows you to share videos, presentations, spreadsheets and just about anything that’s displayed on your iOS or ipadOS device’s screen wirelessly. Plus, you don’t need to install any additional third-party app on your phone, as everything is handled by the software on your Windows PC.
Most of the AirPlay receiver software work in a very similar way, so if you’re interested in trying this out, we’ll walk you through the necessary steps to screen mirror iPhone or iPad to your Windows PC using Reflector 3.
How to Screen Mirror iPhone or iPad to Windows PC
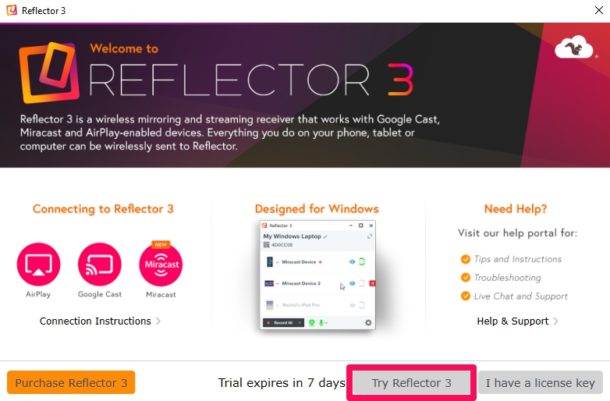
Before you get started with the procedure, you’ll need to install Reflector 3 on your Windows PC. You can take advantage of the free 7-day trial before you decide on purchasing the software. Once you’ve installed it, simply follow the steps below to mirror your screen.
- Open Reflector 3 on your computer. If you don’t know where you installed it, use the Windows search bar to find it. Now, click on “Try Reflector 3” if you’re not willing to purchase it.

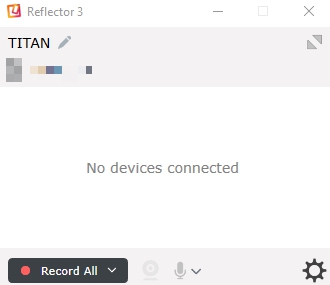
- The software will now open up in a tiny window and you’ll see that no devices are connected.

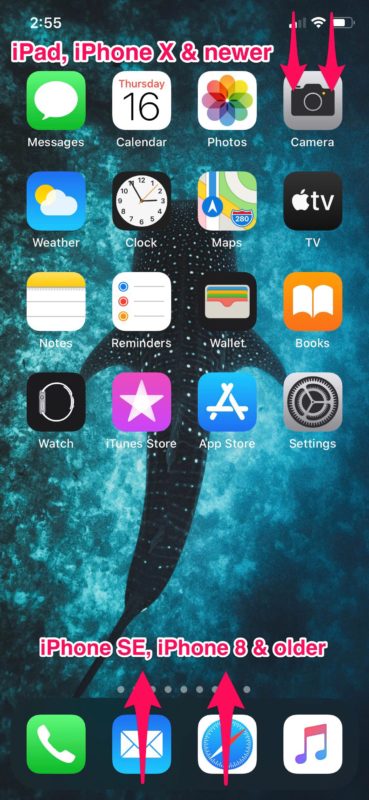
- Next, you’ll need to head over to the Control Center on your iOS device. If you’re using an iPad, iPhone X or newer device, you can access the Control Center by swiping down from the top-right edge of the screen. However, if you’re using an iPhone with a physical home button, simply swipe up from the bottom of your screen.

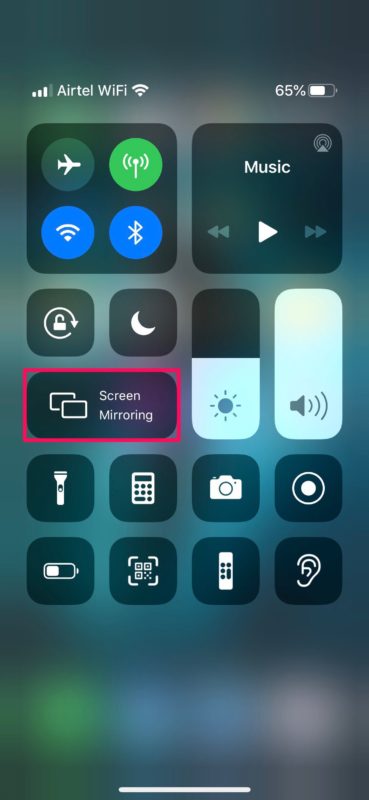
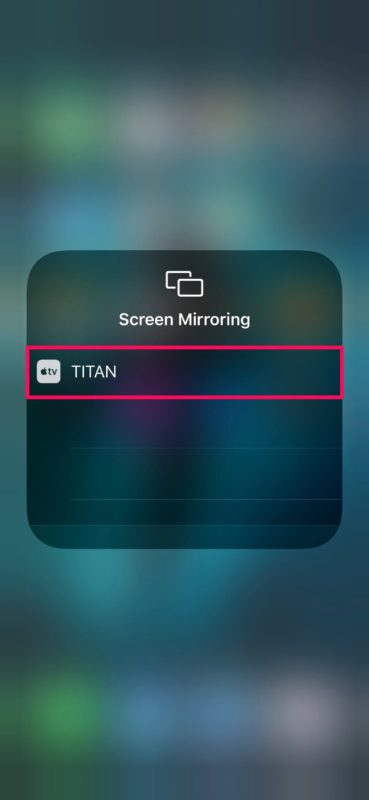
- Now, long-press on “Screen Mirroring” as shown in the screenshot below.

- Here, you’ll see your PC show up in the list of AirPlay receivers. Tap on it.

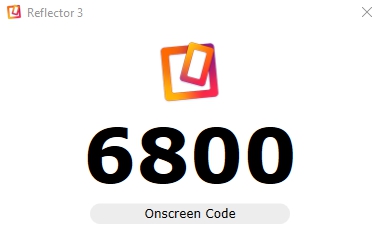
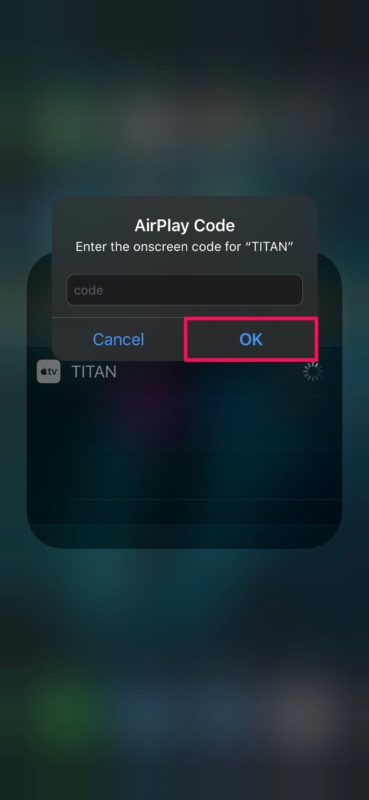
- Now, you’ll be asked to enter an onscreen code that’ll be displayed by the software on your PC as shown below.

- Type in the code and press “OK” to initiate the connection.

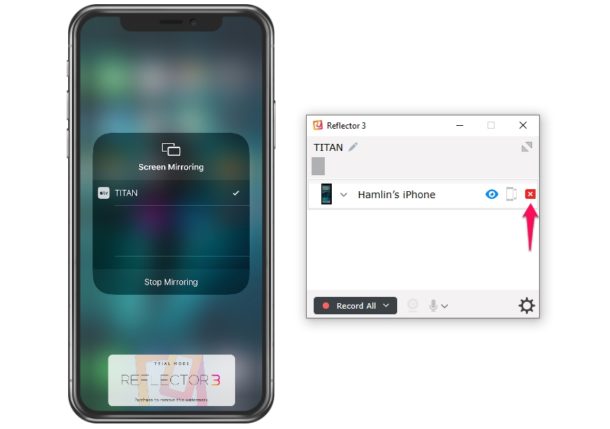
- As you can see here, the screen mirroring session has begun. If you want to disconnect at any time, you can either tap “Stop Mirroring” on your iOS device or simply click the “x” icon in Reflector.

There you go, you’re now able to mirror your iPhone or iPad screen to a Windows PC. Pretty easy, right?
If you hover over the screen mirroring window on your PC, you’ll have the option to take a screenshot or record your screen using Reflector.
By default, the resolution of the mirrored content is set to 1080p, but this can be easily adjusted within the software’s settings.
Once the 7-day trial period is over, you’ll have to purchase Reflector for $17.99 in order to continue using it. However, the pricing is reasonable in comparison to various other AirPlay receiver software like ApowerMirror that costs $59.95 for a lifetime license. That being said, if you want a completely free solution to mirror your screen, you might be interested in trying out LetsView. Regardless of what software you choose to use, the procedure to mirror your iPhone or iPad screen will remain fairly identical, so feel free to explore other apps and share with us what you find works the best.
Do you use a Mac as your secondary computer? If so, you’ll be pleased to know that AirPlay receiver software like Reflector are available for macOS devices too. You can take advantage of it to mirror content to your MacBook or iMac from your iOS device. Likewise, once you’ve learned how to use AirPlay mirroring on a Mac, you can also mirror your Mac’s display to a Windows machine using these software.
We hope you managed to mirror your iPhone or iPad screen to a Windows PC without any issues. Have you tried out any software other than Reflector? Let us know your experiences with mirroring iPhone and iPad to PC’s in the comments!

