How to Use Guided Access on iPhone & iPad to Lock an App on Screen

Guided Access is an extremely useful accessibility feature that can be utilized to lock your iPhone and iPad’s screen to one app. It can also limit what you can touch on the iPad, iPhone, or iPod touch screen. Guided Access is a great feature of iOS and iPadOS, particularly for parents, educators, and even businesses wanting to put an iPad into a form of kiosk mode.
If you often let your kids use your iOS or iPadOS devices to play games or access homework apps, you can take advantage of Guided access to limit access to just the one app that they want to use (sometimes Guided Access is referred to as ‘kid mode’ for this reason). Additionally, this feature could come in handy for businesses that makes use of devices like iPads to display specific content on the screen. Guided Access prevents users from switching to a different application or mess with the device’s settings.
Interested in trying Guided Access on your device? Then read on to learn how you can use Guided Access to lock an app onto the screen on either the iPhone or iPad.
How to Use Guided Access on iPhone & iPad
In order to get started with guided access on a specific app, you’ll need to enable this feature first within the accessibility settings. So, simply follow the steps below to turn the feature on and start using it to lock an app on screen.
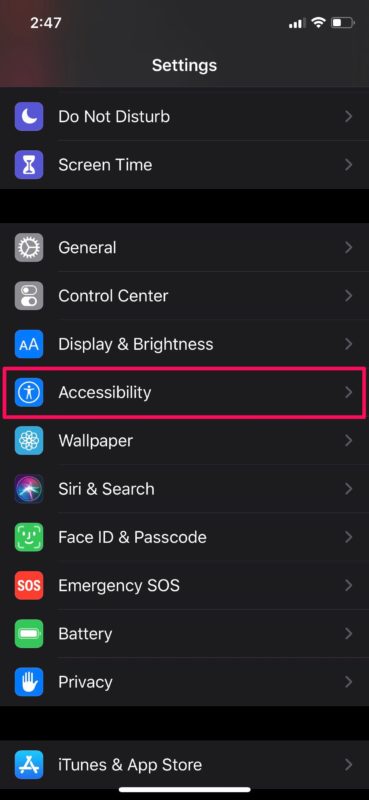
- Head over to the “Settings” app on your iPhone or iPad. Scroll down and tap on “Accessibility”.

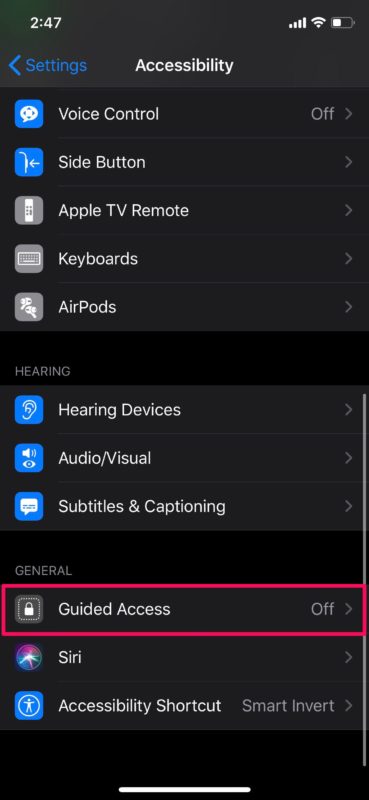
- In the accessibility settings menu, scroll down to the bottom and select “Guided Access”.
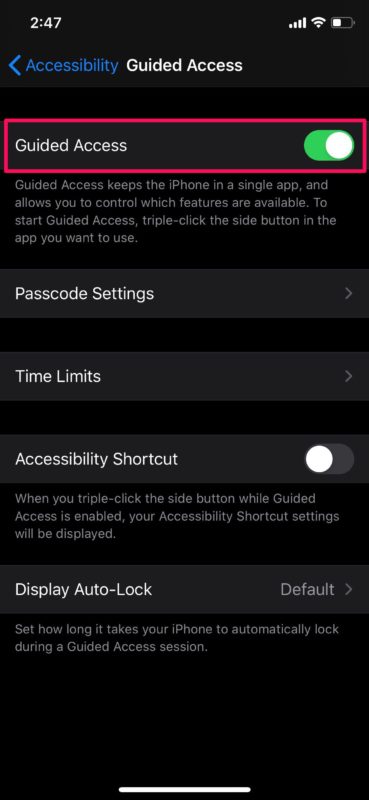
- Now, tap on the toggle to turn this feature on.
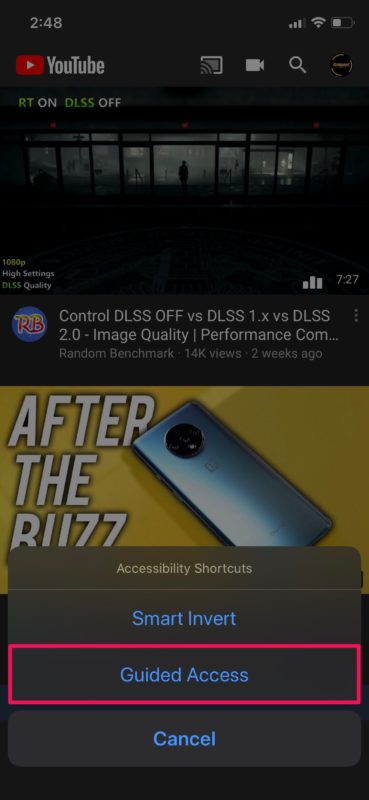
- Next, open the app that you want to limit your iPhone or iPad to. Triple-click the power button / side button on your iOS device to access the accessibility shortcuts and select “Guided Access”.
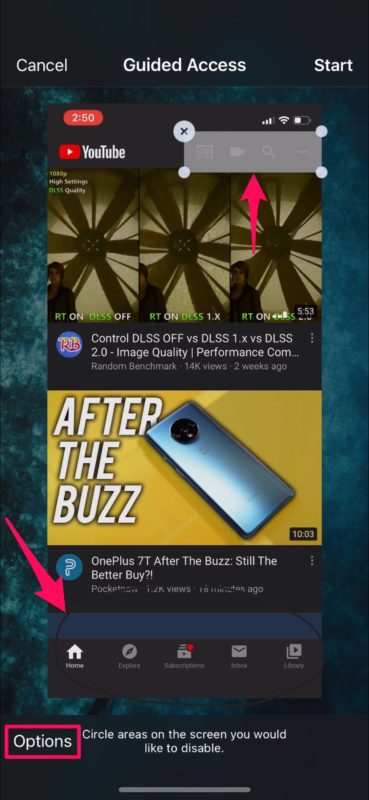
- You’ll be taken to the Guided Access setup menu. Here, you can circle the areas on the screen that you’d like to disable. Tap on “Options” for more controls.
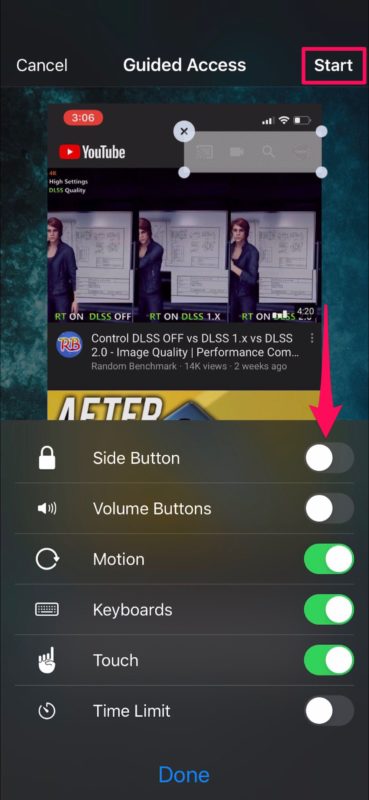
- Here, you’ll have the option to enable or disable physical buttons, motion controls and touch inputs on your device, You’ll also be able to add a time limit on the app, if necessary. Once you’re done configuring, tap on “Start” which is located at the top-right corner on the screen.
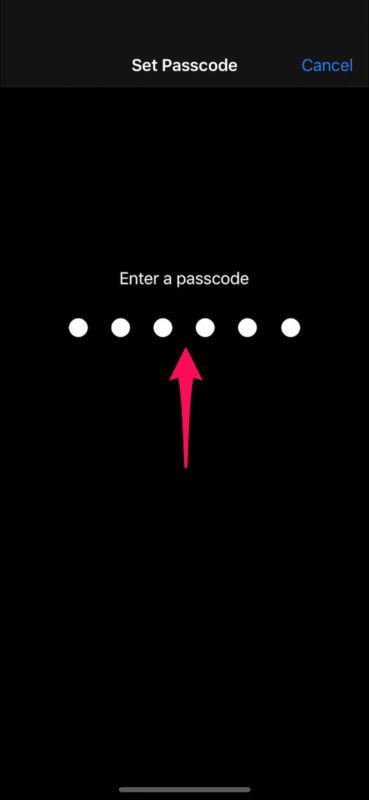
- Now, set a passcode which can be used later on to exit Guided Access or adjust its settings.
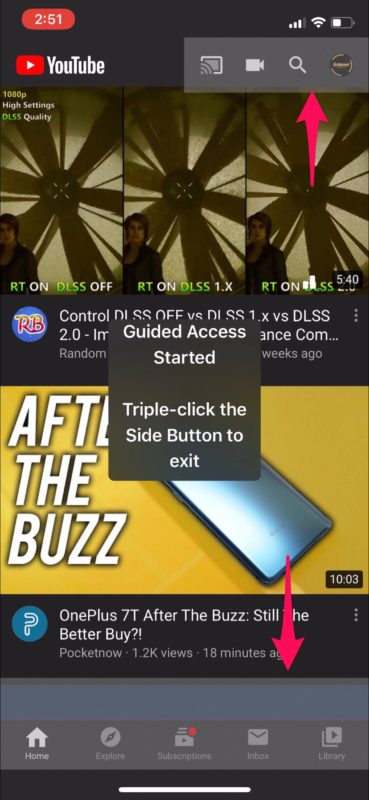
- You’ve successfully started a Guided Access session on the iPhone or iPad. As you can see here, the disabled areas are grayed out on the screen.
And that’s how you enable Guided Access and then enter Guided Access mode within an app on iPad or iPhone.
How to Exit Guided Access on iPhone or iPad
Ready to get out of Guided Access mode to use the device as usual again? That’s equally simple, so
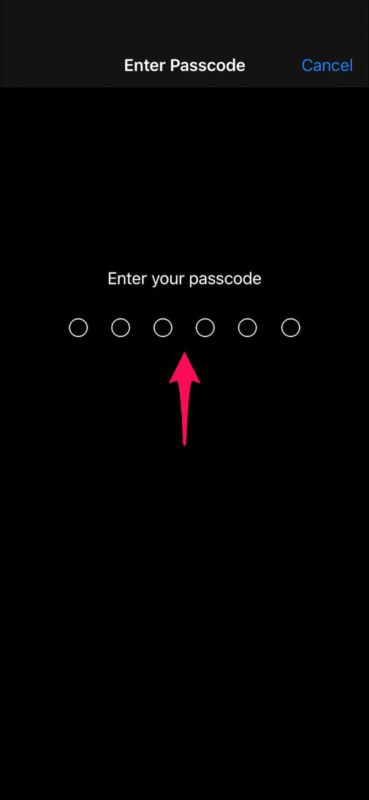
- To exit a Guided Access session, simply triple-click the power button / side button on your device.
- Now, enter the passcode you set earlier.
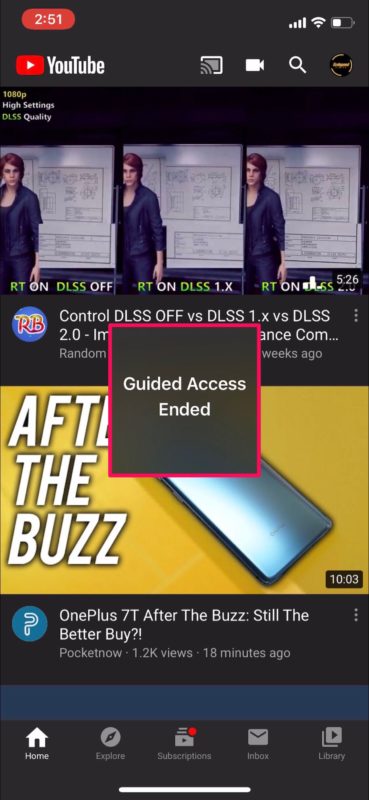
- This will take you back to the Guided Access menu where you can adjust the restrictions. In order to exit Guided Access, tap on “End” located at the top-left corner on your screen.
- As you can see in the screenshot below, there are no restricted areas on the screen as the Guided Access session has ended.

That’s all there is to this procedure. Now you’ve learned how to start and end a Guided Access session on your iPhone and iPad. It’s pretty easy, but like many things it’s best to experience yourself to understand fully how it works.
This feature come prove to be useful in a lot of scenarios. For example, you may want to put a device into Guided Access mode before you hand it to a child to use for a particular game or app so they can’t leave or exit that app, or you might not want accidental gestures to distract you while you’re playing a game on your device. By limiting areas on the screen that accepts touch input, that type of annoyance can be avoided. This can be used to avoid misclicking ads within an app too, which may be experienced when some apps place ads over game play and other app content.
Whether it’s for your business, fun, education, research, or simply just limiting device access for your children, Guided Access is a great tool to have full control over what your iPhone and iPad displays on the screen.
Guided Access has been around a while but it’s often underutilized, and many users might not even know the capability exists to lock an app onto their iPhone or iPad screen. The directions here cover this feature in modern versions of iOS and iPadOS, but if you have a much older device laying around you can refer to these instructions for older iOS versions where the feature works mostly the same but the interface and some other aspects are a bit different.
Do you want to restrict access to more than one app on your iPhone and iPad? Although that’s not possible with Guided Access, you can take advantage of Apple’s Screen Time functionality which allows you to set time limits on apps within a matter of minutes. Screen Time offers many other parental control features like being able to set communication limits, blocking in-app purchases, app installations and more.
We hope you managed to set up and use Guided Access on your iPhone and iPad without any issues. Do you use this feature and find it useful? Have you used any other accessibility features in a similar way? Do let us know your thoughts and opinions on Guided Access mode in the comments section down below.
