How to Share Screen with Zoom on Mac
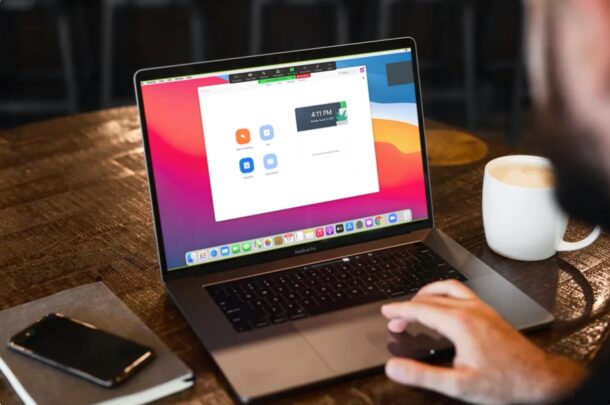
You likely already know that you can host Zoom meetings and join them from your Mac, but did you know you can also screen share? Whether video conferencing for work, personal, family, or any other reason, you may be interested in checking out Zoom’s screen sharing functionality.
As the name would imply, this feature lets you share whatever is on your Mac screen with other participants in the Zoom meeting.
How to Share Screen with Zoom on Mac
Before you go ahead with the following procedure, make sure your Mac is running macOS Mojave or later. Assuming you already know how to host and join a Zoom Meeting on your Mac, let’s get started with the necessary steps.
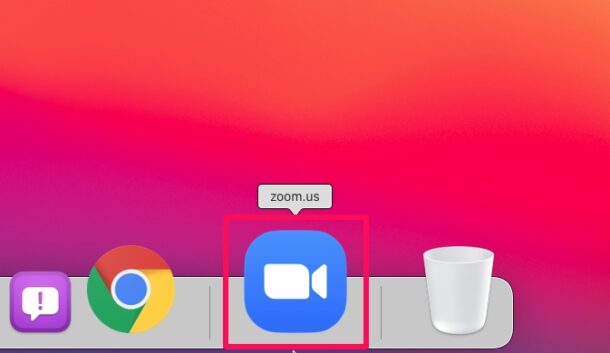
- Launch “Zoom” on your Mac and host or join a meeting.

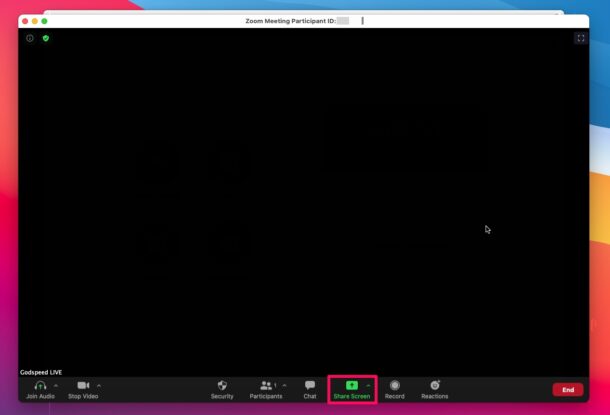
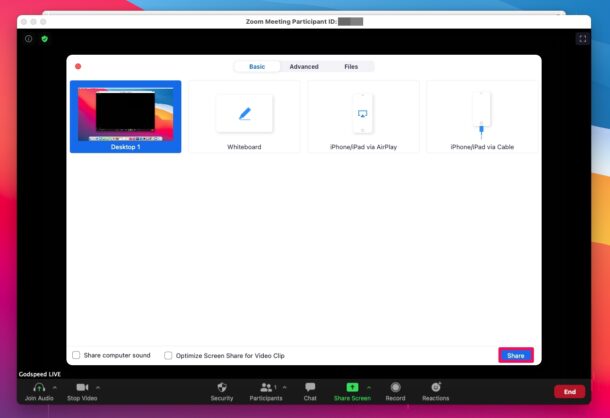
- Once you’re in an active meeting, click on the “Share Screen” option from the bottom menu, as shown in the screenshot below.

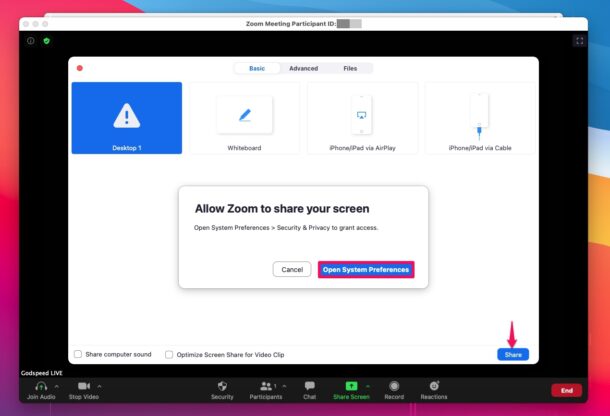
- This will open a new window on your screen. Here, you’ll be able to choose your desktop for screen sharing. Click on “Share” to get started. When you’re prompted to give Zoom the necessary permissions to share your screen, click on “Open System Preferences”.

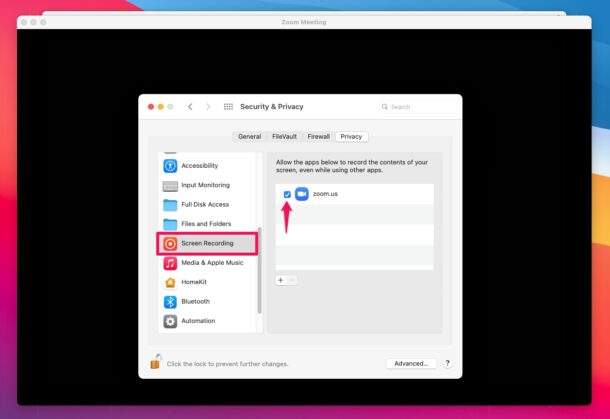
- This will automatically take you to the Security & Privacy section. Here, choose “Screen Recording” from the left pane and check the box next to Zoom. You may be prompted to relaunch your Zoom, but that’s not necessary. You can close this window and go back to Zoom.

- Now, select your desktop and click on “Share” again to start the screen sharing session.

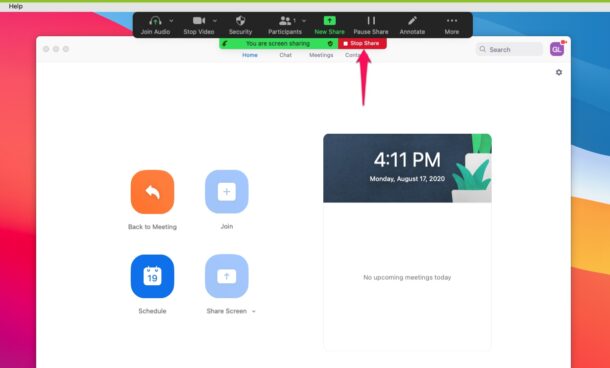
- You’ll be notified when you’ve started sharing your screen. You will be able to pause the share using the controls at the top. When you’re done screen sharing, click on “Stop Share”, as shown below.

There you go. Now you’ve successfully managed to share your Mac’s screen during an ongoing Zoom meeting.
This wouldn’t have been possible if it wasn’t for the native screen recording functionality in modern MacOS releases. If your Mac is running an older version of macOS, you won’t be able to take advantage of Zoom’s screen sharing tools.
If you own other Apple devices like the iPhone or iPad, you can connect them to your Mac via AirPlay or Lightning/USB-C cable and then use your iOS device as the screen sharing display while you’re actively video chatting and looking at other participants on your Mac. This feature could come in handy during an online lecture or presentation, or for many other purposes. Or, you can even use the Zoom Meetings mobile app to share your iPhone or iPad’s screen conveniently.
Zoom certainly isn’t the only video conferencing software that lets you share your screen with other users. You can also do so from Google Hangouts Meet, Skype for Business, and there’s even macOS native screen sharing, so you can use whichever works for you for your particular needs.
Did you share your Mac screen using Zoom? Do you use another screen sharing solution instead? Let us know your thoughts, experiences, and opinions on Zoom screen sharing in the comments section down below.


My friend has a Mac High Sierra 13.10.6 and cannot see what she shares on screen in a Zoom meeting. Help?
Very useful step-by-step tutorial. Worth mentioning that the screen sharing functionality can be further expanded to include remote cursor control, which I found very useful when helping students with their projects.
I was so stressed out about this but your help was amazing!
Went through at least 10 websites to find the example on your website to actually help me solve my problem with screen sharing on Zoom. Your step by step instructions and pictures easily solved the problem. I really appreciate this website.
Microsoft Teams also allows Desktop Sharing and doesn’t require so many steps to achieve this.