How to Create a Signal Group & Signal Group Link on iPhone
Did you recently start using Signal messenger to text your friends, family, and colleagues? You’re certainly not the only one in that regard, as many iPhone and Android users have been making the switch due to privacy or security concerns. Considering you’re new to the platform, you may not know how to get started with groups within the Signal app.
If you’re one of those many people who switched over from WhatsApp, creating a group in Signal would be fairly similar. On the other hand, iMessage users may find it to be very different due to the fact that groups created on Signal can use an optional group link for inviting and adding new people to the group conversation. This is exactly why we’ve decided to cover the procedure in detail to avoid any sort of confusion. No matter what instant messaging service you’re coming from, we got you covered.
Here, we’ll be discussing the necessary steps to create a Signal group, and to create a unique group link to invite people, right from your iPhone.
How to Create a Signal Group & Signal Group Link on iPhone
Assuming you have set up your Signal account on your iPhone already, let’s take a look at what you need to do to create a group and add your contacts:
- First, launch the Signal messenger app on your iPhone or iPad.

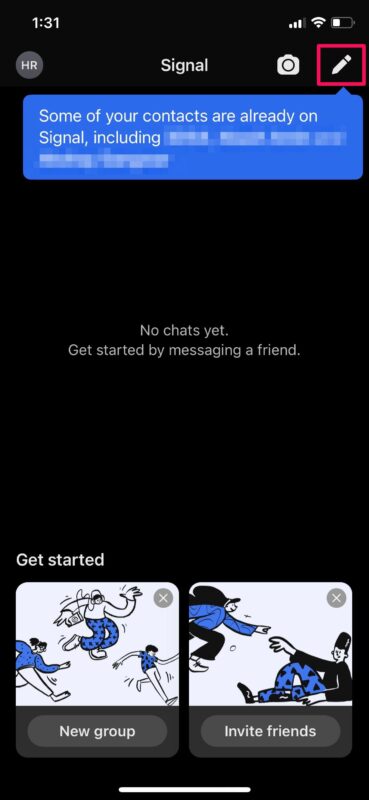
- Upon launch, you’ll be taken to the main chats section of the app. Here, tap on the compose option located at the top-right corner of the screen next to the camera icon.

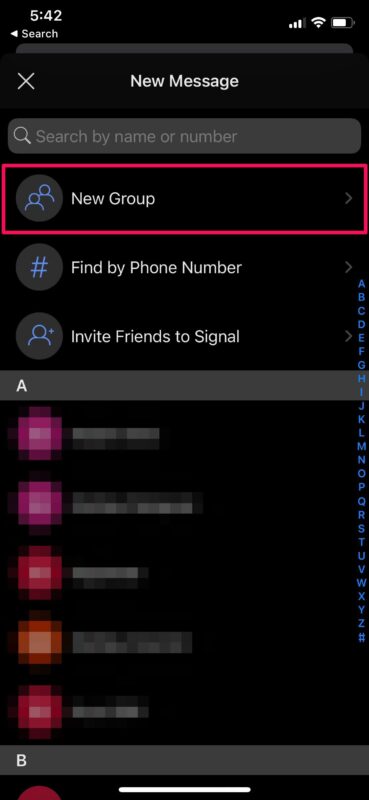
- In this menu, you’ll find the option to create a group right at the top. Select “New Group” to get started.

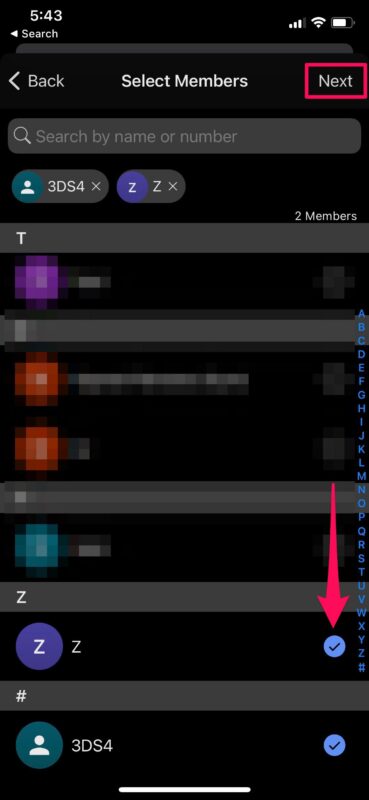
- Now, you can manually select the members you want to add to the group from your Signal contacts list and tap on “Next” to proceed with the group creation.

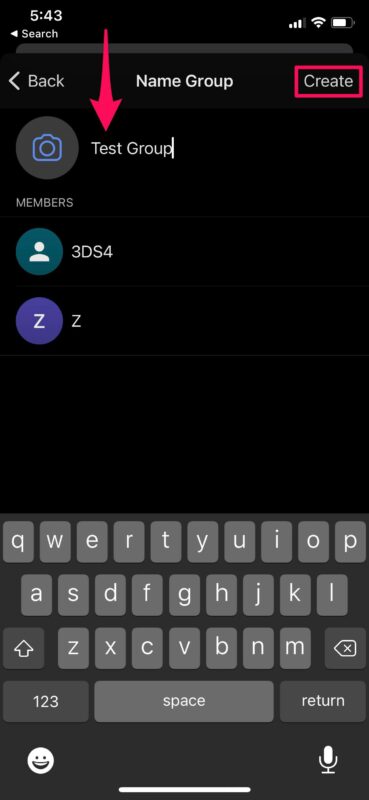
- Next, give the group a preferred name and add a group icon if you want to, and tap on “Create”.

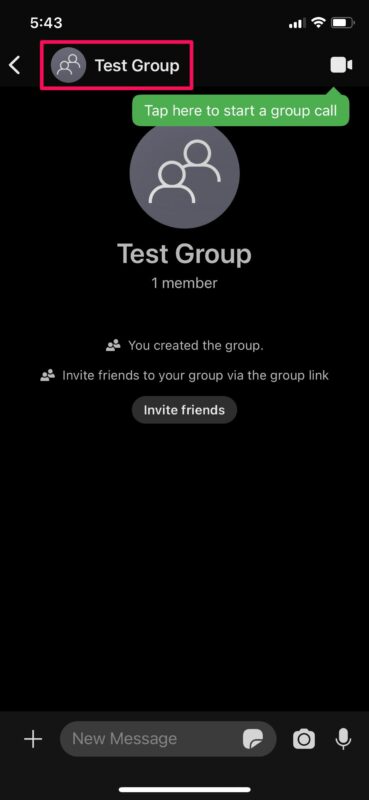
- Now that the group has been successfully created, the next thing you need to do is to turn on the Group Link feature which is disabled by default. To do this, first tap on the group name to access group info.

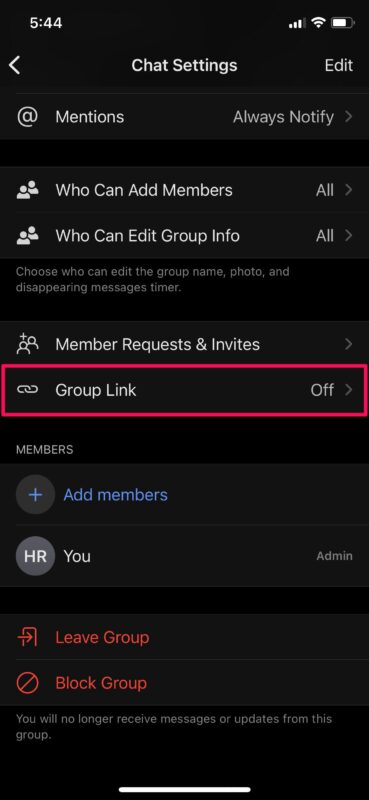
- Here, scroll down and select the “Group Link” option located just above the members list.

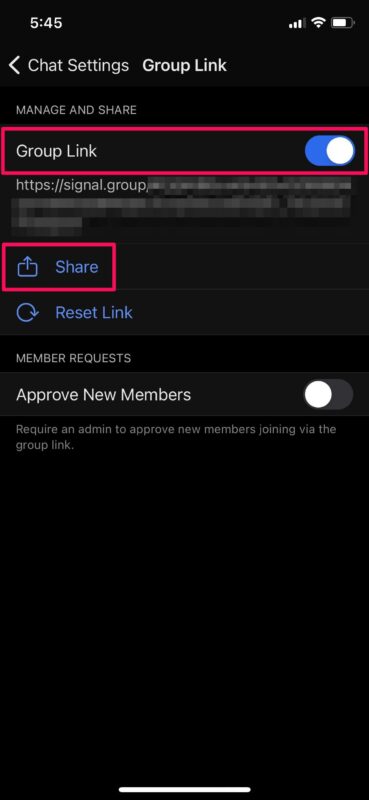
- Now, simply use the toggle to enable Group Link. The unique link to join your group will be displayed right below. You can tap on “Share” if you want to copy the link and share it with other people.

That’s it. Your very first Signal group has been set up with Group Link enabled.
In the same menu where you turn on Group Link, there’s an additional setting that you can use to approve new members who join with the group link. This may be handy if you’re making your group link public but you still want to filter out the people who join the group. You can accept member requests from the group settings.
Although this procedure focused heavily on the iOS/iPadOS version of the app, the steps are very similar if you’re looking to set up a new group using the Signal desktop app on macOS, Windows, or Linux.
As of this writing, a Signal group can have a maximum of 150 participants. In comparison, this is way more than the 25-person limit set by Apple for iMessage groups, but it still falls short in comparison to its primary rival WhatsApp which currently allows up to 256 participants in a group. Regardless, this group limit should be plenty enough for most people.
One of the standout features of Signal is disappearing messages and thankfully, this feature is available for group chats as well. The group admin will be able to enable or disable this feature at their discretion and even set the expiry time for such messages.
Hopefully, you were able to set up your new Signal group and configure it properly without any issues. What are your first impressions on Signal messenger and how does it stack up against the competition? Are you planning to use it in the long run or did you install it just to try it out? Share your thoughts in the comments!

