How to Lock Into a Single App on iPhone & iPad with Guided Access

Do you want to lock your iPhone or iPad to a single app? This can be helpful to do before you pass your device off to let a child, friend, or family member use the device. Thanks to the Guided Access feature within iOS and iPadOS, locking a single app onto the screen is a fairly simple and straightforward procedure.
Considered as an accessibility feature in iOS and iPadOS, Guided Access can be utilized to lock your iPhone and iPad’s screen to any one of the apps installed on the device, whether a native app or from the App Store. Effectively, Guided Access prevents users from switching to a different application, or mess with the device’s settings. Guided Access has a ton of obvious applications for kids, parents, educators, caregivers, ad businesses, and it could even come in handy for businesses that make use of devices like iPads to display specific content on the screen, like a menu or kiosk.
If you are interested in trying out Guided Access for yourself on your iPad or iPhone, we’ll be covering locking your iPhone and iPad to a single app by using this feature.
How to Lock iPhone or iPad to a Specific App with Guided Access
In order to get started with guided access on a specific app, you’ll need to enable this feature first within the accessibility settings. Just follow the steps below to turn the feature on, and then use it to lock into an app.
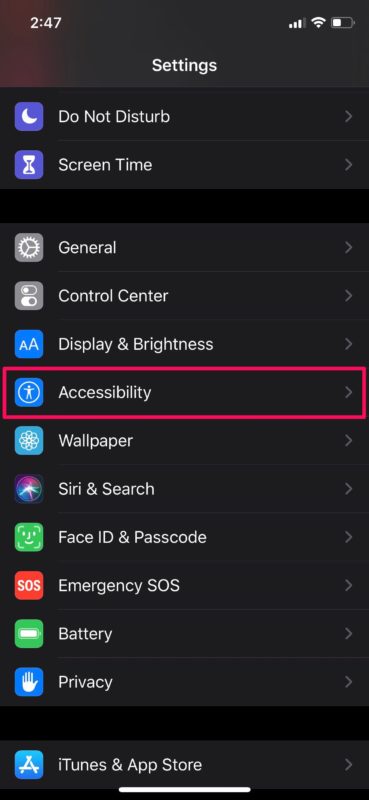
- Head over to the “Settings” app on your iPhone or iPad. Scroll down and tap on “Accessibility”.

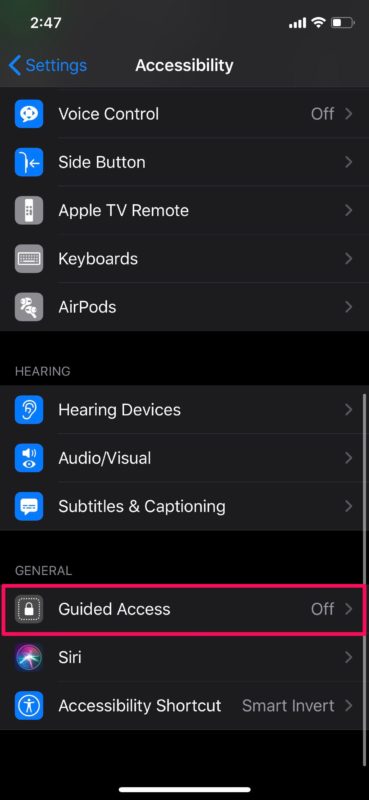
- In the accessibility settings menu, scroll down to the bottom and select “Guided Access”.

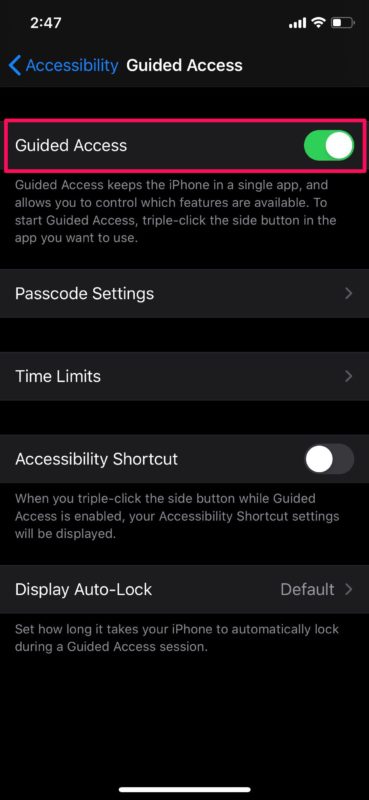
- Now, tap on the toggle to turn this feature on.

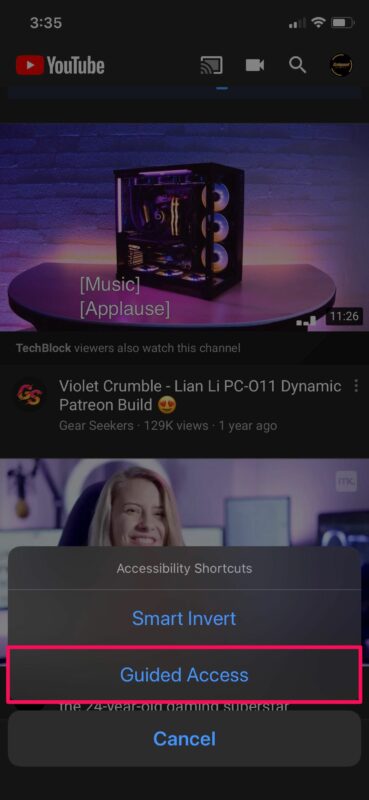
- Now that you’ve enabled this feature on your device, open the app that you want to limit your iPhone or iPad to. Triple-click the power button/side button on your iOS device to access the accessibility shortcuts and select “Guided Access”.

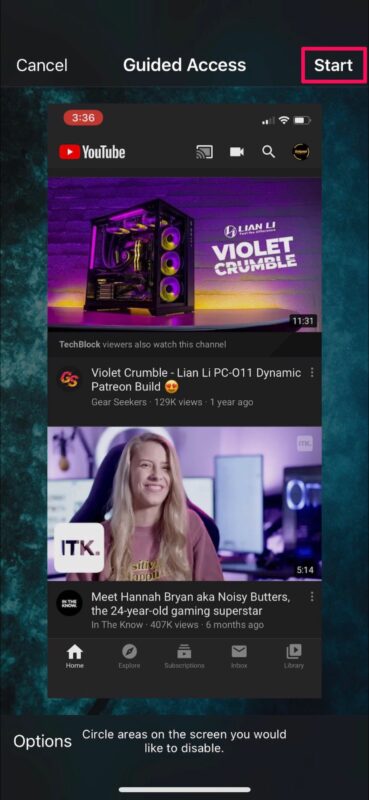
- You’ll be taken to the Guided Access setup menu. Tap on “Start” to lock your device to the opened app.

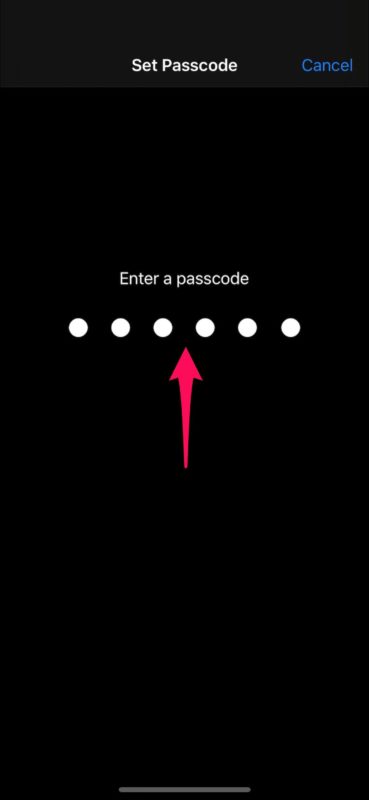
- Now, set a passcode that can be used later on to exit Guided Access or adjust its settings.

- That’s it. You’ve started a Guided Access session and your device is now locked to a single app.
The iPad or iPhone will stay locked into the specific app as long as Guided Access is in use and active.
Of course you can exit out of Guided Access too…
How to Unlock from Locked Apps on iPhone & iPad
Escaping an app from Guided Access mode is fairly straight forward on iPhone and iPad:
- In order to exit Guided Access, triple-click the power/side button on your iPhone or iPad.

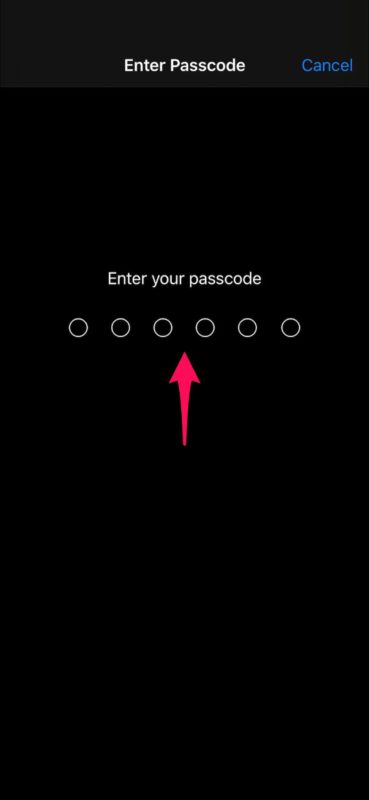
- Next, enter the passcode you set earlier.

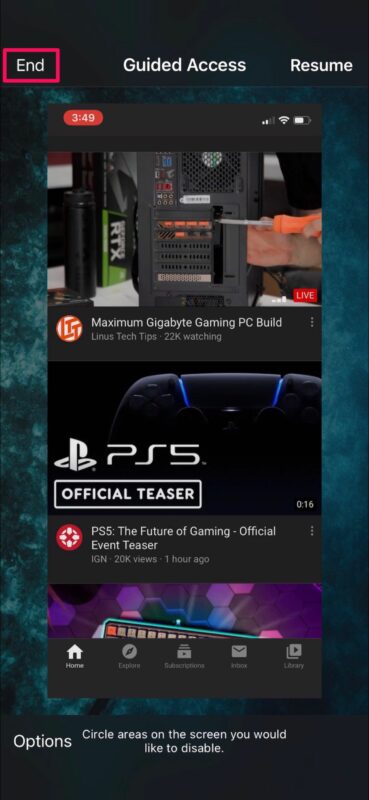
- This will take you back to the Guided Access menu. Tap on “End” located at the top-left corner of your screen to exit Guided Access.

There you go. Now you’ve learned how to lock your device to one app using Guided Access on your iPhone and iPad, and how to exit Guided Access mode too.
In addition to locking into a single app, Guided Access can also be used to limit touch input to specific areas of the screen. For example, you can use this to restrict access to the menu or settings of an app. Or, you can choose to disable the entire touchscreen altogether.
Whether it’s for your business, or research, or simply just limiting device access for children, Guided Access is a great tool to have full control over what your iPhone and iPad displays on the screen, and how it can be interacted with.
Do you want to lock more than one app on your iPhone and iPad? Although that’s not possible with Guided Access, you can take advantage of Apple’s Screen Time functionality which allows you to set time limits on apps within a matter of minutes. It offers other parental control features like being able to set communication limits, blocking in-app purchases, app installations, and more.
Were you able to restrict your device’s access to just one app on your iPhone and iPad? How often do you find this useful? Do share your thoughts and experience in the comments section down below.

