How to Cut & Trim Video on iPhone & iPad with iMovie

Do you want to cut and trim some of the videos you captured on your iPhone or iPad, perhaps to remove the unwanted portions, shorten the length, or otherwise make the video more appealing? With the iMovie app that’s available for iOS and iPadOS devices, this is a fairly simple and straightforward procedure.
While the built-in video editor in the stock Photos app is adequate for most people, you can’t use it to access advanced features like being able to view your timeline, add transitions, combine multiple videos, and so on. This is exactly where a dedicated video editing app like iMovie comes in handy. There are several video editing apps on the App Store, but Apple’s iMovie is completely free and it’s pretty to use for how powerful it is.
Interested in taking advantage of iMovie for some of your video editing needs? As you read along, you’ll learn how to cut and trim videos with iMovie on iPhone, and it works the same on iPad too.
How to Cut & Trim Video on iPhone & iPad with iMovie
Before you get started with the following procedure, you need to install the latest version of iMovie from the Apple App Store, since it doesn’t come pre-installed mobile devices. Once you’re done, simply follow the steps below to combine videos.
- Open the “iMovie” app on your iPhone or iPad.

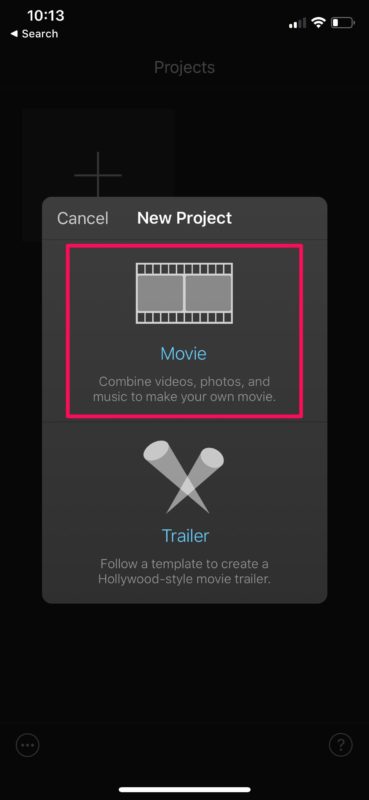
- Tap on “Create Project” to start a new video editing project within the app.
- Next, choose the “Movie” option when you’re asked about the type of project you want to create.
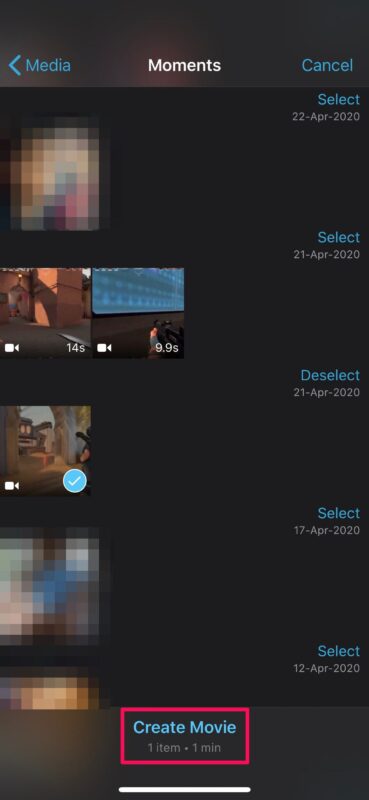
- This will open your Photos library. Here, you can scroll through your videos and select the clip you want to add to your project. Once you’re done with the selection, tap on “Create Movie” at the bottom of the menu.
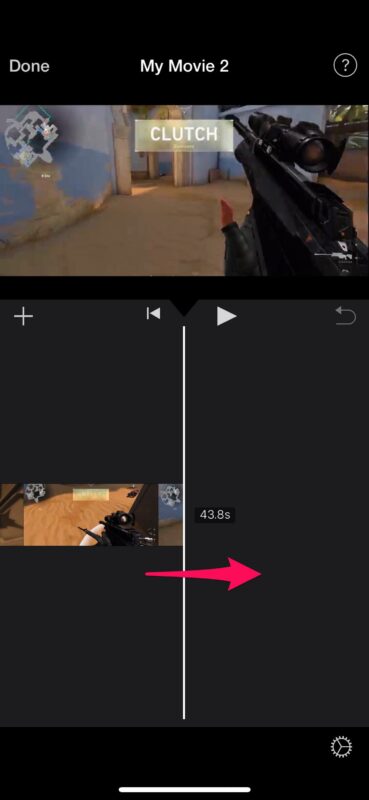
- The video you selected will be added to the iMovie timeline. The cursor will be at the end of the clip by default, but you can gradually drag the clip towards the right and stop exactly where you want to cut the video.
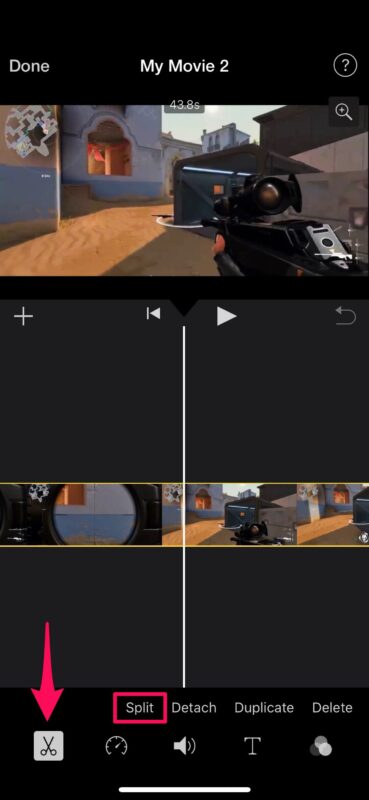
- Now, tap on the timeline to proceed to the next step.
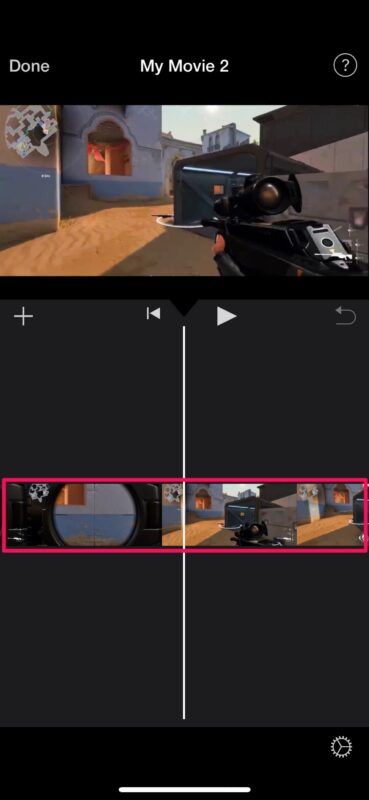
- You’ll be able to access various tools available in iMovie now. Make sure the cut tool is selected, which is indicated by a “scissors” icon as shown below. Tap on “Split” to cut the video clip exactly where you marked.
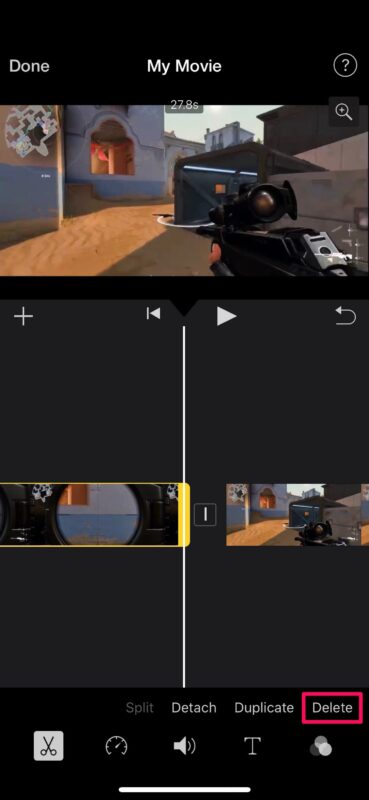
- Next, select the unwanted portion of the video clip in the timeline and then tap on “Delete” to trim it.
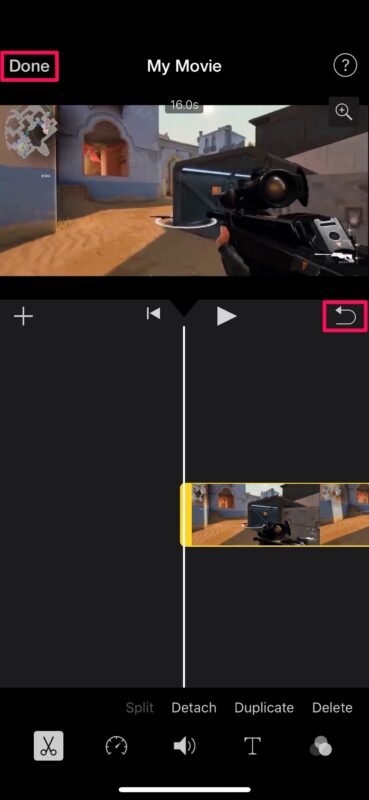
- The deleted portion will no longer be visible in the timeline, but if you think you made a mistake, you can tap on the “undo” option located above the timeline. You can repeat the above steps for cutting and trimming parts of your video further, but once you’re finished, tap on “Done” to save the project.
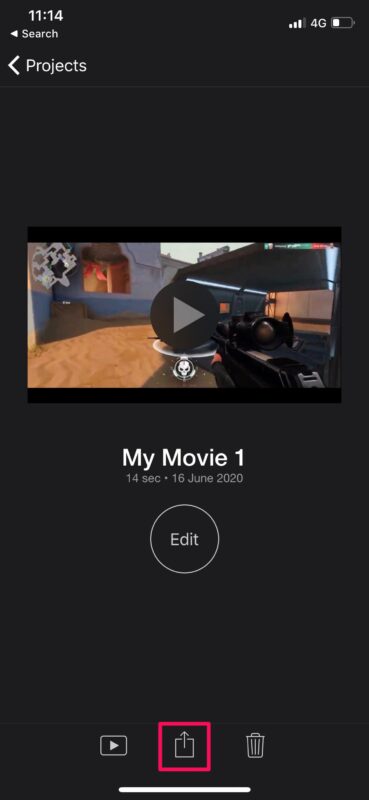
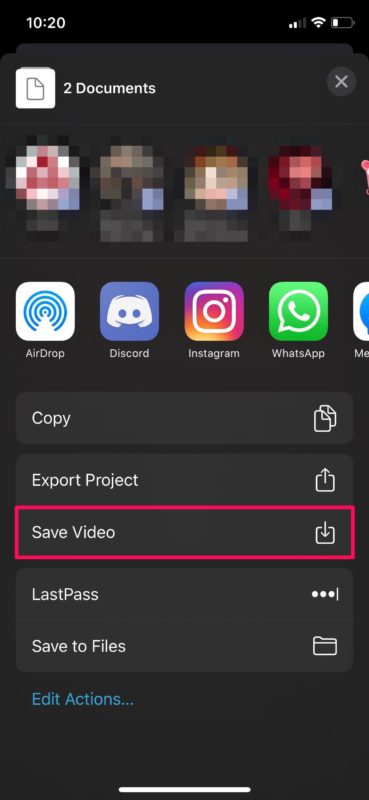
- Here, tap on the “share” icon located at the bottom, as shown in the screenshot below.
- Choose “Save Video” to save the final video file in the Photos app.

There you have it, you’ve now learned how to cut and trim videos using iMovie on an iPhone and iPad. That was pretty easy, right?
Keep in mind that while you’re saving the final video, iMovie must be running in the foreground. Depending on the length of the video, it could take anywhere from a few seconds to minutes for finishing the export.
Cutting and trimming videos is one of the several features that iMovie has to offer. If you’re going to be using iMovie for most of your video editing needs, you might also be interested in learning how to combine multiple videos with iMovie on your iPhone and iPad so you can create fancy montages and combine video clips to make your Oscar worthy movie. Other nifty iMovie features include being able to slow down or speed up a clip, increase or decrease the audio volume, add background music, etc, check out more iMovie tips if you’re interested.
If you’re not quite content with iMovie, there are plenty of similar video editing options available on the App Store, like Splice, InShot and VivaVideo to name a few. If you’re already a video editing professional who’s looking for a full-fledged software, you might be okay with spending $29.99 on LumaFusion.
Do you use a Mac? If so, you’ll be pleased to know that iMovie comes pre-installed on macOS devices. You have a similar set of tools on the Mac version too. For example, you can check out how to crop videos using iMovie on macOS.
Were you successful in cutting and trimming your video with iMovie on iPhone or iPad? How did it go? Do you have any other helpful tips or experiences you’d like to share? Let us know in the comments.

Very simple and to the point guide. Kudos