How to Scan Documents with Notes App on Mac
There was once a time when scanning a document required a piece of big, clunky hardware. Those times have thankfully long passed and we can scan things using our iPhones and iPads. But did you know that you can use your Mac to scan things too?
Technically, you’re still using your iPhone or iPad but only as the scanning hardware. The document that you’re scanning will appear in the Notes app on your Mac, ready to be manipulated or saved for posterity. Whatever the reason for your scanning, doing it is way easier than you might think.
We’ve already shown you how to do this using the Notes app on your iPhone or iPad, but here’s how things go down when you throw a Mac into the mix.
What You’ll Need To Scan Documents
As usual, there are a few prerequisites that need to be met before you can scan documents using your Mac, iPhone, and iPad. Both the Mac and the device you’re using to take the scan will need to be on the same Wi-Fi network with Bluetooth enabled. They also need to be signed into the same iCloud account, too.
The Mac will need to be running macOS Mojave or later, while iOS 12 and iPadOS 12 or later are required on the iPhone and iPad.
Scanning Documents on the Mac with Notes
Start by opening the Notes app on your Mac and either creating a new note or selecting the one that you want to import the scanned document into. We’d suggest starting a new note per scan, but it’s entirely up to you depending on what you’re scanning and what you intend to use it for.
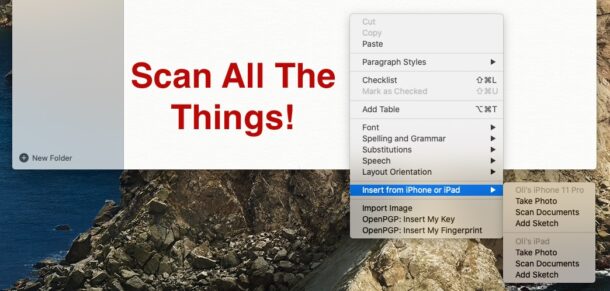
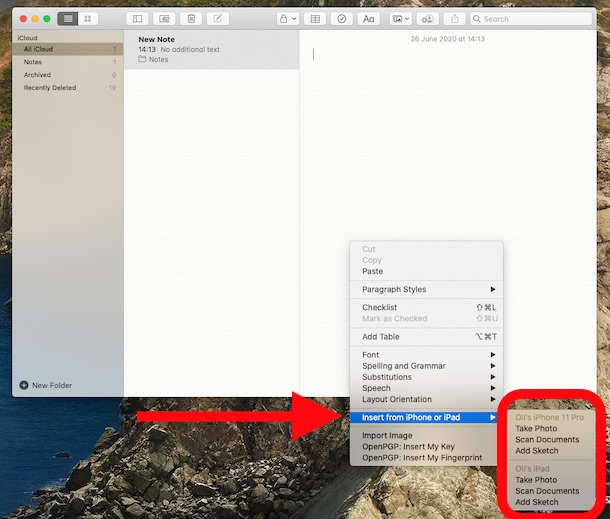
- Right-click inside the note that you want to attach the scanned document to and select “Scan Documents” below the device that you want to use. Again, that could be an iPhone or iPad – in this case, we’re using an iPhone 11 Pro.
- If multiple devices are available, select “Insert from iPhone or iPad” and then select the correct source.

- If multiple devices are available, select “Insert from iPhone or iPad” and then select the correct source.
- The camera will open on the iPhone or iPad you’re using. Position the document in the viewfinder and the camera will automatically take a scan of it. You can scan multiple pages by placing them in front of the camera.
- Tap the “Auto” button in the top-right corner if you’d prefer to take the scan manually by tapping the shutter button. This will give you more control over the scan’s composition, although the automatic scanning has worked surprisingly well in our testing.
- Tap the flash icon to enable or disable it as required. You can also switch from a color to a grayscale scan by tapping the three circles in the top-center of the screen.
- Tap the “Auto” button in the top-right corner if you’d prefer to take the scan manually by tapping the shutter button. This will give you more control over the scan’s composition, although the automatic scanning has worked surprisingly well in our testing.
- Tap “Save” when you have scanned all of the pages you need.

Your scans will now appear in the Notes app and inside the note that you selected. Those scans and notes will also be pushed to your other devices if you have iCloud syncing enabled, too.
You can do all of this right from your iPhone or iPad, too. The process is very similar and you don’t need to use your Mac at all. If you have iCloud syncing enabled everything will also be pushed to it anyway.
Happy scanning! Oh and by the way, outside of the Notes app you can also initiate scanning from the Files app of iPhone and iPad, and directly from the Mac Finder too – but more on that later.
This feature is called Continuity Camera, and it works within many other Mac apps too like TextEdit and Pages as well, so check it out it’s very handy.
Have you used the file scanner feature of the Mac Notes app with your iPhone or iPad? What do you think? Got any handy tips or tricks to share with this? Let us know your thoughts and experiences in the comments!

the same! I am using iPhone with iOS 14.5 and MacOS 10.15.7.
Upon right-clicking inside a new Note, the option to Insert from iPhone or iPad does not appear. Instead it is in Notes Menu (File – Insert from iPhone or iPad), but everything is greyed. Both are on the same wifi and both bluetooth are activated.
Any advice?
Make sure that Handoff is activated on both iPhone and Mac
I’ve had issues before getting this to work. Once I enabled all the stuff, updated all my system software, rebooted, it worked.
From my experience, this works best when all devices are on the latest versions of system software. So Big Sur may be more functional than Catalina for example.
Bluetooth is on with both devices, Handoff enabled on both devices… the same, it doesn’t work
I am using iPhone with iOS 14.5 and MacOS 10.15.7.
Upon right-clicking inside a new Note, the option to Insert from iPhone or iPad does not appear. Instead it is in Notes Menu (File – Insert from iPhone or iPad), but everything is greyed. Both are on the same wifi and both bluetooth are activated.
Any advice?
MacOs 10.15.7
There is that option at all!