How to Use Email Instead of Phone Number for iMessage on iPhone & iPad
Have you ever wanted to hide your phone number from iMessage, or stop using a phone number for iMessage, whether for privacy reasons or another purpose? Ever wished you could use an email address instead? If so, you’ll be pleased to know that you can indeed get this done pretty easily on your iPhone or iPad.
Apple lets users access iMessage with either their phone numbers or email addresses, but the issue here is that when you set up the service on an iPhone, your phone number is used by default. Some users may wish to keep their personal phone numbers private and not share them with everyone they talk to on iMessage. And, if you’re one of them, you’ll need to force iMessage to use your email address instead. Generally speaking, it’s best to let iMessage use the default settings to prevent confusion or misconfigurations, but if you’re an advanced user who wants to change iMessage to use an email instead of of phone number, we’ll show you how to do that.
How to Use Email Address for iMessage Instead of a Phone Number, via iPhone or iPad
To take advantage of these options, you’ll need to first set iMessage to use your Apple ID which will unlock the email addresses linked to your Apple account for use with the service. Once you’re done, just follow these steps:
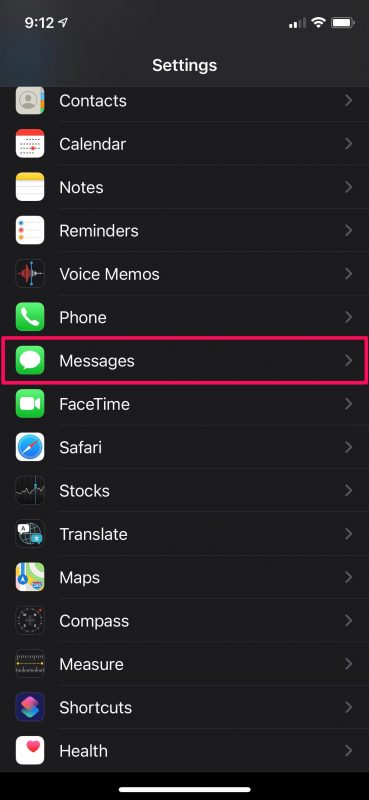
- Head over to “Settings” from the home screen of your iPhone.

- In the settings menu, scroll down and select the Messages app to view your iMessage configuration.

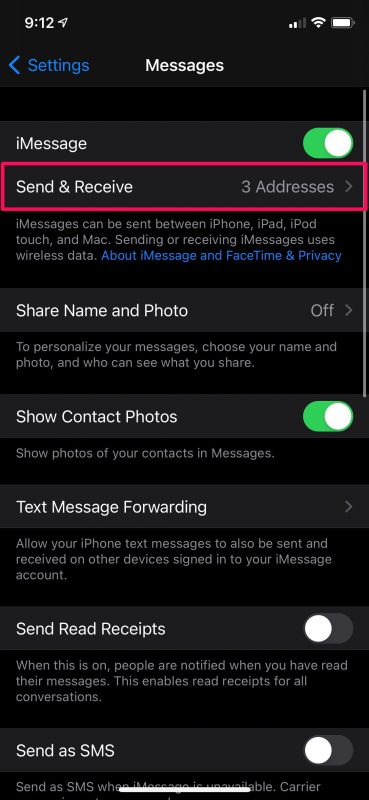
- Next, tap on the “Send & Receive” option as shown in the screenshot below to proceed further. Make sure you’re able to see more than one iMessage address here.

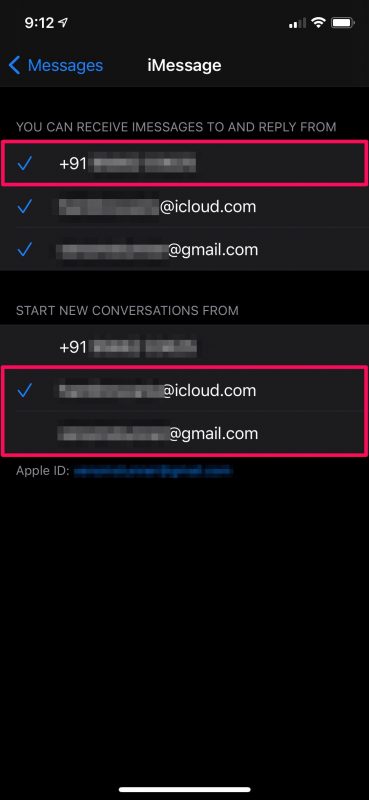
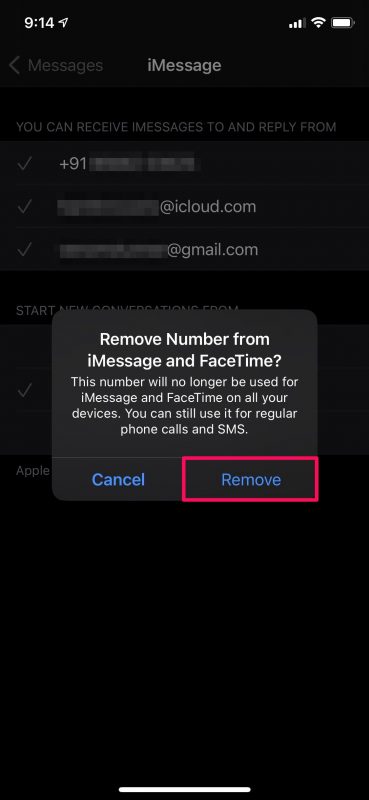
- Here, select your email address for the “Start New Conversations From” setting to make sure the new people you text don’t get your phone number. Or, if you want to completely stop using your phone and make it unreachable for iMessage, tap your phone number under “You Can Receive iMessages To And Reply From”.

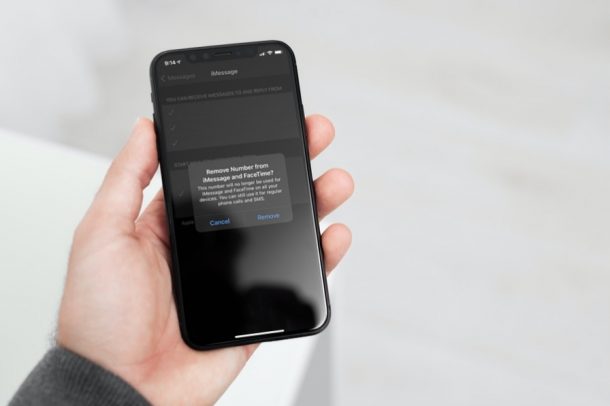
- You’ll get a pop-up prompting you for confirmation. Select “Remove” and that’s it.

There you have it. You can continue to use iMessage with just your email address.
There’s one key thing that you need to note here. Removing your phone number from iMessage will also remove it from FaceTime as you’ll see in the final confirmation prompt. So, this may not be the best option if you’re looking to use your phone number for FaceTime calls.
If you’re using your personal email address with your Apple account and you’re skeptical about sharing it too, you can create a throwaway iCloud.com email address and use it with iMessage. If you already have one, it should show up along with your Apple ID email similar to the screenshots we attached above.
Another way to not share your actual email would be by using a different Apple ID account specifically for iMessage. No, you don’t have to sign out of your device for this. Instead, you can use this trick.
Likewise, you can make sure your phone number doesn’t show up during FaceTime calls too. This is achieved by changing the FaceTime caller ID on your iPhone & iPad. The procedure is fairly similar to what we discussed here.
Did you make this change for privacy reasons, or another purpose? Let us know the reason you used this trick, and if you have any particular insight or experiences in doing so.


Can we switch it back any time?
This is also useful for users who don’t need a cell phone plan but have a Mac or iPad, such as kids or mother-in-law!