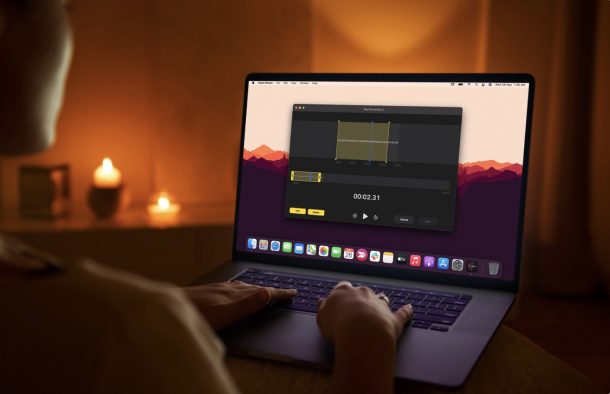
How to Edit & Enhance Voice Memos on Mac
Do you use Voice Memos app on the Mac to record audio, a quick voice note, phone call, or some other content? Perhaps, you use it to create podcasts from your home, or record an interview or meeting? If you’re a Voice Memos for Mac user, you may also be interested in editing those voice memos and enhancing them.
The stock Voice Memos app is a simple, yet effective tool to record audio on your Mac. Even beginners have no trouble getting a hang of the app due to its simplistic interface. Some people are evern using it to record audio for professional use with an external microphone setup. While doing this, they often tend to overlook the fact that the app can edit the recorded clips as well. Let’s check out the built-in editor of Voice Memos app on the Mac.
How to Edit & Enhance Voice Memos on Mac
To take full advantage of the Voice Memos app’s built-in editor, make sure you’re running macOS Big Sur or later.
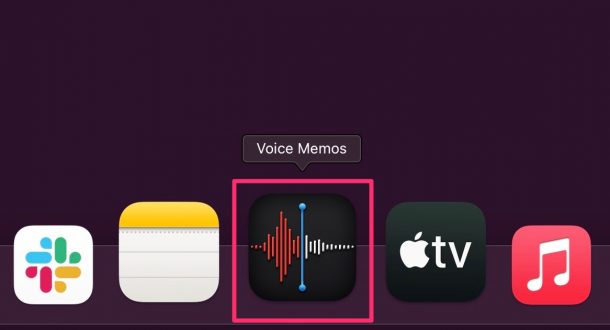
- First, launch the Voice Memos app on your Mac. It should be accessible from the Launchpad. Or, you can find it with a simple Spotlight search.

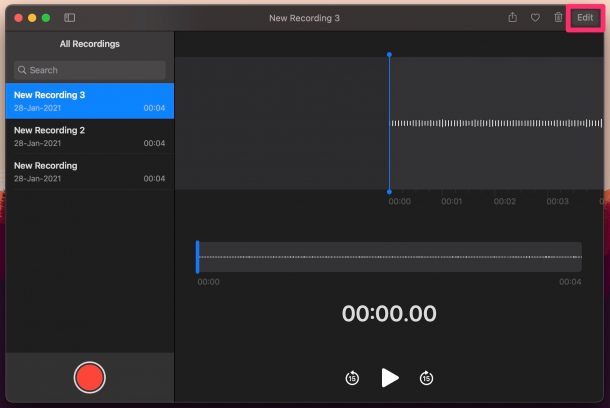
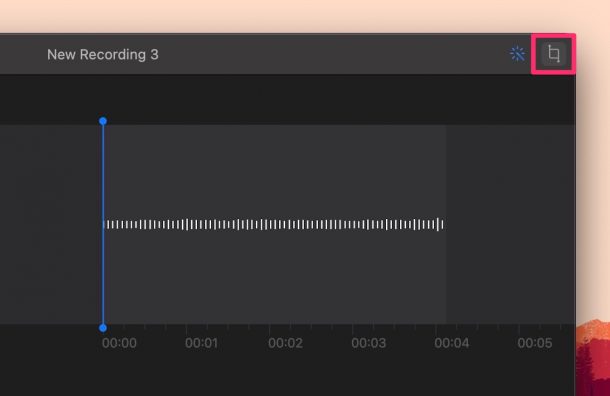
- Select the recording that you want to edit from the left pane. Next, click on “Edit” located at the top-right corner of the window.
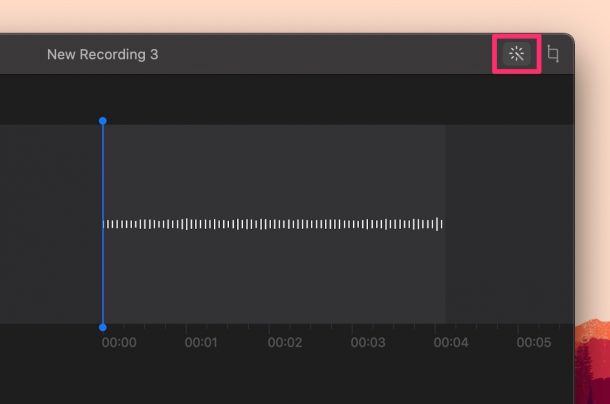
- This should give you access to the audio timeline. Let’s start with the easy one. Click on the magic wand icon at the top-right corner of the window to automatically enhance the audio recording.
- If you want to overwrite a portion of the audio recording, you can use the “Replace” button in the editor. First, you need to drag the vertical line to the part where you want to start replacing audio and then press the button. You can pause when you’re done replacing and then click on “Done” to save the updated recording.
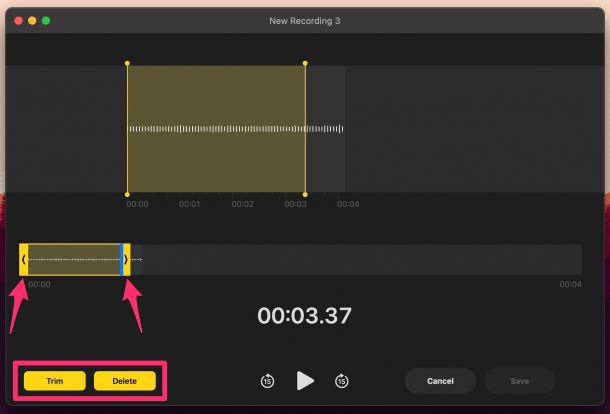
- Clicking on the crop icon at the upper-right corner of the window will give you access to the trimming tools.
- Now, the entire timeline will be highlighted in yellow. You can drag the ends to select the portion of the recording that you want to trim. Click on “Trim” if you want to remove the part that’s not highlighted. Choosing “Delete” will remove the highlighted portion instead.
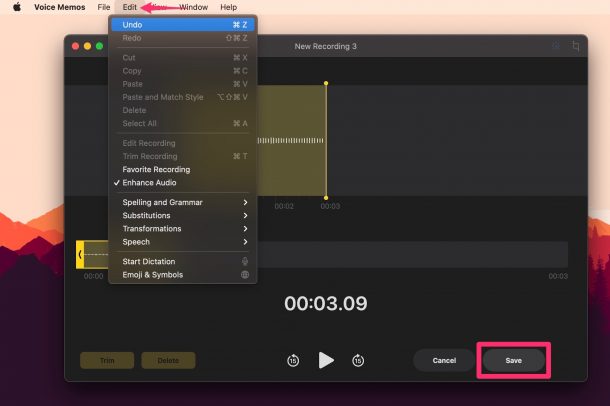
- That’s everything you needed to know about the editing tools. If you want to revert any of your changes, you can click on “Edit” from the menu bar and then choose “Undo” from the dropdown menu. When you’re done editing, click on the “Save” option to overwrite the original recording.

There you go. Now, you know everything about editing audio recordings in the Voice Memos app.
If your Mac is running an older version of the software such as macOS Catalina or macOS Mojave, you will not be able to make use of the one-click auto enhancement feature since that was introduced alongside macOS Big Sur.
Sure, the Voice Memos app may not give you access to advanced tools like professional software like Adobe Audition or Audacity, but it’s still good enough for most people. More importantly, it’s very easy to get a hang of, making it suitable for beginners. For example, the app does a good job at removing background noise from audio recordings with just a single click.
Likewise, if you use the Voice Memos app on other Apple devices, you may also be interested in learning how to trim voice memos on your iPhone & iPad. On devices running iOS 14/iPadOS 14 or later, you’ll be able to use the one-click enhancement feature to remove background noise too.
Now that you have learned how to easily edit voice recordings on your Mac with the Voice Memos app, what do you think of these capabilities and audio editing tools? Do you still wish for more advanced features? Share your thoughts and opinions in the comments.
