8 Tips for New MacBook Pro 14″ & 16″ Owners

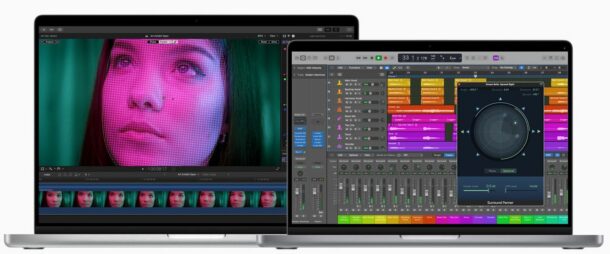
Get a fancy new MacBook Pro 14″ or 16″ model with the powerful M1 Pro or M1 Max chip? These are feature packed laptops with plenty of oomph, and there are also some unique aspects to the hardware.
Let’s take a look at some specific tips and tricks for the new MacBook Pro 14″ and MacBook Pro 15″ models, with either M1 Pro or M1 Max chips.
1: Hide the Notch with TopNotch
The display Notch is controversial, with some users hating it, and others not minding it. If you’re bothered by the display notch, which houses the camera and impedes into the top of the display, then the app TopNotch may be for you. It works by turning the menu bars all black, effectively hiding the notch.
TopNotch is a free download from the developer here.

2: Apps Menu Bar Bumping into The Notch? Use “Scale to Fit Below Camera” to Scale the Display Down
Some apps with a lot of menu bar items may bump into the Notch, leading to menu items disappearing behind the notch or otherwise not behaving as they should. The more busy a menu bar is, the more likely this is to happen.
Apple offers a workaround to this on a per-application basis.
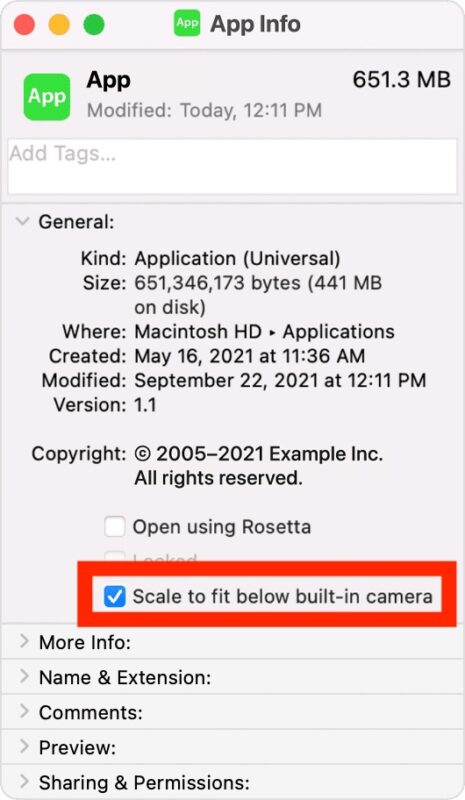
For the offending application that has menu bar items running behind the notch, navigate to the /Applications/ folder use Command+I to Get Info for that application, then toggle the option for “Scale to fit below camera”.

Perhaps a future release of macOS will allow the entire display to be scaled down constantly, rather than on a per-app basis, to avoid the notch.
3: Use Low Power Mode to Prolong Battery Life
Low Power Mode comes to the Mac laptop lineup, enabling it basically reduces power usage to prolong battery life.
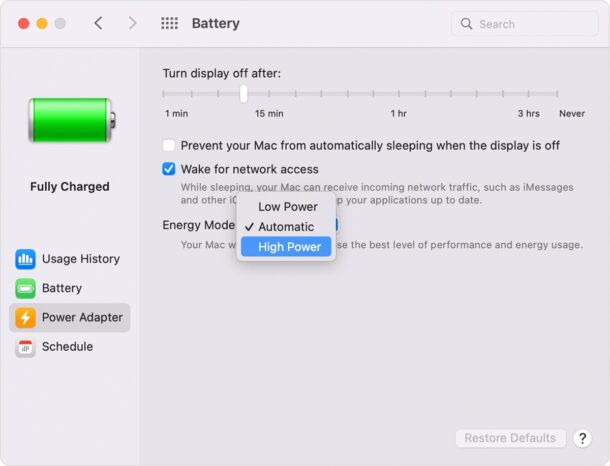
Go to > System Preferences > Battery, and choose “Low Power Mode” from the energy mode options.
Technically this great available on any MacBook Pro, MacBook Air, or MacBook running MacOS Monterey 12 or later, M1 Pro and M1 Max users may find it extra useful.
4: Use High Power Mode for Maximum Performance (M1 Max Only)
The M1 Max equipped MacBook Pro can use High Power Mode, which draws even more power to push the CPU and GPU to maximum performance. You’ll hear more fan noise, but if you’re grinding away at some incredibly complex graphical task, you’ll probably appreciate the extra performance boost.
You can enable High Power Mode from Apple menu > System Preferences > Battery > Battery / Power Adapter > Energy Mode > High Power

Kind of like Turbo Mode from the beige PC’s of yesteryear, right?
5: Custom Calibrate the Display for your Workflow
Calibrating your display is good practice for any Mac, but thanks to the impressive capabilities of the mini-LED equipped M1 Pro and M1 Max MacBook Pro display, you have even more customization options to fine-tune the calibration.
Go to Apple menu > System Preferences > Displays > Color to run through the typical calibration method.
To fine tune calibration with specific white level measurements, check out this from Apple Support, where you can learn how to use data from a spectroradiometer to fine-tune your MacBook Pro display calibration. Fancy!
6: Use Fast Charging to Rapidly Charge Battery to 50%
Fast Charging allows you to quickly get to 50% battery in about 30 minutes, perfect for when you need to juice up a battery for a portable workflow.
To use Fast Charging on the 16″ MacBook Pro, you’ll need to use the included 140W USB-C Power Adapter and USB-C to MagSafe 3 Cable.
TO use Fast Charging on the 14″ MacBook Pro, you can use most charging methods, including the MagSafe cable with either 140W or 96W USB-C power adapter, or a 96W USB-C power adapter with a USB-C charging cable.
You can also use the Pro Display with a Thunderbolt 3 cable to fast charge on the 14″, but not the 16″.
7: Sensitive to PWM? Keep Display Brightness Above 30%
PWM, or Pulsed Width Modulation, causes the display backlight to rapidly flicker off and on again, and it’s a predominant power management feature on many OLED and LED displays. Unfortunately, some users can be negatively impacted by PWM, with excessive eyestrain, headaches, nausea, or even visibility of the display flickering. Initially, the PWM issue impacted OLED iPhone users primarily, but now that the MacBook Pro has a mini-LED display, some users may be bothered by this on the Mac too.
According to NoteBookChecker, the 14″ MacBook Pro uses PWM on the mini-LED display, specifically:
“Like the Mini-LED screen on the current Ipad Pro, we can once again detect constant PWM flickering at 14.8 kHz at all brightness levels. The frequency is very high, but it might still cause problems when you are sensitive to the flickering.”
What this means is going to depend on individuals, but the more sensitive to PWM you are the more this could be troublesome.
One possible solution is to keep display brightness at 30% or greater, based on this video which shows visible PWM scan line flickering when the display brightness is lowered to around 25% or lower (skip to about halfway through the video, it is filmed in slow-motion to show the PWM).
If you have any particular experience with PWM on the new MacBook Pro models, let us know in the comments.
8: Enjoy the 1080P Webcam and Improved Microphone
If you spend a lot of time on video conferences through Zoom, WebEx, Telehealth, FaceTime, Skype, or any other video service, you’ll be happy to know the new 1080p front facing webcam is quite sharp. Additionally, the new microphones are much improved on the MacBook Pro, making your audio more clear than ever before.
The camera and microphone should also be great for users who create video blogs or diaries, YouTube videos, webcam performances, and many other activities that require high-def video and audio.
–
Do you have any tips specific to the new MacBook Pro 14″ or MacBook Pro 16″ with M1 Pro or M1 Max chips? Share in the comments below!


After long research I can not find any usb WiFi dongle working with MacBook Pro max. Any clues?
RE: “Hide the Notch with TopNotch”
Don’t care, where is the notch, I don’t see it.