Where Are Screenshots Saved on Mac?

It’s a reasonable question to wonder where screenshots are stored on the Mac, particularly if you’re a Mac user that is taking screenshots who then needs to interact with those screen captures for whatever reason. Maybe you want to send a screenshot file to someone, or maybe you want to work with a particular screenshot in an image editor or other application.
Screenshots are very easy to find on the Mac, and, if you wish, you can even change the location where they are saved to.
Where do I find screenshots taken on Mac?
The default location for screenshots taken on the Mac is the Desktop.
This means that if you look at your Desktop, or access Desktop through Finder, you will find your screenshots there.
The Mac Desktop is the default save destination for all screenshots taken on a Mac using any of the keyboard shortcuts that save a file, including the popular Command+Shift+3 and Command+Shift+4 (as opposed to copying them to the clipboard by using the same keystrokes with the additional Control key modifier).
How do I access screen shots taken on Mac?
The simplest way to access your screenshots taken on a Mac is to click on your Mac Desktop, where you will see your screenshots.
The next easiest way to access your screenshots is to navigate to the Finder, and then to the Desktop folder of the user taking the screen shots.
- Go to the Dock and click on the Finder icon, it looks like a smiling face
- Click on “Desktop” from the sidebar of a Finder window to access the current users Desktop
- You will find your screenshots files shown in a familiar Finder window
![]()
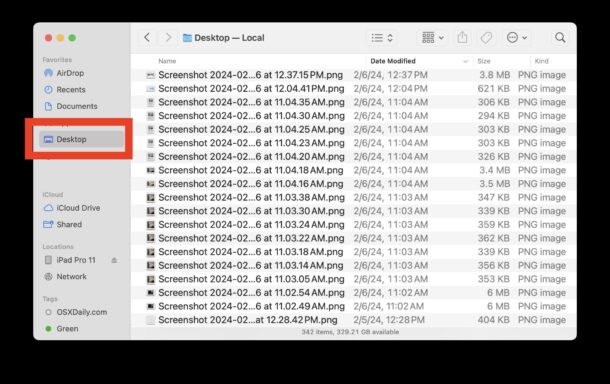
Your screenshots are located on the Desktop
Can I change where screenshots are saved on Mac?
While the default save location for screenshots is the Desktop, you can change it if you’d like to.
In fact, there are two ways to change where screenshots are saved by default on the Mac.
Changing Screenshot Save Location via Screenshot Tool
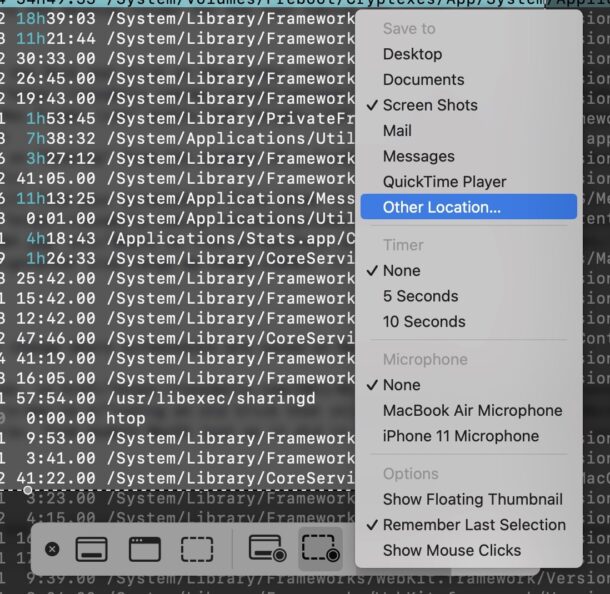
One method to change where screenshots are saved on a Mac is to hit Command+Shift+5 to access the screenshot tool for MacOS, and then click on “Options” to see a menu where you can change your screenshot save location to a series of preset options or select your own destination.
Changing Screenshot Save Location with defaults Command
The other method is using an old defaults write trick that still works perfectly in all MacOS versions, from modern MacOS just as it did in older Mac OS X versions of system software.
Changes initiated by the ‘defaults write’ approach on the Mac rely on using the Terminal application and command line, and thus are a little more advanced.
Tip for Mac Users Working with Many Screenshots: Create a Designated Screenshots Folder
If you’re a Mac user who works with a lot of screenshots, like myself, do yourself a favor and create a new folder somewhere; maybe the Desktop, maybe in Pictures, or maybe in Documents, and call that folder “Screenshots”.
Then, using either the aforementioned screenshot tool or defaults trick, use your newly created “Screenshots” folder as the default destination for your screenshots.
This helps to tidy up your screenshots and avoid cluttering your Mac desktop.
–
If you have any additional insight, tips, or thoughts about working with screenshots and the location of them on the Mac, let us know in the comments.

usefularticle. thanks.
is there a similar parking place for screenshots which i take on my ipad?
In a way my question deals with screenshots. Several years ago you published an article for iPads involving a floating darkened circle similar to a “home” button. Tapping on it brought up a number of options including: screenshot, volume, brightness, control center, among other options. One could access a button in “system preferences” that would place that “home” button on your screen. If possible would you run that article again. Some way I may have deleted it or something else, but I no longer have it. I have tried searching for it but to no avail. Thank you for the service you provide to all of us Apple users. I bought my first Apple IIe (no hard drive, no mouse, and used the 5” +/- inch floppy disks one for the program and another to save your data) sometime in the 1980s and have used the Apple.
I’d say the feature you are after is called AssistiveTouch. You can find it in Settings > Accessibility > [under PHYSICAL AND MOTOR] Touch > AssistiveTouch
Further information: https://support.apple.com/en-au/guide/ipad/ipad9a2466d3/ipados
George: to turn on a ‘floating home button’ :
on iPhone or iPad:
Settings>Accessibility>Touch
AssistiveTouch – > turn on
Also here you can Customize Top Level Menu
reset… will put it back to default of 6 icons, with defaults, and you can add/remove or edit the action for any of the icons… quite powerful as you set one to any shortcut and so on…
I had to do this with a very old iPhone 6+ whose built in home button was no longer working. The floating option worked liked a charm.
Enjoy!
thanks for this article. I suspect you are also aware of the Tinkertool app which is great for setting the handling of screenshots, plus a lot of other system behaviours.
latest version at https://www.bresink.com/osx/TinkerTool.html