6 Tips for Taking Better Macro Photos with the iPhone Camera
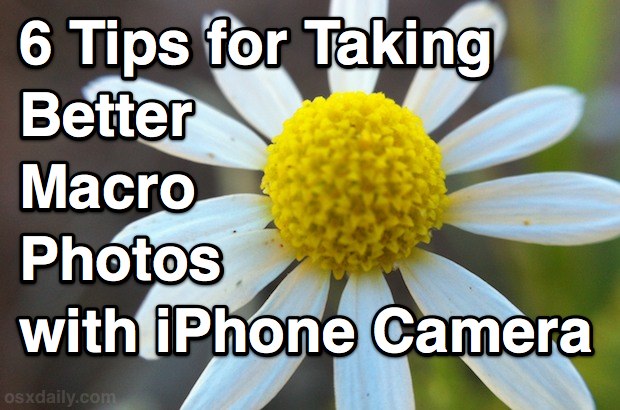
The iPhone is quickly becoming the primary camera for many of us, and though it makes a great point-and-shoot for your average pictures, it can also take surprisingly good close-up and macro shots. With that in mind, here are 5 tips to make the most of macro photography with the iPhone.
1: Avoid Direct Lighting
The iPhone camera tends to have trouble focusing on something that is extremely bright and close-up, plus your photo will usually turn out overexposed. For the best closeup and macro shots, aim for indirect lighting. If it’s a bright sunny day and you can’t avoid that direct lighting, try to position yourself so the light is aiming into the shot rather than behind it, or try using your own shadow to create indirect light. The close-up image seen below of a grasshopper is a good example of a macro shot taken with indirect lighting:
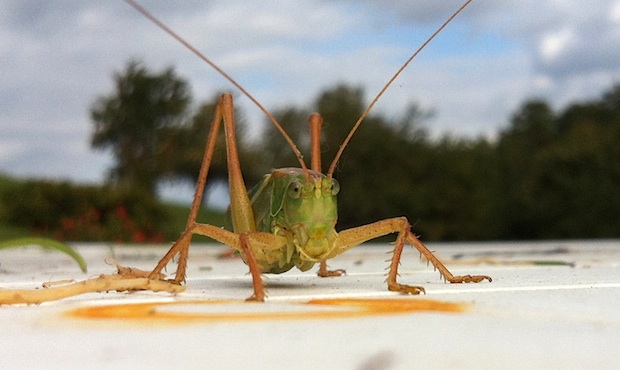
Thanks to Dawid Z. for the grasshopper shot above, it was taken with an iPhone 4
2: Use Exposure & Focus Locking
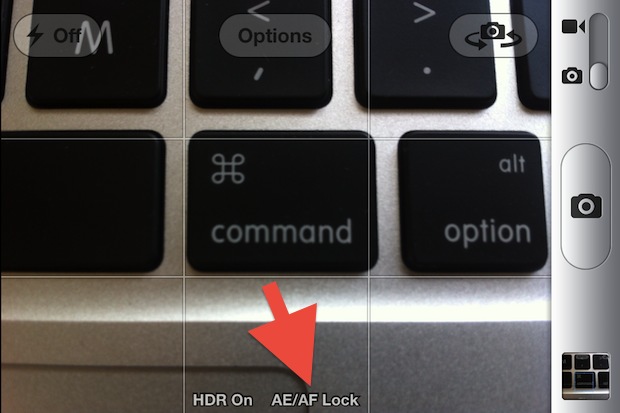
When shooting pictures of things up close, the tiniest movements can change what the camera is focused on. Use the cameras focus and exposure locking feature when you get the target in focus, then those little shakes and camera wiggles won’t mess up the focus. All you need to do is tap and hold on the screen until the little “AE/AF Lock” message appears, then you know it’s active and the focus is locked in.
3: Avoid Blur and Movements by Shooting Like a Sniper
To take the best macro shots you’ll want to stay as still as possible, and one of the best ways to do this is to borrow a technique used by snipers and hunters: deep breathing and shooting between breaths. Generally you’ll want to breathe slow and shoot the photo right after you exhale a breath, where there’s a moment of particular steadiness to your body and grip while holding the iPhone.
Another way to avoid the close-up jitters? Set the iPhone down once the focus is locked, then snap the picture from the white earbuds. Using the earbuds to take a picture is best used with a little tripod, but you can usually steady the iPhone against a rock or something else too.
This is a seemingly obvious tip for almost all photography, but it’s more important than ever with close-up macro shots since the slightest movement can result in motion blur.
4: Use HDR
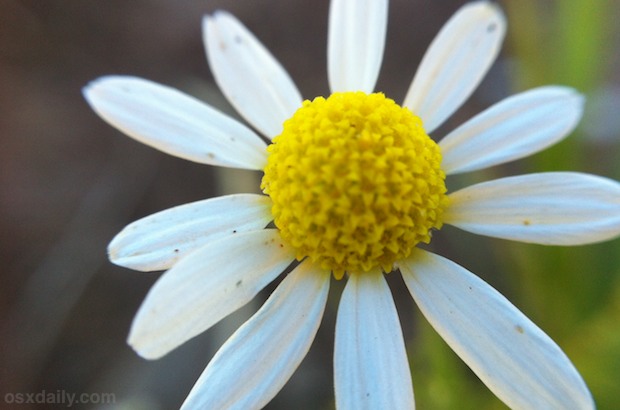
This may seem counterintuitive, but using the built-in HDR mode on iPhone can actually sometimes take better macro shots than not. HDR works by taking multiple images and combining them through software processing to level out the highlights and lowlights in pictures, and when used properly it it can often create sharper looking images as you can see in the example below:

Just be sure to have “Keep Original” left on so that you can decide which picture is the best.
5: Try the Teeny-Tiny Water Drop Trick
Placing an extremely small water droplet on the iPhone lens can turn it into a surprisingly effective macro lens. The image of the dollar below was shot with the water drop technique:

This is obviously not going to be for everyone since it involves placing water onto the iPhone, which could theoretically damage the phone if it wasn’t done properly. Do so at your own risk, or just use a third party external macro lens.
6: Spring for an External Macro Lens
If you want to take the absolute best macro shots possible with an iPhone, you’ll need to spring for an external macro lens. Put an Olloclip or Photojojo lens onto an iPhone and the quality of macro shots shoots through the roof and starts looking like a $2000 professional camera, allowing you to take ridiculously close-up pictures with freakishly high detail. Best of all, Olloclip is actually a 3-in-1 camera lens, giving you not only the super macro lens, but also a fisheye and wide-angle lens. If you’re serious about iPhone photography these are well worth the purchases, they’re tiny, lightweight, slide easily on and off the iPhone, and take your pictures to a whole new level.
- Olloclip 3-in-1: Fisheye Lens, Macro Lens, Wide-angle Lens – $70 – iPhone 4 & 4S version
 (iPhone 5 version coming soon)
The picture below is a closeup of the same area of sand. On the left is as close as the default iPhone 4 will shoot without losing focus, and on the right is the same area of sand taken with an Olloclip macro lens on the same iPhone 4. The difference is remarkable, with the Olloclip taking near-microscope level shots. If you’re serious about macro shots, you can’t beat the Olloclip.
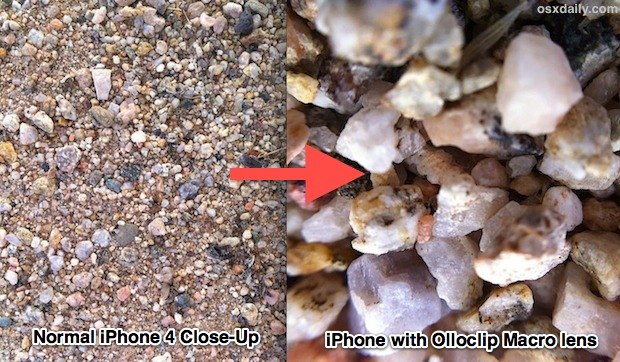
Want some more iPhone camera tricks? Maybe you’re on the other end of the spectrum and want some tips for taking great panoramic shots with iPhone? Maybe learning to use the lock screen camera for quick access? Or resolving that annoying slow camera shutter that happens over time? We’ve got you covered. As always, if you have any other great tips, tricks, or ideas for taking better iPhone pictures, feel free to send them in or let us know in the comments.


Now I know how to use my roadeavour lens! Thanks!
How does the lens attach to the iPhone 5. I tried the magnetic item but it doesn’t stay on the phone
The Shapeways one is a friction slide-over fit. It will stay in place. The plastic is slightly springy and holds on with no problem.
There’s a Shapeways 3d printable device that does a really nice job on iPhone macro shots. Full disclosure is that this a device I designed. The 3D printed device and a $4 lens got me a nice macro lens with no barrel distortion for $12. Search “iPhone macro” on Shapeways.com.
I’ve finally tried the waterdrop trick and got some suprising results. See below:
A photo of my iPod with the waterdrop:
http://cl.ly/image/3c2X0l2d1E2u
The result image taken with the iPod touch 5g:
http://cl.ly/image/3M1t1e0W3n39
and a comparison photo of the wallet:
http://cl.ly/image/3i0d2d0l3N3A
Has anyone else tried this?
I haven’t heard of the water drop technique. The photo taken looks great but very hesitant to intentionally place water on my shiny new iPhone 5.
The add on lens looks cool but not sure about carrying around a separate lens. Does anyone own this lens for an extended period of time & still use it? I am afraid I would use it for a week or so & forget about it.
What do you think?
It’s not really a Purple Haze, but more of a Hot Magenta Haze. Those “bored” websites speak for O’Bammy.
Interesting article. Thumbs up for the information.
Does the PURPLE HAZE problem occur in iPhone 5 macro shots?
There is no purple haze problem, I take photos with my iPhone 5 every day and have never seen it. Some bored websites make stuff up to get attention and stir up controversy, you shouldn’t listen to them.
I have a Ollo Clip and really like it, the wide screen and macro lens are fantastic.