If you don’t like the Auto-Save feature of OS X, you’ll be pleased to discover that turning it off system-wide on a Mac is just a matter of checking a settings box within OS X Mountain Lion and OS X Mavericks. This will disable the automatic saving behavior for all files across all documents on a Mac. Read more »
Twitter is deeply integrated into the Mac now with the latest versions of OS X, and that means you can send tweets from just about anywhere once it’s set up and configured. If you went to System Preferences hoping to find a panel to set it up and walked away confused, don’t worry because enabling Twitter is just tucked into a general services panel, and configuring it will only take a minute or two: Read more »
You can make your iPhone life a lot easier by assigning custom ringtones to contacts. This makes it easy to determine who is calling before you even see the caller ID, letting you either rush to answer the phone or continue snoozing and ignore the call.
With how easy it is to make ringtones for the iPhone out of songs or entirely on your own with Garageband, this also provides a great way to differentiate inbound calls from the general device ringtone, and among common ringtones you hear elsewhere too.
If you’ve been holding out for SSD prices to drop into a reasonable range before upgrading a Mac to the fastest type of hard drive around, wait no longer. Today only, Amazon’s Gold Box Deals offer some of the best prices on SSD’s we’ve ever seen for their size with prices up to 65% off, and as usual with Amazon they all include free shipping:
These USB keys are perfect for moving huge files around, creating Mountain Lion boot install drives, or for providing auxiliary storage capacity to smaller drived Macs like a 64GB MacBook Air.
Do Not Track is a new privacy feature in Safari 6 that causes Safari to tell certain websites to not track you online as you browse the web. This prevents social platforms like Twitter, Facebook, and Google, from tracking you across the web, and it also causes ad servers and analytic services to not follow your browsing history. In some ways this could be looked at like an alternative to ad blockers, but ultimately the no-tracking feature is more useful for those concerned about privacy since ad blockers don’t prevent things like Facebook from following you around the web. Read more »
It seems everyone is overwhelmed by email these days, with every inbox piling up humungous lists of messages that are usually not too important. If you’re tired of the email onslaught and use the Mac Mail app as your email client, you can use the VIP feature to better manage your mailbox. Senders tagged as VIP get pushed to their own VIP inbox, helping you overlook all the crud and get straight to the important stuff. Going a step further, you can also set Mail app to only trigger a notification when a message comes from a VIP sender.
Field Test Mode is a hidden feature on the iPhone which allows you to see technical details of the device, the most useful of which is the true cell signal strength displayed as a number rather than the traditional signal bars or dots. We’ll show you exactly how to enter Field Test Mode, as well as how to enable Field Test Mode all the time to be able to see the real cellular signal from your iPhone represented as numbers in the upper left corner. Of course, we’ll also show you how to read the numbers so that you can understand what a good cell signal looks like versus a bad signal reception. It only takes a minute or two to complete the process, and it’s easy to revert back to normal signal indicators if you decide you’d rather not see the numbers anymore, so even though it’s a bit of iPhone geekiness, try it out!
The latest versions of Mac OS feature deeper iCloud integration than ever before on the Mac, a feature that is extremely convenient for syncing things likes desktop Notes, desktop Reminders lists, documents, emails, bookmarks, and whatever else with iOS devices, but it can also be frustrating when you’re just trying to save a file in an app like TextEdit, Pages, or Preview directly to your desktop and local file system. If you’d rather save to your Mac rather than iCloud, here is how to change it per-save and also two different ways to change the default behavior entirely. Read more »
You’ll often hear Mac users reference their machines by a model and the build year (for example, Mac Mini 2010, or MacBook Pro 2016), or by a timeline within the year it was released (iMac mid-2011 model). Sure some Mac users just have an amazing memory for this stuff, but everyone else can retrieve the model year and build date of their Mac by looking under the About This Mac screen in new versions of macOS and Mac OS X.
This tutorial will show you exactly how to find the model year of any Mac so that you’ll know when it was built. This can be invaluable information to know before seeking out hardware upgrades, warranty details, software compatibility, and much more.
Ever wondered just how fast a 3G, 4G LTE, or Edge network is on your iPhone or Android? Using a free app called Speed Test you can easily test and compare the mobile broadband speed of your smartphone (or cell equipped iPad) with others, whether they’re on AT&T, Sprint, Verizon, T-Mobile, or any other network.
If you’ve been thinking about switching carriers when the new iPhone arrives, this is a great app to help you make such decisions. Have your friends with iPhones or Androids download the SpeedTest app on their device and check mobile broadband on their respective carrier networks, then compare the results to see if it makes sense to jump ship.
Want to concert an audio file to an iPhone ringtone? That’s easy to do on the Mac, thanks to QuickTime. Yes the video player! This also allows you to concert audio tracks of video files to ringtones too.
Sure, most people use QuickTime Player as a way to watch movies, but using it’s Export function you can also turn any audio or video file into an iPhone ringtone very quickly.
How to Convert Audio to iPhone Ringtones with QuickTime Player on Mac
Here is how to convert just about any audio file into an m4r ringtone file, which can then be used on iPhone.
Launch QuickTime Player and use it to open the desired audio or video file that you want to turn into a ringtone
With the audio or movie file is in QuickTime, hit Command+T or pull down the “Edit” menu to activate the Trim function and trim the clip to 30 seconds or less, use the sliders to select the portion of audio to use as the ringtone, then hit the yellow “Trim” button when done
Now pull down the “File” menu and choose “Export”, selecting “Audio Only” as the Format type, and set the Desktop as the save location, then click “Export”
Next, go to the desktop to find your ringtone, and rename the .m4a file extension to .m4r, confirm the change
Double-click yourfile.m4r to open it in iTunes, where you’ll find it under the “Library” section within “Tones”
Connect the iPhone to the computer via USB and drag & drop the ringtone from the Tones folder to the iPhone
That’s all there is to it, pretty simple and should take you just a minute or two to complete.
One hiccup I ran into with some audio sources is the audio length metadata remains in exported m4r despite creating a new file. This then causes iTunes to complain the ringtone is too long and can’t be transferred to the iPhone, but it ends up copying over anyway. Just ignore the error if you see it and you should find the ringtone on the iPhone anyway.
Also, if you recorded a video with your iPhone or iPad that you want to use the audio track as a ringtone, you can get a head start by using the same trim function in iOS before sending it to your computer to finish the conversion to a ringtone.
You can also still use iTunes to create free ringtones out of any song in your music library, a method that has been around forever, but the QuickTime approach is often faster and works with a wider variety of file formats, reading and converting both audio and video files to the desired m4a filetype. You can also create your own ringtone files with GarageBand, both on iPhone, iPad, and Mac.
Were you able to convert your audio file into a ringtone using this method with QuickTime? Did you find another solution? Share with us in the comments whatever your experience is!
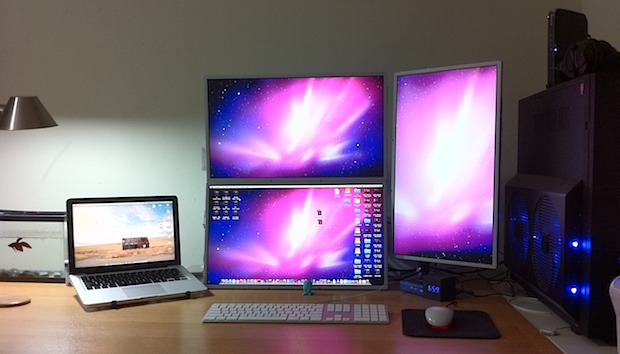
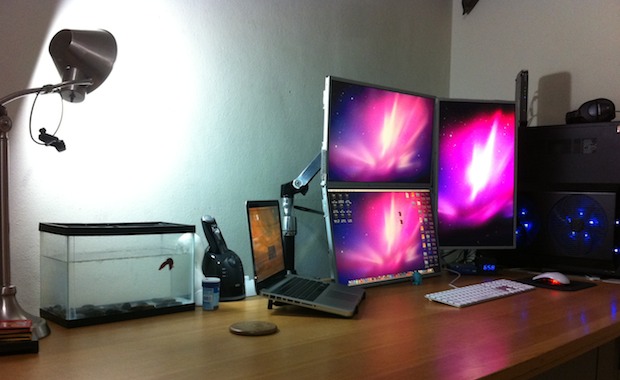
This ultra-clean and bright workstation is the Mac desk setup of the CEO of an (anonymous) internet startup. The Apple gear that gets the job done includes the following:
MacBook Pro 13″- Mid 2011 – 2.7GHz i7, 8GB RAM, 1TB HD, OS X 10.8
iMac 27″ – Mid 2011 – 2.5 GHz i5, 12GB RAM, 500GB HD, OS X 10.8
iPhone 4S – 16GB, iOS 5.1.1 (Jailbroken)
iPad 1 – 64GB, iOS 5.1.1 (Jailbroken)
Apple wireless keyboard and Magic Mouse
Brookstone Clock – Time, Temp, Moon Phase, World Time
Any workstation that is flush with natural lighting and looks towards a window is a big plus in my book, it’s usually the best soft lighting source and tends to keep glare to a minimum, plus it makes it easy to give your eyes a rest throughout the day. Try arranging your desk that way, you’ll probably agree.
Do you have a sweet Mac setup you want featured? Send us a good picture or few, a list of hardware shown, and a short description of what the gear is used for to osxdailycom@gmail.com
Recording video is one of the great features of the iPhone and iPad, but before you send that movie out to a friend, copy it to a computer, or upload to YouTube, you can make some quick edits right in iOS to clip the video. This is helpful if you want to shorten the video clip, or maybe just to ditch unnecessary parts of any recorded video, and you’ll find you can complete the entire process quickly right in iOS by using the built-in Trim feature.
Mac OS X makes it easier and faster than ever to access and tweak Accessibility Options from anywhere on the Mac, thanks to a new keyboard shortcut.
The Accessibility panel allows Mac users to quickly toggle zoom, VoiceOver, sticky keys, slow keys, mouse keys, screen contrasts, screen invert, and more, depending on what version of Mac OS you are using.
Safari on iPhone and iPod touch can be set to open new links in the background, a behavior that closely represents opening links in new tabs on the desktop or iPad. This lets you continue to browse the current web page while opening the link in question, rather than switching from the current web page to the newly opened link.
Removing all photos from the Camera Roll on an iPhone can be notoriously slow, particularly for Mac users with large picture libraries. Deleting all images from an iOS device with Image Capture can literally take hours, and deleting more than one photo directly on an iPhone itself is time consuming and a very hands-on process as you have to tap each picture you want to ditch.
Using the OS X app Preview you can speed up the removal process quite a bit with the help of a fairly silly adjustment.
Bored with your Mac screen savers? Don’t forget to check out the four beautiful new screensaver additions to OS X Mountain Lion, or the 14 new ways to display them. If you haven’t seen them yet:
Open System Preferences from the Apple menu and click on the “Desktop & Screen Saver” panel
Find them under the Screen Saver tab and click on the “Source” menu to reveal the choices
The new screen savers are basically picture slideshows of some amazing photography in four themes: National Geographic, Aerial, Cosmos, and Nature Patterns. Combine those with the fourteen new slideshow types: Floating, Flip-up, Reflections, Origami, Shifting Tiles, Sliding Panels, Photo Mobile, Holiday Mobile, Photo Wall, Snapshots, Vintage Prints, Scrapbook, Ken Burns, and Classic, and you have 56 new screensaver possibilities.
Preview the screen savers full screen by selecting one then clicking in the thumbnail pane.
Ken Burns is the most subtle and probably the best if you want to enjoy the pictures, but the other choices like Shifting Tiles are fun too, particularly with iPhoto libraries and personal pictures.
Also worth mentioning, you can still make your own by selecting any specified folder as the screensavers image source, but in Mountain Lion you can no longer select a stream from Flickr or RSS like you could in prior versions of Mac OS X – bummer.
The new OS X Reminders app is iCloud enabled, and much like the Notes app, it lets you pin a list to the desktop. These two features combine to bring a synced and automatically updating To-Do list right to the Mac desktop, meaning if you change or complete a task while on the go from an iPhone or iPad, it will reflect instantaneously on the Mac and vice versa.
This great feature is very easy to use, but you’ll need OS X Mountain Lion and iOS 5 or later, and obviously you will have needed to set up iCloud in iOS and Mac OS X for this to work properly.
Pinning the Task List to the OS X Desktop
This simple action splits the chosen to-do list from the Reminders app:
Launch Reminders in OS X and double-click on the to-do list you want to pin on the desktop
The task list will update without splitting it from the primary app, but the pinned Reminders lists take up much less space and are cleaner looking, making them more suitable for leaving around on the desktop.
Place the floating Reminders list anywhere on the desktop and now grab an iOS device to make remote changes to the list.
Update the Desktop To-Do List from an iPhone or iPad
Grab any iOS device with iCloud enabled and do the following:
Open Reminders and make a change to the same task list that is floating on the OS X desktop
As long as the Mac (or iPad/iPhone/iPod) is online, the lists will automatically update to reflect changes made from any other machine using the same iCloud account.