Mac Setups: Programmers Desk

Jun 9, 2012 - 5 Comments

Mac programmers desk

This weeks Mac setup comes to us from Marc D., a programmer in Austria who has a nice clean desk with some great hardware. From left to right you’ll find:

  • Macbook Pro 15″ – Late 2011 – 2.4GHz i7 4GB
  • Apple Cinema HD 23″ connected to the MacBook Pro (and viewing OSXDaily.com!)
  • iMac 21.5″ – Late 2009 – 3.06Ghz Core 2 Duo 4GB
  • iPad 2 (in Leather casing from Galeli) accompanied by a Bamboo stylus for my note taking pleasures.

The single Apple keyboard and wireless Logitech M510 mouse are shared between both computers with the help of Synergy.

Other gear that isn’t pictured but worth mentioning includes a custom built Hackintosh which functions as a web server, a 2009 Mac Mini running Boxee and iTunes serving as a media center, and an Apple TV which works as an AirPlay hub. Of course the photo was taken with an iPhone 4 16GB too.

Great Apple setup Marc, thanks for sending it in!

Want your Apple gear or Mac setup featured? Send us a brief description of hardware, what you use it for, and a decent picture to osxdailycom@gmail.com

By William Pearson - Mac Setups - 5 Comments

14 Must-Know Tips & Tricks for Mac OS X

Jun 8, 2012 - 32 Comments

Must Know Mac OS X Tips and Tricks

We often get asked what the single most useful Mac tip is, or what a handful of the best tricks are. It’s impossible to answer such a question given the diversity of use cases of OS X, but here’s a collection of what are surely some of the absolute best tips for Mac OS X that should be considered must-knows for all Mac users. We’ve covered just about all of these on an individual basis before, but if you want to learn a whole lot in one sitting you’re in the right place.

Read more »

By Paul Horowitz - Mac OS, Tips & Tricks - 32 Comments

Quickly Enter Clamshell Mode with an External Display in Mac OS X

Jun 8, 2012 - 15 Comments

Clamshell MacBook in a Book Arc

Keeping a portable Mac turned on while the lid remains closed is commonly referred to as clamshell mode. Clamshell mode basically docks the MacBook Air / Pro / etc and allows the GPU to power an external display only, which can help performance of some games and graphics intensive tasks. Additionally, some MacBook users just prefer clamshell mode because it can offer a more minimalist desk experience when using their Mac laptop connected to an external screen.

There are several ways to use and enter into clamshell but what we will discuss here is probably the fastest approach for those who use an external keyboard or mouse with a MacBook that is also connected to an external screen.

Read more »

By Paul Horowitz - Mac OS, Tips & Tricks - 15 Comments

6 Totally Rad Retro Apple Wallpapers

Jun 8, 2012 - 8 Comments

Retro Apple logo & Think Different lock screen wallpaper

Want some retro Apple wallpapers featuring the classic rainbow  logo? Of course you do, so get ready to feel like you’re somewhere back in the 80’s and early 90’s again with this collection of six old school wallpapers.

Read more »

By Paul Horowitz - Customize, Retro - 8 Comments

Show iCloud Photo Stream as a Slideshow or Screen Saver on Apple TV

Jun 7, 2012 - 5 Comments

Apple TV slideshow of Photo Stream images

Want to show a quick slideshow to your friends and family of pictures contained within Photo Stream? Assuming you already have Apple TV signed into your iCloud account, do the following:

  1. From the main Apple TV menu choose “Internet” and select “Photo Stream”
  2. Choose “Slideshow” to start the slideshow

By default this will go through all images contained within Photo Stream, that means every picture in the photos library of an iPhone and iPad, keep that in mind if you have pictures on any such device that you don’t necessarily want to share.

You can also set the Photo Stream to show as the default Apple TV screen saver:

  1. Go to Settings and choose Screen Saver
  2. Choose the Slideshow and under slideshow settings choose iCloud Photo Stream

Again you’ll want to remember that everything in the photo stream gets displayed, so you may want to create a specific folder or collection of images if you have some pictures you don’t want to share with everyone in your living room.

If you do find yourself embarrassed by some of the pictures in your iCloud stream, do yourself a favor and transfer the photos from the iOS device and then delete them all from Photo Stream.

By Paul Horowitz - Apple TV, Tips & Tricks - 5 Comments

Redownload & Reinstall Any iOS App on iPhone or iPad

Jun 7, 2012 - 8 Comments

App Store logo in iOS

You can redownload and reinstall any previously purchased apps that have since been deleted from an iOS device, even if you deleted them a long time ago or never even installed them in the first place. As long as the iPhone, iPad, or iPod touch is using the same Apple ID where the original app was bought and downloaded with, the re-download process is quick and simple.

And for clarification, yes, re-downloading an app will re-install that app into iOS. You can use this to reinstall apps you have deleted, or with apps that are assigned to an Apple ID but have not yet been installed onto a particular iOS device using the same Apple ID. That means you can download an app to your iPhone that you previously downloaded or bought onto a different iPhone or iPad, as long as it remains compatible.

Read more »

Fish Shell for Mac OS X Makes the Command Line Smarter & Friendlier

Jun 7, 2012 - 6 Comments

Fish Shell for Mac OS X showing autosuggestions

Are you looking for a way to make the command line a bit more user friendly? If so, you may find Fish to be a pretty nice alternative shell whether you are completely new to the OS X Terminal or you just want some general assistance when at the command line.
Read more »

By William Pearson - Command Line, Mac OS, Tips & Tricks - 6 Comments

Enable Closed Captioning on iPhone, iPad, and in iTunes

Jun 6, 2012 - 4 Comments

Closed Caption Closed Captioning places written text at the bottom of video content, allowing for anyone to read along with the video rather than listen to the audio. This is an essential feature for certain accessibility purposes and for individuals who are hard of hearing, but it’s also just a useful feature to enable if you want to watch a movie silently and read subtitles.

We’ll cover how to enable Closed Captioning on the iPhone, iPod, iPad, and also in iTunes for videos on Mac OS X and Windows.

Enable Closed Captioning on iOS Videos

This applies to all iOS devices, including iPad, iPhone, and iPod touch:

  1. Launch “Settings” and tap on “Video”
  2. Next to “Closed Captioning” slide the switch to ON

Enable Closed Captioning of videos in iOS

Turn On Closed Captioning in iTunes

This applies to Mac OS X and Windows:

  1. Launch iTunes and open Preferences from the “iTunes” menu
  2. Click the “Playback” tab and check the box next to “Show closed captioning when available”

Enable closed caption videos in iTunes for Mac OS X or Windows PC

Find Closed Caption Supported Video in iTunes

Enabling closed captions is only useful if you have video that supports it however, and thankfully many videos offered through iTunes do. The process of finding compatible video is the same in iTunes on iOS, OS X, and Windows:

  1. Open iTunes and using the search box in the upper right corner, type “closed caption” and hit return
  2. All video content that is returned should support closed captioning, individual videos can be verified by choosing them and looking for the familiar “CC” logo in the description

Find Closed Caption videos in iTunes

With Closed Captions enabled all supported videos will use them when played through the Videos app or iTunes.

Oddly, Closed Captioning does not appear to be widely supported in the iTunes Trailers app for iOS. This seems like an unusual oversight for Apple, who is usually very good at maintaining accessibility options, though many of the features have to be enabled separately on a per-case basis, such as text to speech in iOS, screen zoom in iOS and OS X, and the aforementioned closed captioning abilities.

Thanks to @julesdameron for the tip idea.

By Paul Horowitz - iPad, iPhone, iTunes, Mac OS, Tips & Tricks - 4 Comments

Get 11 Great Mac Apps for $49.99 with the MacUpdate June 2012 Bundle

Jun 6, 2012 - 6 Comments

MacUpdate June 2012 Bundle for Mac Apps

The MacUpdate June 2012 Bundle is an absolute whopper of a deal with 11 killer Mac apps that would otherwise retail for $457 for just $49.99. Some particular highlights in the bundle are Parallels 7, ScreenFlow 3, Civilization 5, Jaksta, and My Living Desktop, but you’ll find every app in the bundle to be quite useful, making this one heck of an app bundle deal. Mac apps included are:

  • Parallels Desktop 7 – Run Windows, Windows applications, Linux, and more directly in Mac OS X. Virtual Machines made easy.
  • BusyCal – Ultimate calendar and to-do list manager for the Mac
  • ScreenFlow 3 – Powerful yet easy to use screencasting software for Mac OS X
  • Civilization V – Incredibly fun turn-based strategy game that takes you from the dawn of time and through the ages
  • Jaksta – Capture audio and video from the web with ease
  • Espionage 3 – Protect files and folders right from the OS X menu bar
  • Speed Download 5 – Lightning fast download manager, lets you pause and resume nearly any download
  • Attachment Tamer 3 – Take complete control over Mail attachments
  • KeyCue 6 – Handy utility for learning and memorizing keyboard shortcuts
  • A Better Finder Rename – Bulk rename files with drag & drop simplicity
  • My Living Desktop 5 – Transform your desktop wallpaper into a moving, living environment

Grab the MacUpdate bundle now or check out the promo video below.

By Paul Horowitz - Mac, Mac OS, News - 6 Comments

How to Check SHA1 Hash of a String

Jun 6, 2012 - 3 Comments

terminal

Do you need to check the sha1 hash of a string? You can easily find the sha1 hash of any string from the command line, and this trick works to check sha1 hash from Mac OS or Linux.

We’ll use the openssl command to

Read more »

By William Pearson - Command Line, Security, Tips & Tricks - 3 Comments

How to Remote Wipe an iPhone or iPad

Jun 5, 2012 - 36 Comments

How to Remote Wipe an iPhone or iPad

If you have an iPhone, iPad, or iPod, you can remotely wipe the device with the help of an excellent free service offered through iCloud called “Find My iPhone” (or Find My iPad, etc). This is perfect for situations where a lost device is long gone with no chance of recovery, because it erases anything that is personally identifying, be it emails, texts, contacts, apps, quite literally everything.

If you don’t have this configured yet and you don’t know how to use the Find My and remote wipe feature, set aside some time to learn, it only takes a few minutes.

Read more »

By William Pearson - iPad, iPhone, Tips & Tricks - 36 Comments

Create a Sorted Applications Launcher & App Menu for the Mac OS X Dock

Jun 5, 2012 - 11 Comments

Group Applications by Category and use a sorted app launcher in the Mac OS X Dock

If you keep the Applications folder in the OS X Dock for quick app launching you’ve probably noticed it’s just a giant list of all the apps installed. Sure you can change the display to use a grid, list, or fan, but if you have a lot of apps you’ll still end up with a humungous unsorted launcher with a lot of apps you probably don’t want in there.

Here’s an easy way to get around those limitations and annoyances by creating a separate app launcher for the Dock that is sorted by defined categories, featuring only the applications you want. This is perfect for anyone with large amounts of apps installed who likes to keep things organized.

  1. First things first, pull the existing Applications folder out of the Dock
  2. Now create a new folder, preferably somewhere in the users Home directory like ~/Documents/ and name it “Applications”
  3. Within the newly created Applications folder, create subfolders for app categories, like “Productivity”, “Games”, “Music”, etc
  4. Open the primary Applications folder in a new window (Command+N followed by Command+Shift+A), and then drag and drop apps from the primary Applications directory to the respective categories folders you just created – in OS X 10.7 and 10.8 this automatically creates aliases rather than moving the app out of the Application folder, earlier versions of OS X will want to manually create aliases with Command+L
  5. Repeat until you are satisfied with the sorting, and then drag the sorted Applications alias directory to the OS X Dock
  6. Right-click on the new Applications folder and choose “List” as the view type
  7. Click to use the newly sorted and well organized Mac app launcher

You may want to remove the “alias” reference from each app name, or rename them as you see fit in general. Additionally you can complete the overhaul by copying the primary Applications folder icon to the sorted folder of aliases, this gives the appearance of it being the normal Application directory.

If you keep the Dock hidden by default don’t forget to remove the hide and show delays for much quicker Dock access too, it makes menus like these even more useful by rapidly speeding up their accessibility.

Thanks for sending in the great tip Jay!

By Paul Horowitz - Mac OS, Tips & Tricks - 11 Comments

14 Tricks & Tweaks to Speed Up Photoshop CS6 Performance

Jun 5, 2012 - 25 Comments

Speed Up Photoshop CS6

Photoshop CS6 is arguably the best release of the image manipulation app from Adobe in a very long time. It’s feature packed and generally quite fast, but not everyone is pleased with it’s performance on some hardware.

With that in mind we’ve compiled a list of tweaks, adjustments, and tricks to speed up Photoshop. Some of these tips are gathered from a Google Docs file that was sent out on Twitter (hey follow OSXDaily there!) and we’ve added a few comments to those tricks and added some of our own performance recommendations as well. This list was aimed at Mac OS X but there’s no reason the tweaks wouldn’t benefit a Windows PC too if that’s what you’re stuck with at work.

Read more »

Transfer Music from iPhone, iPod, or iPad to a Computer

Jun 4, 2012 - 78 Comments

Everyone knows how easy it is to get music onto an iPod, iPhone, or iPad with the help of iTunes, but have you ever tried to get music off an iPod or iPhone and onto a new computer? As it turns out, transferring music from an iOS device and to a new or different computer isn’t a feature that is supported in iTunes. Nonetheless it’s easy to do on your own, and we’ll walk you through exactly how to copy all your music from a device and back to a computer.

Transfer Music from iPod or iPhone to a computer

The end result? The entire music library copied from an iOS device to a computer, ready for iTunes or whatever other media player you want to use. Let’s begin!
Read more »

By Paul Horowitz - iPad, iPhone, iTunes, Mac OS, Tips & Tricks - 78 Comments

Add the Voice of Siri to Mac OS X

Jun 4, 2012 - 7 Comments

Add the voice of Siri to Mac OS X with Samantha

If you bought a new Mac with OS X Lion (or later) pre-installed you probably already have the voice of Siri enabled by default. Siri is actually called “Samantha”, but if you upgraded to OS X Lion manually from Snow Leopard you may have missed the addition of Siri’s voice completely, so here’s how to add it to a Mac.

Read more »

By Paul Horowitz - Mac OS, Tips & Tricks - 7 Comments

How to Jailbreak iOS 5.1.1 Untethered with Redsn0w

Jun 4, 2012 - 145 Comments

Jailbreak iOS 5.1.1 Untethered with Redsn0w

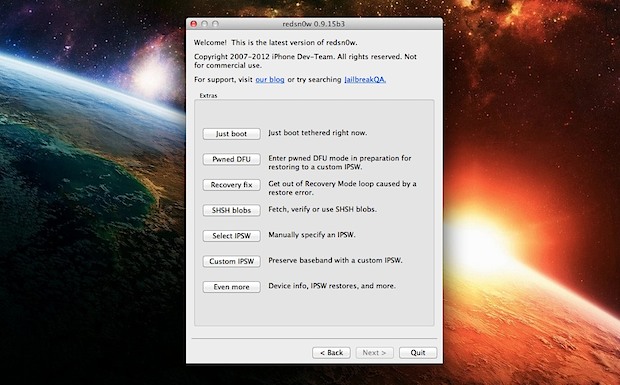
The recently released update to Redsn0w 0.9.12 brings the untethered jailbreak to virtually all iOS 5.1.1 users. The latest version of redsn0w has two paths to the untethered jailbreak and which you use will depend on your iOS device, with A5 hardware being the simplest and other hardware requiring the traditional DFU mode method. Neither is particularly challenging, here they are grouped by device, the instructions below cover both.

Super Easy: iPhone 4S, iPad 2, iPad 3

Moderately Easy DFU Method: iPhone 3GS, iPhone 4, iPod touch 3rd and 4th gen, iPad 1

Note: if you are already jailbroken tethered, launch Cydia to search for and install Rocky Raccoon untether. You do not need to rejailbreak your device.

Jailbreaking iOS 5.1.1 Untethered with Redsn0w

Upgrade to iOS 5.1.1 before beginning, quit iTunes beforehand as well. Depending on hardware you may or may not need to go into DFU mode:

  • Download Redsn0w 0.9.12 (direct link for Mac or Windows) and launch redsn0w
  • Connect the iOS device to the computer and click “Jailbreak”
    • For iPhone 4S, iPad 2, and iPad 3, click “Next” and let redsn0w run the jailbreak
    • For iPhone 4 & 3GS, iPod touch 3rd and 4th gen, and iPad 1, put the device into DFU mode: hold Power button for 3 seconds, continue holding Power and now hold the Home button for 5 seconds, release Power button but hold home button for another 15 seconds>
  • Let Redsn0w run and install the jailbreak, the device will reboot itself and you will be able to find Cydia on the home screen to verify the device is jailbroken

When finished, you can reboot the device freely without having to connect it to a computer for a tethered boot. The ability to freely reboot is the primary difference between a tethered vs untethered jailbreak.

By Matt Chan - iPad, iPhone - 145 Comments

Redsn0w 0.9.12b1 Brings Untethered Jailbreak to iOS 5.1.1 [Download Links]

Jun 4, 2012 - 89 Comments

Redsn0w 0.9.12b1 jailbreaks iOS 5.1.1

The popular Redsn0w jailbreak utility has been updated to bring untethered jailbreaks to iOS 5.1.1 on most iDevices. Versioned as redsn0w 0.9.12b1, the tool supports the following hardware on 5.1.1: iPhone 3GS, iPhone 4, iPhone 4S, iPad, iPad 2, iPad 3, iPod touch 3rd and 4th gen, and Apple TV1 and ATV2. The A5 support is identical to that found in the recently released Absinthe 2 for iOS 5.1.1, which focused on the new iPad and iPhone 4S.

If you are already jailbroken tethered with iOS 5.1.1 you can use Cydia to download the Rocky Raccoon untether, you do not need to re-run Redsn0w. Likewise, if you’ve already installed the rocky-raccoon package to untether a 5.1.1 jailbreak there is no reason to download or use the new redsnow tool.

Download Redsn0w 0.9.12b1

These are direct download links from the iPhoneDevTeam:

Windows users must run redsn0w in administrator mode.

If you like to follow guides, here is a simple tutorial on using Redsn0w for an untethered iOS 5.1.1 jailbreak.

By Matt Chan - iPad, iPhone - 89 Comments

Create SSH Bookmarks in Terminal for Quick Remote Server Access in Mac OS X

Jun 3, 2012 - 5 Comments

SSH Bookmarks in Terminal

Setting up SSH bookmarks within Terminal app is an easy way to quickly connect to remote machines. If you haven’t noticed these in Terminal before it’s probably because they aren’t labeled as bookmarks, and therefore the feature gets frequently overlooked by even the most advanced Mac users. Here’s how to create bookmarks within Terminal, and also two quick ways to access any of those bookmarks from just about anywhere in Mac OS X.

Setting SSH Bookmarks in Terminal

This guide is intended for SSH but it would also work for Telnet:

  1. Launch Terminal (/Applications/Utilities/ folder)
  2. Pull down the “Shell” menu and choose “New Remote Connection”
  3. Choose SSH on the left side, then click the [+] plus icon to add a new server bookmark
  4. Enter the IP of the server – Important note: if you use a custom port and username enter those in the URL field as the following syntax: “-p port user@host.com”
  5. For example, if I use port 24 and the username “dude” for server3.osxdaily.com, the syntax would be: “-p 24 dude@server3.osxdaily.com”
    Create an SSH bookmark in Terminal for Mac OS X

  6. Click “OK” and you’ll find the standard command line syntax for connecting to an SSH server is printed in the connection window
  7. Click “Connect” and away you go, using the custom port and username you specified

You’ll notice we ignored the “User” field in this example because we set a custom port. If the server you are connecting to uses the default port 22 (like the OS X SSH server does) you won’t need to do this.

2 Ways to Quickly Access Terminal Bookmarks

Now that a bookmark has been created, quickly access the bookmarks from just about anywhere using these two methods:

  • From Terminal, hit Command+Shift+K to open the New Connection window
  • From anywhere in Mac OS X, right-click on the Terminal Dock icon and choose “New Remote Connection”

Access Terminal bookmarks from the OS X Dock

Both of these will bring up the connection window where the bookmarks reside. Connecting to a bookmark will request a password unless you have SSH keys set up for passwordless logins.

If you live and breathe in the command line you’ll likely find that making SSH shortcuts with aliases is a faster method to access any frequently used server, however.

By William Pearson - Command Line, Mac OS, Tips & Tricks - 5 Comments

Subscribe to OSXDaily

Subscribe to RSS Subscribe to Twitter Feed Follow on Facebook Subscribe to eMail Updates

Tips & Tricks

News

iPhone / iPad

Mac

Troubleshooting

Shop on Amazon to help support this site