How to Write an .img to SD Card on Mac the Easy Way with Etcher
![]()
If you need to burn an .img image file to an SD card from a Mac, you may have discovered that there isn’t a particularly obvious way to do so with a default GUI app like Disk Utility. Not to worry though, an excellent free third party solution exists called Etcher, which makes burning image files to an SD card remarkably simple.
Writing images to SD cards is probably going to be most useful for Mac users who are setting up a RaspberryPi or another lightweight linux distribution, but there are certainly many other reasons to flash an SD card with an image as well. We’re obviously focusing on writing .img files to an SD card here, but you can use Etcher to burn a variety other image file formats, including .img, .iso, .dmg, .zip, .dsk, .etch, .bin, .bz2, .gz, .hddimg, .raw, .rpi-sdimg, sdcard, and xz.
And yes, the flashed SD card will be bootable if the starting image is intended to be, like for a RaspberryPi.
How to Write .img Files to SD Cards on Mac with Etcher
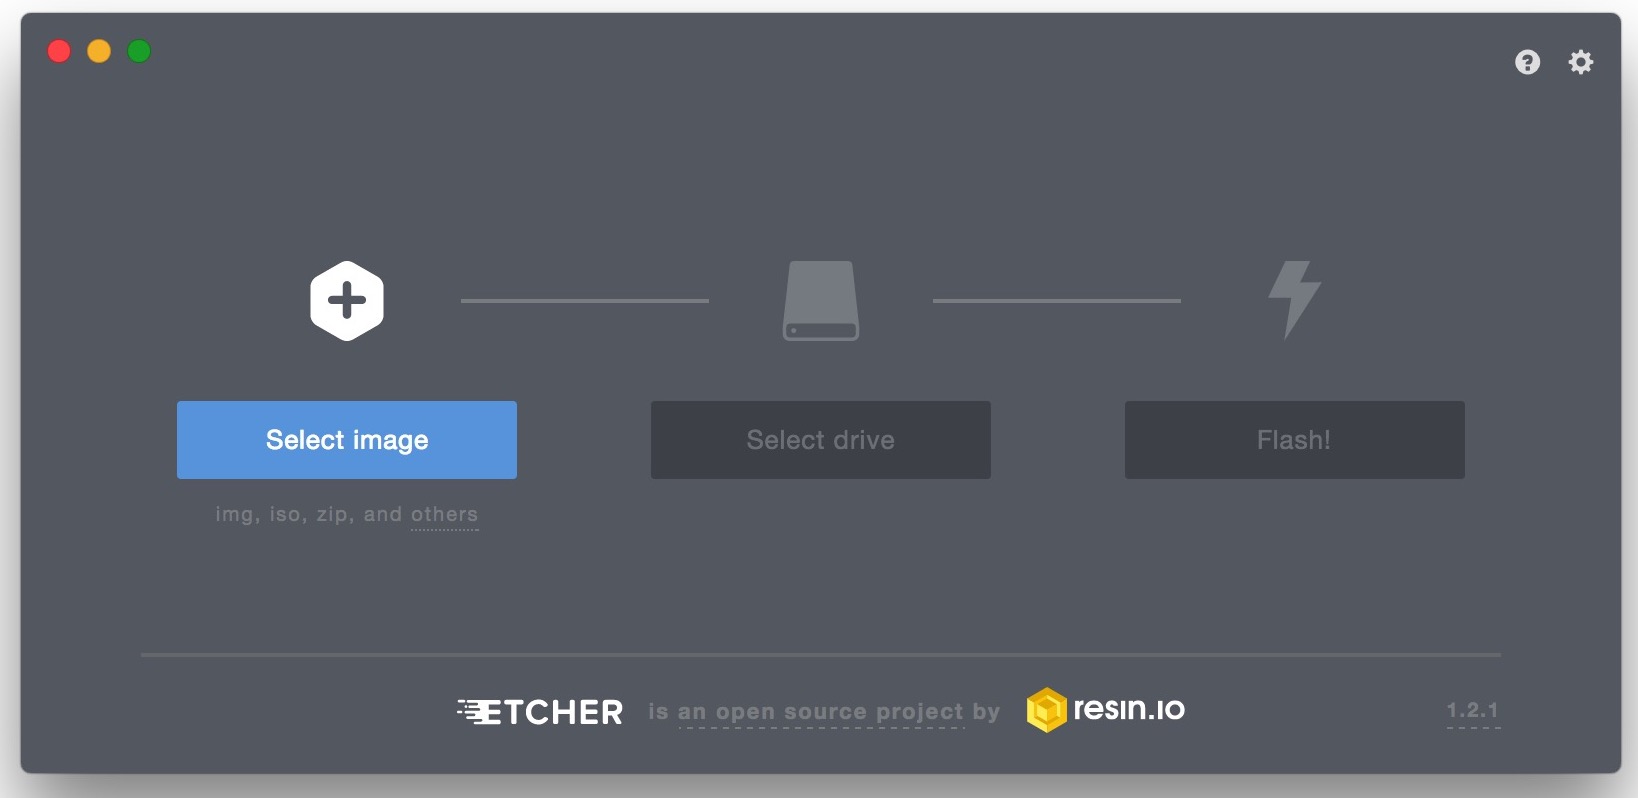
You can write an .img file (or other disk image) to an SD card with Etcher in a few simple steps:
- Get Etcher from the developer free here
- Drag Etcher into the Applications folder on the Mac to install, and then launch the app
- Click on “Select Image” to choose your disk image file to write to the SD card
- Click on “Select Drive” and choose the target SD card you want to write the image to
- Click on “Flash” to start the image writing process
It can take a while to write an image to an SD card, depending on the card speed as well as the size of the disk image. In my testing when writing a 30 GB RetroPie .img disk image file to a 32 GB SD card for use with a CanaKit RaspberryPi, the entire process of writing the image and then validating the SD card took about 1.5 hours, but your mileage may vary.
When finished, the Etcher app will report that flashing has been completed.
That’s it, you’re done. Pull out the SD card and it’s ready to boot and use used for whatever your project is. Super easy, right?
IMPORTANT: Etcher defaults to automatically unmounting the drive or SD card after the image been successfully burned and written to the target volume, so keep that in mind if you go looking around in the Finder or elsewhere for a mounted image, it won’t be there. And yes, you can turn that off in Etcher app settings if need be.
By the way, Etcher is available for Mac OS, Windows, and Linux, so if you’re needing to write an SD card from a different operating system, you should be covered as the instructions for using the app are identical regardless of the OS in use.
If you’re opposed to using something like Etcher for whatever reason, you can use dd to burn an image too via the command line, but it’s certainly more complicated than using an easy GUI app. But, to each their own.
If you enjoyed this you’ll probably appreciate our other tips for managing, writing, and working with disk images here too.

Thanks for sharing!
Thanks for the guide, on latest version of osx disk utility will say “operation canceled” trying to do this. You need to add disk utility to full disk access by:
Prefs -> Security & Privacy -> Privacy tab -> Full Disk Access (in list on left side of window)
Click on the lock at the bottom left of the screen, enter your password, then press the + button near the centre of the screen. Add Disk Utility to the list. Click on the lock again and things should work.
OMG, why is it so hard to configure Disk Utility to perform this task? Beautiful app that creates a solution to this problem that I spent ages trying to figure out. Thank you!
Thank you! I’ve been looking for the perfect solution for writing a Linux .img file and here it is!
I usually use Apple Pi Baker but this looks really slick and I like that clean look. Thanks for this!
Yo not only for SD cards. It’s a good program. Another good alternative is ROSA image writer. Both are part of mine Mac stack :-)
Seems to not be limited to SD cards, correct? A USB stick is much more valuable in many cases (more devices can boot from USB than SD, aside from clunky adapters).
Thank you, Paul@OSXDaily! Thank you, resin.io!