How to Make Text Size Much Larger on iPad
Some iPad and iPhone users may prefer to have larger text sizes and font sizes visible when using the device. Having bigger text size can make reading things on an iPad screen easier for many people, particularly if you find the default font sizes on iPad to be too small, or difficult on the eyes. While many iPad users may know about the general text size slider in Settings, there is another deeper text settings option that allows for notably larger text size to be used as well.
This article will show you how to increase the text size on the iPad, and this applies for much of the onscreen text and fonts shown throughout iPad and many apps. The result will be that text is notably larger in iOS, beyond what the typical settings allow for.
How to Make Text Sizes Larger on iPad
You will need to enable an optional setting to gain access to the largest text size options on iOS, which you can then adjust the size of easily with a slider, here’s how to do this:
- Open the Settings app on iPad
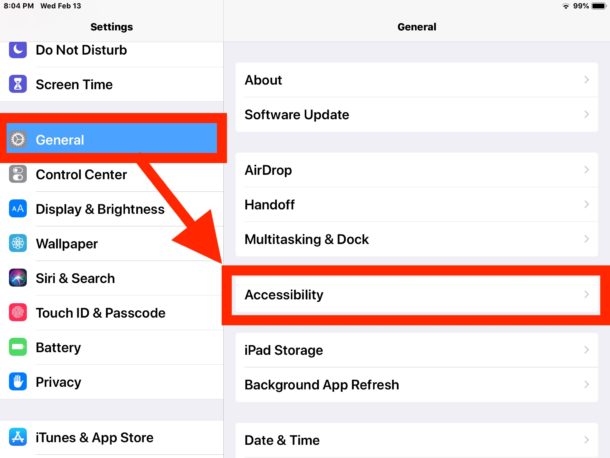
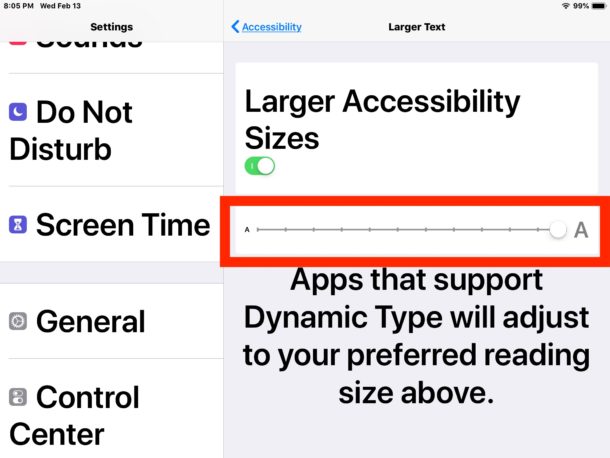
- Choose “General” and then go to “Accessibility”
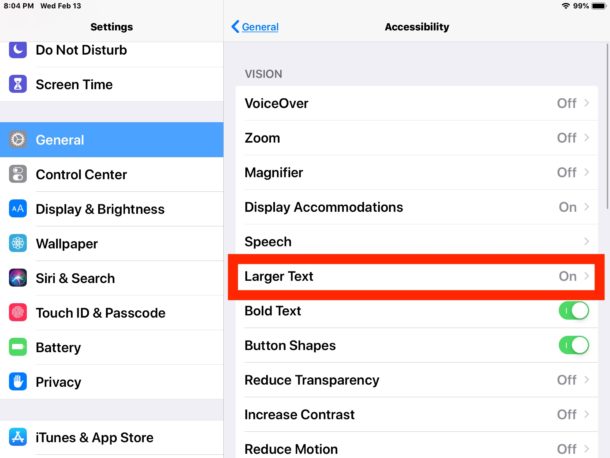
- Now tap on “Larger Text”
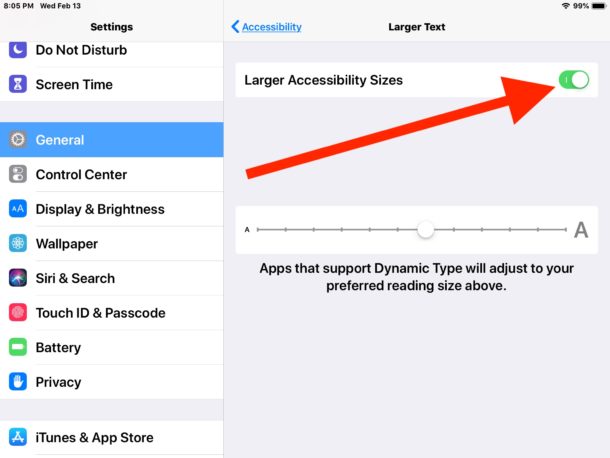
- Toggle the switch for “Larger Accessibility Sizes” to the ON position, then drag the Larger Text slider to your desired text size
- The font size increases as you move the slider further to the right, to use the largest option move the slider all the way to the right
- When satisfied with your text size, tap back into Accessibility Settings or leave Settings
- Recommended but optional, within Accessibility Settings, toggle on “Bold Text” to make reading onscreen text much easier (this requires a restart of the iPad)
![]()
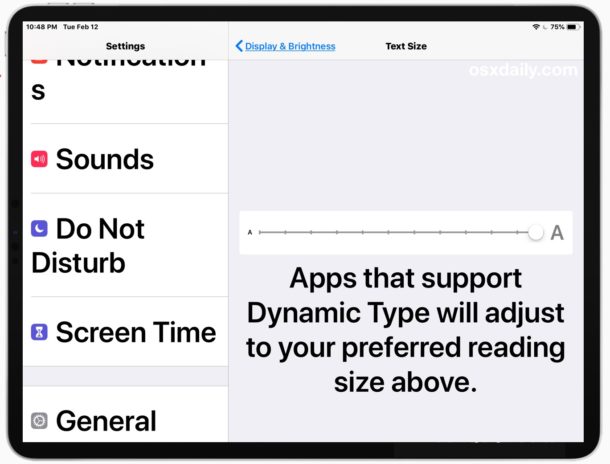
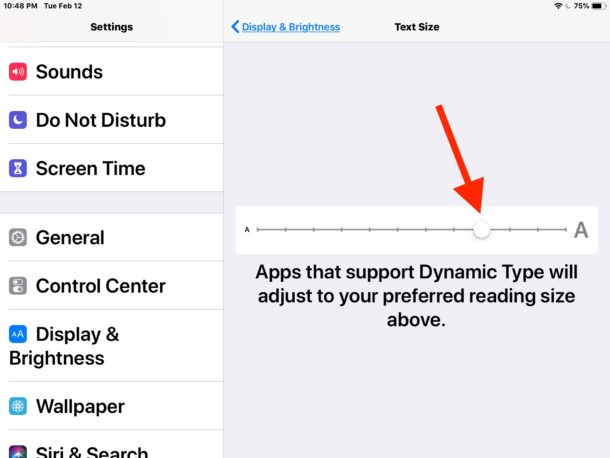
* Note you can also go to Settings > “Display & Brightness” to access the font size slider, but by default there is a limit on the maximum text size that is shown without enabling the “Larger Accessibility Sizes” within the Accessibility Settings. To gain access to the larger text size options, you will need to enable the “Larger Accessibility Sizes” larger text option. After that accessibility setting has been enabled, the general Display & Brightness text size option includes the larger sizes as well.
Changing the text size this way impacts any iOS app that supports a feature called Dynamic Type, which includes many Apple apps like Mail, Notes, Calendar, and others, and some third party apps too.
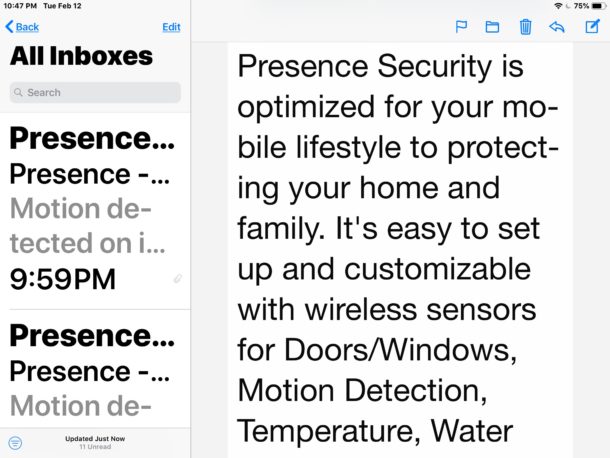
For example, here’s what Mail app can look like with a larger text size on iPad:
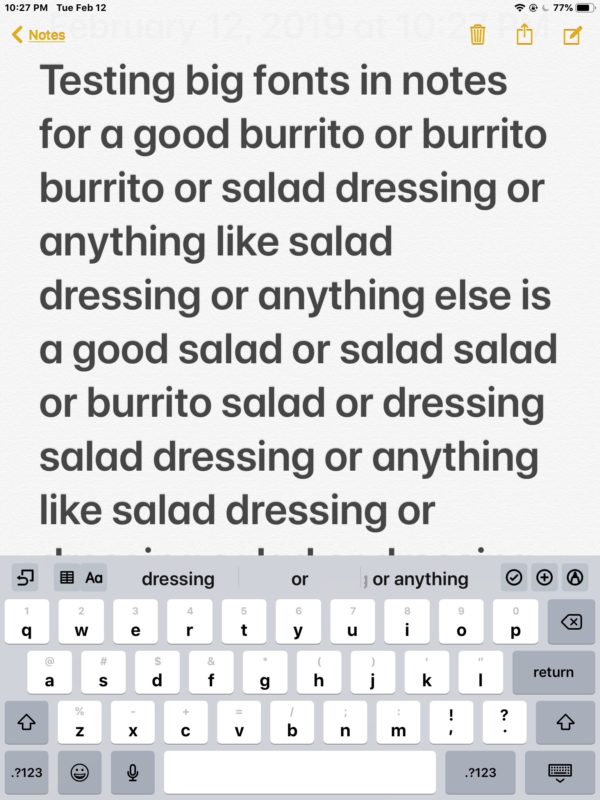
And here’s what larger text size looks like with Notes app on iPad:
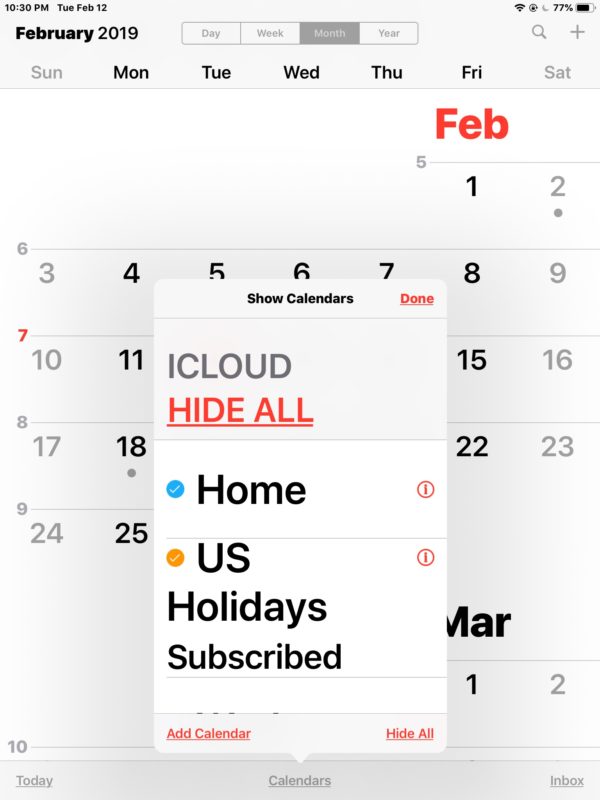
And here are larger font sizes shown in Calendar app on iPad:
As you can see in the screenshots, with the “Larger Accessibility Sizes” font size option enabled, all text size in those apps is significantly larger, depending on the text size option you chose. These larger text size options can make the difference between an iPad or iPhone being usable or unusable for plenty of users, particularly those with vision challenges. Additionally, these settings are often the only way to increase font sizes overall in apps like Mail or Notes, making the setting all the more important to some users.
You’ll notice that (aside from the URL bar) Safari is largely not impacted by adjusting the font sizes because Safari obeys the stylesheets of websites, but if you want to you can manually increase font sizes for web pages in Safari using Reader mode.
If you’re wondering about the iOS Home Screen, then text shown on Homescreen of the iPad with the app icons will not get any bigger though, so if you want that text to be easier to read and larger than a good setting to enable is Bold Text, which is also in the same settings section of the iPad.
These settings are helpful whether you have vision difficulties or not, and even for users with perfect vision it make a device easier to use and read when larger fonts are enabled.
Larger text size pairs well with another helpful feature for making the iPad screen easier to use too, and that’s using Night Shift in iOS to warm the display colors automatically for the evening hours, thereby reducing blue light.
This article is obviously focused on the iPad, but this text size tip applies to all iOS devices, and using it is the same for iPhone and iPod touch as well.

How do you increase the font size on Apple’s Maps ? It’s very frustrating how you can zoom in on the map but the street names remains tiny – especially on the iPhone and iPad –
Great question, this trick actually does that! If you enlarge the iOS system font size as described here, it will also increase the font size in Apple Maps on iPhone and iPad. Likewise if you shrink the font size in Settings > Display & Brightness > Text Size then the font sizes in Apple Maps will get smaller.
It turns out that Apple Maps can no longer separately change the font size of labels and roads, but in much older versions of Apple Maps you could change the font size independently within Settings > Maps > Label Size > Small, Normal, or Large. It’s not clear why that feature was removed, perhaps because the Maps font size now adjusts along with the general system font size changes thanks to Dynamic Type.