How to Install Intel Power Gadget on MacOS Mojave
![]()
Intel Power Gadget for Mac is a processor monitoring tool that allows computer users to monitor the performance of an Intel processor in real-time. Intel Power Gadget will show you power and energy information in watts, the clock speed frequency of the CPU in GHz, the temperature of the CPU, and CPU utilization. It’s a handy utility for many reasons, and some Mac users may even use it as an alternative system monitor sort of like Activity Monitor.
Newer versions of MacOS can sometimes have trouble installing Intel Power Gadget, and many MacOS Mojave users have discovered the installation fails or the app doesn’t work. This installation failure is usually due to a default security setting in MacOS, and is easy to resolve.
How to Install Intel Power Gadget on MacOS
Installing Intel Power Gadget on the Mac is easy, though you may run into a Gatekeeper security block that can cause installation trouble. Here’s how to successfully install the tool in modern macOS releases:
- Download Intel Power Gadget from Intel.com for Mac, it’s free (also available for Windows)
- Launch the “Install Intel Power Gadget.pkg” from the mounted disk image as usual and start the installation process
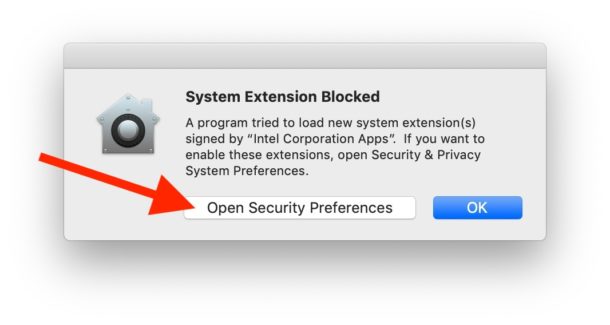
- If you see a ‘System Extension Blocked’ message, click on “Open Security Preferences”, otherwise go to the Apple menu and choose ‘System Preferences’ followed by ‘Security’
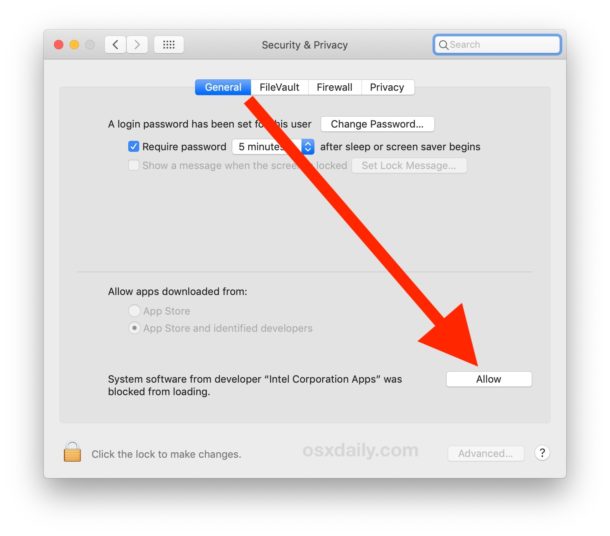
- Under the ‘General’ section of the Security preference panel, click the button to “Allow” the ‘system software from developer Intel corporation apps’ which was blocked by Gatekeeper *
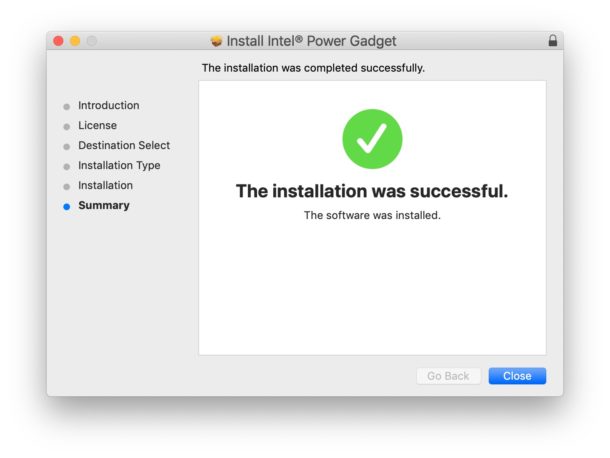
- The Intel Power Gadget installer should proceed as usual and successfully install, if it fails then just run the “Install Intel Power Gadget.pkg” package installer again
- When finished, launch Intel Power Gadget from the /Applications folder as usual
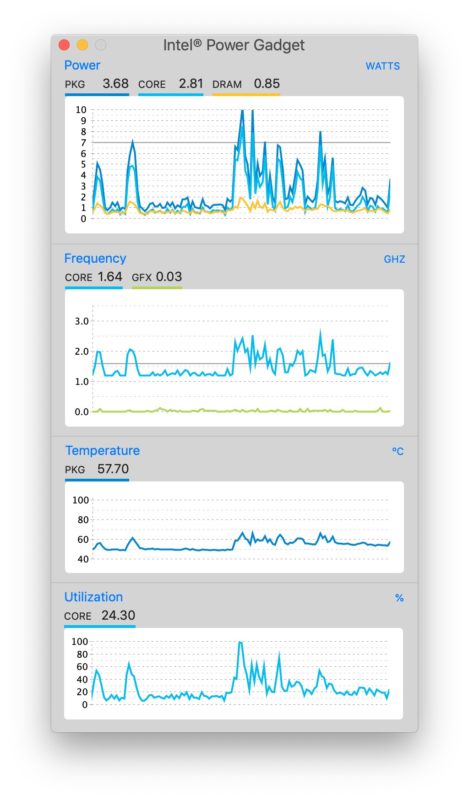
If you run Intel Power Gadget while you’re using the Mac, you may notice that processor performance can change around quite a bit depending on what you’re doing and what sort of apps you’re using.
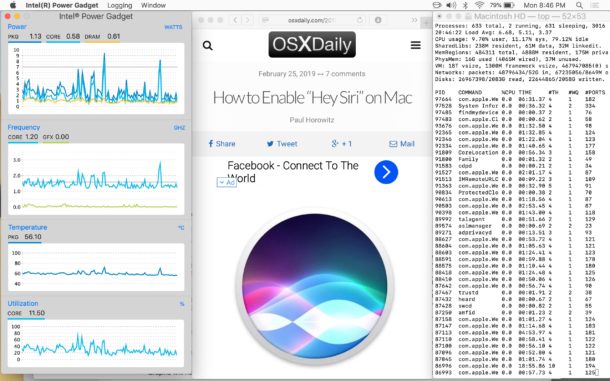
It is completely normal for the processor charts to be changing constantly, and you’ll find that the processor clock speed may go up or down, as will both CPU temperature and power, typically correlated with processor utilization – this makes sense as more processing utilization requires more power to have a higher clock speed, which raises the temperature of the CPU, and of course the opposite can happen as well with CPU speed lowering along with lower power and lower temperature and utilization when the Mac is less busy. If you’re interested in doing so, you can see this directly and test it yourself by running any CPU intensive task, like the Terminal command ‘yes’, which is often used for stress testing a Mac (or any Linux PC):
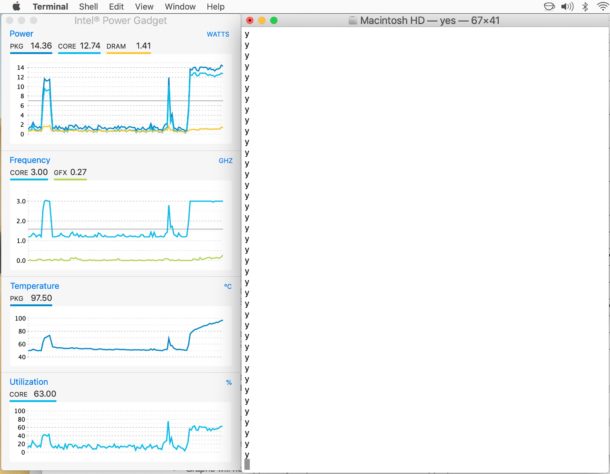
As you can see the graphs for power, frequency, temperature, and utilization suddenly shoot way up as the ‘yes’ command runs in the adjacent Terminal window as a stress test, which is normal and expected behavior for the processor.
Uninstalling Intel Power Gadget on Mac
Decide you don’t need Intel Power Gadget? Uninstalling Intel Power Gadget is quite simple. Simply navigate to the /Applications folder and open the Intel Power Gadget directory, then run the included ‘Uninstaller.pkg’ package file. This will remove the Intel Power Gadget application and the associated kernel extension from the Mac.
* If you’re a truly advanced Mac user and you’re bothered by these type of security measures causing installation issues, you can choose to allow apps from anywhere in macOS by disabling Gatekeeper, though that is strongly not recommended for the vast majority of Mac users. There are quite a few apps that can fail to install because of the stricter security standards that are in place in modern macOS releases, and if you’re the type of person running Intel Power Gadget then you may encounter also a similar issue with installing VirtualBox in MacOS where the kernel driver fails to install, thereby preventing that app to work as well. Typically you can bypass Gatekeeper on a one-off basis as discussed here, which is arguably the best approach, but you can also just turn it off completely if needed.

If you use guide above with mojave 10.14.6. your system will not boot to macos anymore and only way I found to fix it was to use timemachine backup.
Web archive is your friend;)
https://software.intel.com/file/778485/download
Link to Mac version of Intel Power Gadget no longer works. Can’t find it by searching web. Anyone found it?
Before you install read the license agreement. It send a lot of stuff home. Most of which, in my opinion, is not needed.
I have been using Monit for some time that does this and more. It’s free in the App Store. Works great, I can see it as part of the Notifications sidebar. Recently added a widget that allows one to see CPU usage, temp and fan speed as well as which apps are using what percentage, not to mention battery charge, disk memory usage — both of these as percentages — and more. Highly recommend.
I just checked but it’s not free, 3.99$
You can also write this in the terminal (if you have Homebrew):
brew cask install intel-power-gadget
Are there any graphical CPU monitors that will display each core individually?
Why is Apple moving macs from intel to ARM?
If I had to guess, I would say more control and greater profit.
Paul hi,
I have searched your site and several others and can’t find the answer to this:
Many monitors, for example Dell, now support daisychaining over displayport 1.2. Suitable monitors have a dp out port for connecting to a second (and potentially third) monitor over DP, saving running a second monitor cable back to the Mac. Generally what I am seeing reported is that this works under windows but no one can get it to work with MacOS. Some even claim that it works on a mac running Bootcamp but not under MacOS. I have a lat 2018 macbook pro 13″ and want to run two dell U2518D monitors with the mac in clamshell mode. You’ve addressed running dual monitors in the past but not, I think, this specific daisy chain set up. Do you have any thoughts on this?
Thanks for your interesting and useful site!
Regards Isidore