How to Use Lock Screen in macOS Big Sur, Catalina, Mojave, & High Sierra
Mac users have long been able to use various tricks to lock the screen of their computers, but with macOS Big Sur, Catalina, Mojave (and anything from High Sierra 10.13.x onward), a simpler and faster option is now available on the Mac with an official Lock Screen feature.
With the new Lock Screen feature, you can instantly lock down a Mac through a system-wide menu option, or with a keyboard shortcut. Once Lock Screen has been enabled, a proper user login and password must be entered before the Mac can be accessed again. This is an excellent privacy and security feature, and one that Mac users should familiarize themselves with if they frequently use their computers in a public setting, be it at work, school, home, or anywhere else they may want to password protect their computer to prevent unwanted access.
Note this specific Lock Screen feature is only available in the latest versions of Mac OS, including macOS Big Sur, Catalina, Mojave, or High Sierra 10.13.x or later. If you’re on an earlier version of Mac OS system software, you’ll need to rely on other methods to initiate the lock screen on a Mac as described here, or if you have a MacBook Pro with Touch Bar you can set a dedicated screen lock button.
How to Use Lock Screen in MacOS via Menu
You can enable the Lock Screen on Mac OS from anywhere via the Apple menu:
- Pull down the Apple menu from any application
- Choose “Lock Screen” to instantly lock the Mac screen and bring up the login window

Locking the screen is instantaneous, and the Mac will require a password to login and regain access.
The Lock Screen feature does not log out of the user account, or quit any applications, it also won’t start a screen saver right away, it only locks the screen by bringing up a familiar login window thereby requiring the user name and user password to regain entry to the Mac.
Another option to enable the Lock Screen feature on the Mac is to use the keyboard shortcut…
How to Enable Lock Screen in MacOS via Keyboard Shortcut
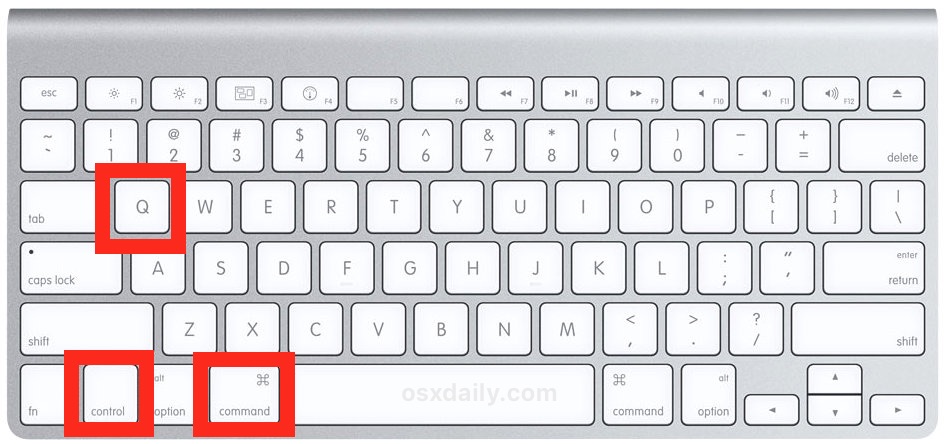
The default keyboard shortcut for the new MacOS Lock Screen option is Command + Control + Q, you can hit the keystroke at any time to lock down the Mac:
- Hit Command + Control + Q to activate Lock Screen on the Mac
Once you hit the command sequence on the keyboard, the Mac screen will instantly lock out, thereby requiring a login to regain access.
For many users, using the keyboard shortcut for Lock Screen will be faster than the menu option, and it’s likely that the keystroke approach is the fastest way to initiate a screen lock procedure on any Mac.
Note that you can change the Lock Screen keyboard shortcut if you’re unhappy with Control + Command + Q for whatever reason by going to the Keyboard system preferences. If you find yourself accidentally quitting apps instead of locking the screen, you may wish to do that. Just be sure your new keystroke doesn’t conflict with anything else.
To reiterate, these dedicated Lock Screen keyboard shortcut and menu options are only available to the latest versions of macOS system software (10.13+), but that does not mean that users of prior Mac OS software releases are left in the dark or without similar options to quickly activate a password screen to lock down a Mac. In fact, all versions of Mac OS can enable a lock screen associated with the Mac Screen Saver feature as described here that can be activated by keystroke or by a mouse corner. Another option is to use an optional Screen Lock button on the Touch Bar of MacBook Pro if you have one of those Macs.
The primary difference between the new Lock Screen option in modern macOS releases versus the older lock screen trick available in earlier Mac OS releases is that the new variation is officially recognized as “Lock Screen” whereas earlier versions of Mac OS would indirectly go about enabling a lock screen by activating the screen saver with password protection. The end result is basically the same however, though the new variation won’t immediately enable a screen saver, whereas the screen saver based approach always immediately does.
By the way, if you’re using the Lock Screen feature for security and privacy reasons (and you should be if your Mac gets used in any work place, public location, school, or even many home environments) then you’ll also want to be certain you enable FileVault disk encryption on the Mac so that all data on the hard drive is encrypted, further protecting your personal data from prying eyes or potential privacy incursions.
Do you have any other handy tricks relating to the Lock Screen feature on the Mac? Share them with us in the comments below.

I’m using macOS 10.13 (High Sierra) and the automatic sleep function (“Schedule…” in the Energy Saver Preference Pane) fails when the computer is in Lock Screen. When the screen is unlocked by entering a password, the 10 min. countdown window is already open and only then starts counting down.
If you use Alfred this is already a built in command.
One thing that remains unanswered is if this new lock screen will actually keep the Mac awake indefinitely. As far as I know, my Mac goes to sleep after a while when the screensaver is enabled using hot corners (at least the screen turns off after a while) – even with Caffeine app activated. That part is really annoying if you want to lock the Mac, but keep it running (e.g. if you’re downloading something or if you just want to remain online in some desktop app). Is there any way I can keep my Mac on while locked and also avoid the screen from turning off?
If you set sleep to never, then using screensaver lock ensures it never goes to sleep, keeping it available for remote access.
Using screensaver lock is far easier and less steps than this idiotic function.
You can also use the third party apps like MenuLock (free) to lock the Mac screen fast
https://github.com/Shufflepuck/MenuLock
More stupid downgraded functions that some idiot at Apple who should probably be flipping burgers supervised thinks is better, despite it being MORE GESTURES than just setting a hot corner to lock the computer.
Lets review:
New method:
1 move curser.
2 click drop down menu.
3 Click lock command.
Old method:
1 Move mouse to hot corner.
Who the hell would chose to do more work to do the exact same thing!!!! Not to mention if you forget to lock the screen, you can set an idle time that will do it for you!!
You can still program what you want by automating a script in Better Touch Tool or another similar automation suite (I’d do this with gestures, drawing a gylph, or keyboard shortcuts); I personally don’t use hot corners because I’ve inadvertently invoked their behavior in the past when I didn’t intend to. Just out of curiosity what kind of computer are you using (desktop/laptop)?
I created a service using Automator (Utilities > Start Screen Saver), saved it in /Users/[name]/Library/Services, assigned a keyboard shortcut (CNTRL+OPT+CMD+S) in Keyboard preferences. I also set the Password Required to 5 Seconds after screen saver begins.
So, when I walk away, pressing the 4 keys immediately starts my screensaver and 5 seconds later requires password (or Apple Watch) to unlock.
With the Finder Lock Screen option, you apparently cannot unlock with Apple Watch.
I have always used the Keychain.app’s menu bar preference. Simple, straightforward and works on any macOS.
Is there any difference between locking the screen in Sierra from the Keychain.app’s menu bar preference
and the HighSierra lock screen? I don’t have HighSierra but I use the tip Liam suggested
@Liam, the padlock in the menu bar disappeared with macOS High Sierra…
Much as I appreciate the ⌘Q shortcut, I find myself accidentally quitting an application all too often. So I decided to re-assign the command to something else. Lock Screen or Sleep are two useful possibilities:
1. System Preferences
2. Keyboard/App Shortcuts
3. All Applications
4. Add a new shortcut by pressing the ⊞ button
5. Add the Text exactly: Lock Screen (or Sleep in my case)
6. Add the command text: ⌘Q
And Robert’s your mother’s brother. I may take a few minutes for the new shortcut to become available.
Did you say that it is possible to change the shortcut to activate Screen Lock?
I searched in various places in the settings and did not find it.
Could you guide me?
Thank you.
Why not a hot corner setting for a password-required screensaver?
You can still set a hot corner for a screen saver if you’d like to in macOS 10.13+ or later, that method of locking a Mac screen works on all Mac OS X versions which is a significant benefit to it as discussed here:
https://osxdaily.com/2011/01/17/lock-screen-mac/
Why not, it’s a simple one step process to lock using a hot corner vs this new dumbed down more work way. Again, I have to question who at Apple makes these idiotic decisions to put this kind of crap in the newer OSX versions. I love my mouse to the hot corner and the screen and computer are locked, end of story. No go to a menu drop down and click anything.
It’s just idiotic to make such simple process’ so much more complicated and think this is better.
Definitely want to second enabling FileVault if you’re going to bother using any form of lock. I always enjoy resetting my friends’ passwords when they don’t use FV just because it’s so easy.
Agreed, enabling Filevault should be standard on all Macs – at least if they have an SSD for speed reasons. Keeps your data secured in the event of theft, and makes getting into a Mac via an unauthorized method much more difficult.
What is the difference Lock Screen and Sleep?
Thanks
Locking the screen just locks the computer screen, requiring a password before it can be accessed or used again. But when locked it keeps the Mac awake with all apps running, internet connectivity enabled for things like mail checking or websites reloading, etc. It uses the normal level of power, the Mac is left powered on as usual, and a quick unlock gets you right back to your computing activities.
Sleeping puts the Mac into a hibernation state where everything is temporarily suspended, and the computer uses less power. All active apps and contents in memory are temporarily placed into a Sleep Image file on the hard drive. This is helpful if you don’t want to shut down a computer, but you want to suspend everything while you travel with a laptop, or go to sleep over night (much like the name) in a lower power suspended state. Waking from sleep still requires a password, but it’s much slower to wake up and resume activity from sleep compared to simply using the lock screen.
Hope that helps!
You are welcome! One of mine!