How to Remove Stuck Time Machine Backups from Mac Trash Due to System Integrity Protection Error
If you’re trying to remove a Time Machine backup from a drive and find that it’s stuck in the Mac Trash with a specific error message stating the trash can’t be emptied because “Some items in the Trash cannot be deleted because of System Integrity Protection”, then read on to learn how to resolve this particular Time Machine backup removal problem.
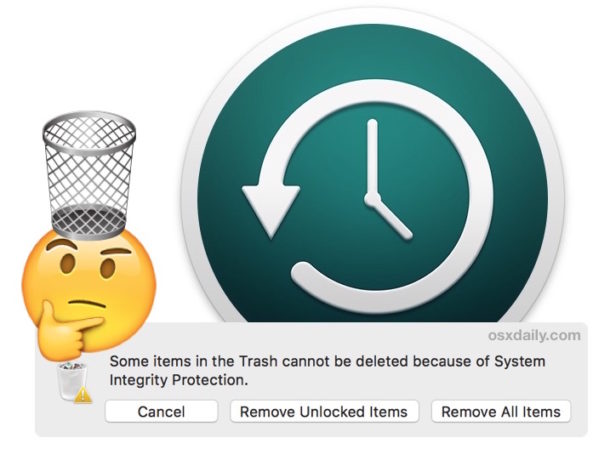
Note: this troubleshooting walkthrough is focused exclusively on when a Time Machine backup is stuck in the Trash with the accompanying SIP related error message stating “Some items in the Trash cannot be deleted because of System Integrity Protection” with three options available, ‘Cancel’, ‘Remove Unlocked Items’, and ‘Remove All Items’ – the fixes discussed here will address this error message pertaining to SIP limits on removal of Time Machine backups specifically. There are other possible reasons (and solutions) as to why a Time Machine backup can get stuck in the Trash and nearly impossible to delete, including the seemingly endless “preparing to empty the Trash” message with Time Machine backups, which can also prevent a backup from being trashed the regular way. If you do not see the ‘System Integrity Protection’ error message when trying to remove the Time Machine backup then skip this walkthrough and instead focus on this guide, or even just deleting old Time Machine backups from Time Machine directly on the Mac.
How to Fix Stuck Time Machine Backups in Mac Trash with “items in the Trash cannot be deleted because of System Integrity Protection” Error
As the “Some items in the Trash cannot be deleted because of System Integrity Protection” error message implies, the reason the Time Machine backup is stuck in the Trash and unable to be deleted is because System Integrity Protection, or SIP, is enabled and protecting that particular backup from removal. SIP is a feature that locks down important system files to prevent their removal, but in this particular case it’s also preventing the removal of an old Time Machine backup file. Thus, we’ll temporarily disable SIP, trash the stuck Time Machine backup, then re-enable SIP. Here are the full steps:
- Backup the Mac before beginning, either with Time Machine or otherwise
- Go to the Apple menu and choose “Restart” to reboot the Mac
- Once you hear the boot sound or see the Apple logo on screen, press and hold COMMAND and R keys concurrently to boot the Mac into Recovery Mode
- Once you see the “MacOS Utilities” (or “OS X Utilities”) screen you’re in Recovery Mode, ignore the initial onscreen options and instead pull down the “Utilities” menu at the top of the screen and then select “Terminal”
- At the command line prompt, enter the following command string:
- Hit “Return” on the keyboard to disable SIP and instantly restart the Mac again
- Let the Mac boot up as usual with System Integrity Protection disabled
- When the Mac has finished booting up, return to placing the old Time Machine backup in the Mac Trash can and then choose “Empty Trash” to remove the stuck Time Machine backup *
- Once the trash emptying process has completed and the once stuck Time Machine backup is deleted, you can now reboot the Mac and re-enable System Integrity Protection
- Restart the Mac as usual and immediately hold down COMMAND + R keys again to enter into Recovery Mode
- Again pull down the ‘Utilities’ menu and choose “Terminal” then enter the following command string to enable SIP:
- Hit return to restart the Mac up again as usual, this time with System Integrity Protection enabled again, where you can use the Mac as usual
csrutil disable; reboot
csrutil enable; reboot
(Note that deleting a Time Machine backup by dumping it into the Trash and emptying the Trash can take quite a while, so be prepared for that. If the backup is huge, you might want to let it sit overnight as it empties from the Trash successfully, in which case you still want to resume the steps to enable SIP again afterwards.)
Assuming you followed the instructions correctly, you should not see the “Some items in the Trash cannot be deleted because of System Integrity Protection” error message when trying to delete the stuck Time Machine backup from Mac Trash again, it will just empty the Trash as normal.
It’s very important to enable System Integrity Protection again on the Mac, as it offers security and privacy protection benefits that won’t work if it’s disabled. Don’t skip that step after you successfully trash the stuck Time Machine backup file.
* If you are still encountering problems, you can either go to the command line and forcibly delete the backups from the Trash with these instructions, or you can put back the stuck Time Machine backup file and focus on the dated specific backup folder you want to delete, these are contained inside the “Backup.backupdb” directory.
Alternative Method: Using tmutil to Properly Remove the Time Machine Backup
** Another option is to use the command line tmutil command, which is a more proper way to delete an old Time Machine backup in the first place.
To try this approach, you need to have the Time Machine backup in its original location on the backup drive, so first go to the Trash in MacOS and right-click on the stuck backup and choose “Put Back”. Then do the following:
- Open the “Terminal” application found in /Applications/Utilities/
- Type the following command string, replacing “DRIVENAME” with the name of the Time Machine backup volume, and replacing “SPECIFICBACKUPNAME” with the specific dated backup folder you’re trying to delete:
- Hit return and enter the admin password as required by sudo, this will instantly delete the Time Machine backup with tmutil
sudo tmutil delete /Volumes/DRIVENAME/Backups.backupdb/SPECIFICBACKUPNAME
However you resolved the issue, once the stuck Time Machine backup is trashed and removed successfully, you can resume using Time Machine for backups on the Mac as usual.
Time Machine is a great feature, and all Mac users should regularly use Time Machine to backup their entire Mac and personal data so that if something goes awry they can easily restore their machine and data to its proper state.
Did the above trick work for you to successfully remove the stuck Time Machine backups from the Mac Trash? Did you use one method or another, or a different entirely? Share with us in the comments below!

Thank you so much! This fixed it and I tried every other way!
Thank you. This helped.
Hi, your instructions worked but I had to futz around with the Terminal commands: you instruct to enter “csrutil enable; reboot” but the ; does not exist and instead there is a <, and it did not like that either. And in the enable command it does not want the ; nor the < nor the word reboot, just a hit on Return … took me sometime as not a Terminal expert but you may want to correct the info above for people like me… ;-) Thanks for the instructions however!
The ; is command operator that tells ‘reboot’ to execute after ‘csrutil enable’ has been successfully completed.
My poor vision didn’t help; typed in carutil. Now I’ll try again with csrutil.
I just create a separate partition for backups, when it gets full. Use disc utils and erase partition then create done :)
Great trick, very useful as I have found this problem before myself.
Another method is this to be using ‘sudo’ at the command line can work too sometimes.
You must know the name of your hard drive and plug it in where “NAME-YOUR-DRIVE” exists in the path:
1. Open the Terminal app
2. Type the following command, replacing “NAME-YOUR-DRIVE” with your drive name, if there are spaces you need to escape them with backslash or use quotes like this “Name\ Your\ Drive” or “Name Your Drive”:
cd /Volumes/NAME-YOUR-DRIVE/.Trashes/This navigates to the hard drive Trashes folder (it is hidden)
3. Type the following:
sudo ls 501/This dumps a list of all items in the folder
4. Now type the following command to delete the file(s) one at a time:
sudo rm -rf 501/Backups.backupdb/Assuming the backup is named “Backups.backupdb” in the folder listing. If there is a space in the file or folder name, use the escape or quotes again as mentioned above.
5. Repeat for other files with the ‘sudo rm’ command to delete more files this way
That’s it, the great thing about this is it works even if SIP error “Some items in the Trash cannot be deleted because of System Integrity Protection” shows up, and you DO NOT NEED TO DISABLE SIP to complete the job!
Try it out, it worked for me.
SO USEFUL!!!
I was totally stuck trying to get rid of all this garbage.
Thank you very much!
Here is a much simpler way to do the same thing. Ive had this problem for a very long time. Not even AppleCare could help me. I called more than a few time and had engineers calling me back because they could not get it figured out on the initial go around. But I found this tonight, coincidently the same day I saw this article from osxdaily in my inbox, weird timing. But in any case check out this very quick YouTube video, https://youtu.be/XJEYKTYm6hY
Excellent tip, I have found myself unable to delete backups due to System Integrity Protection like this before. I was able to remedy it by rebooting in Safe Mode and deleting the Time Machine backup with tmutil at the command line as described.
Kind of surprised this happens at all, the solution is complex and given how easy Time Machine is, one would hope that Apple will resolve this error with a simple Empty Trash on the Mac?
Anyway thanks for the article. Great stuff as always.