How to Enable Screen Recording on iPhone & iPad in iOS
Have you ever wondered how to record the screen of an iPhone or iPad? Thanks to the built-in iOS Screen Recording feature, you can capture recordings of an iPad or iPhone in use, and then save or share those recorded screen video files for any number of purposes.
To be able to use Screen Recording in iOS you will need to enable the screen recorder feature first, and then it’s just a matter of knowing how to use this excellent feature that is native in modern versions of iOS.
Read on to learn how to enable this feature first, and then how to capture and record the screen of an iPhone or iPad, with no computer needed. We’ll also show you some helpful tips for capturing screen recordings successfully in iOS.
Note: you will need a modern version of iOS to have native screen recording capabilities with the Screen Recording feature on an iPhone or iPad, this means iOS 12 and later and iOS 11 or later, as earlier versions do not support the feature natively. If you have an older version of iOS though there are still screen recording options available, which we’ll discuss further on.
How to Enable Screen Recording on iPhone or iPad
Here is how you can enable the native iOS Screen Recording feature:
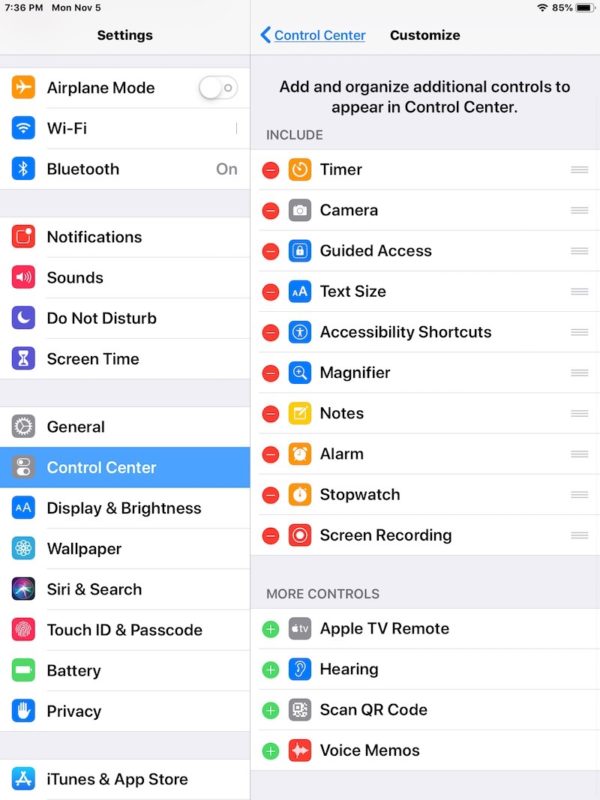
- Open the “Settings” app
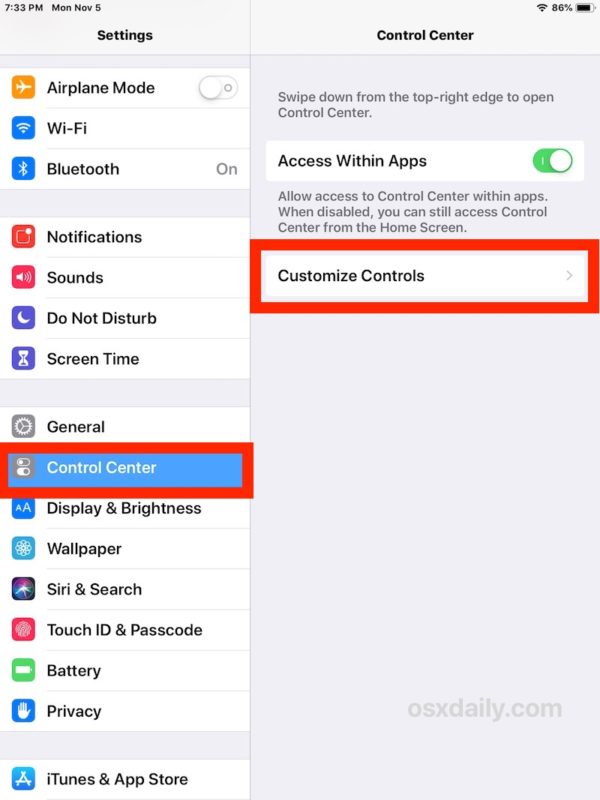
- Choose “Control Center” within Settings and choose “Customize Controls”
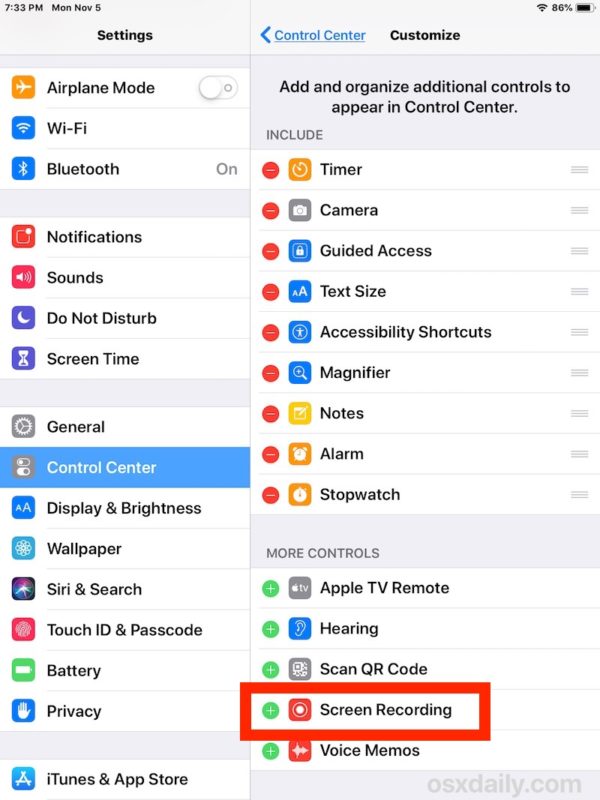
- Find “Screen Recording” and tap the green (+) plus button to add the screen recorder to Control Center in iOS, it will move to the “Include” section higher up
- Exit out of Settings
![]()
Now you have enabled the iOS Screen Recorder. You can customize other Control Center options while you’re in that setting if you want, but we’re focusing on enabling the Screen Recording feature so that you can capture videos of what you are doing on an iPhone or iPad display.
How to Use Screen Recording on iPhone & iPad
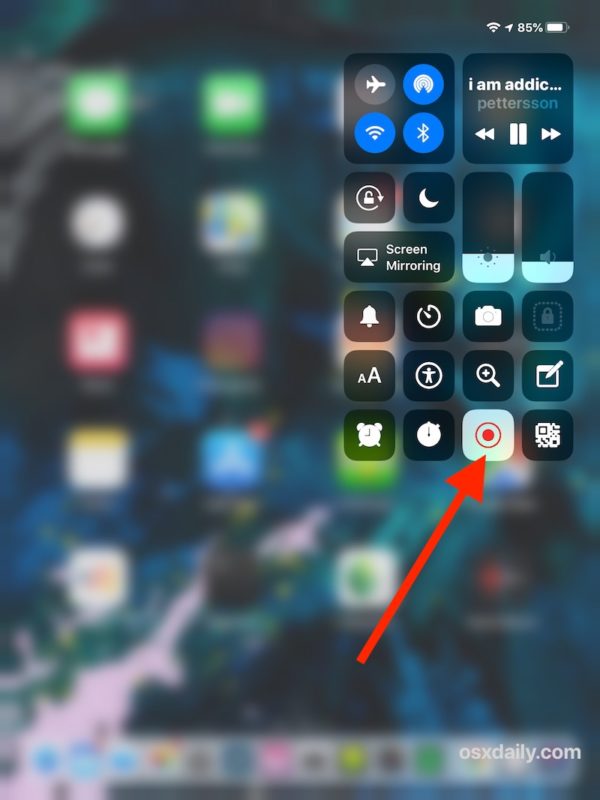
- Swipe to access Control Center (swipe down from the top-right of the screen on any iPhone or iPad without a Home button, swipe up from bottom of screen on any Home button device)
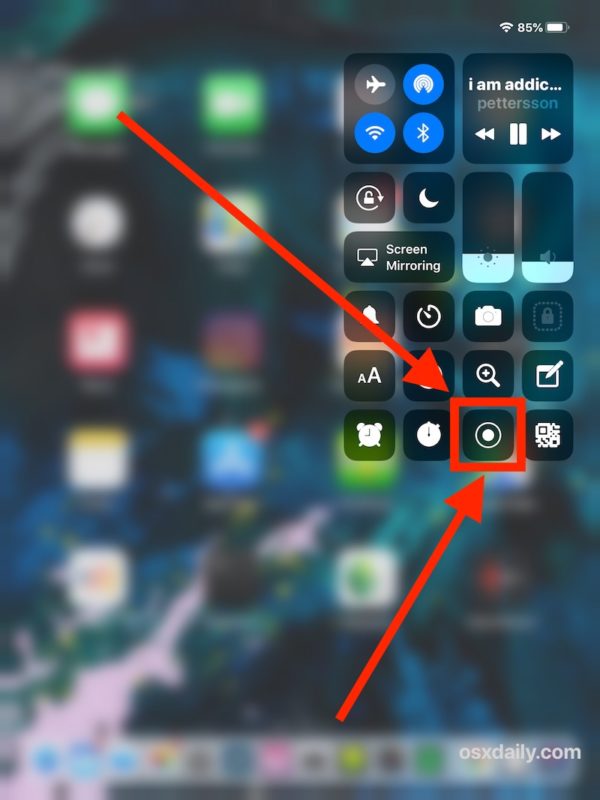
- Tap the Screen Recording button in Control Center, it looks like a little (O) circle button, this will count down from 3… 2… 1… to begin recording what’s on screen
- Use the iPhone or iPad doing what you want to be recorded, when finished recording tap the red button at the top of the screen, or return to Control Center and tap the stop recording button there
Once finished you will get a little notificaiton alerting you to the screen recording being captured successfully.
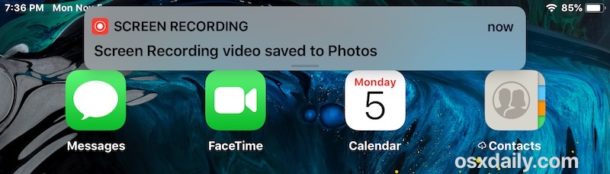
The captured screen recording video will appear in the Photos app Camera Roll like any other recently recorded video, photo, or screen capture, except of course it’s a recording of the screen itself.
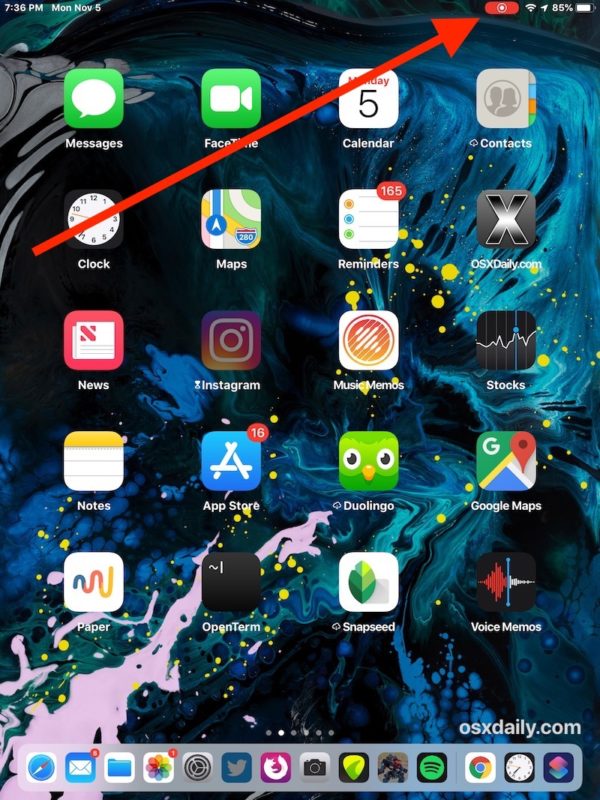
You’ll know the screen is recording because of the pulsating red recording icon / button visible at the top of the iOS device screen. If there is no red indicator, the screen is not being recorded.
This works exactly the same to capture a screen recording on iPhone and iPad, the process is identical, but of course the output of the saved screen recording video will be sized differently depending on the iOS device being used, as well as the devices screen orientation (for example if you record an iPad in horizontal mode versus vertical mode, or an iPhone, or if you’re capturing a recording of a particular app being used).
iOS Screen Recording Tips
Some additional helpful tips for capturing screen recordings on iPhone and iPad include:
- You can enable or disable Microphone recording (audio capture) to go along with the screen recording if desired by long-pressing on the Screen Record button while in Control Center and toggling that setting on or off
- You can stop screen recordings by tapping the red button at the top of the scree, or by going back to Control Center and tapping the stop button there too
- To have a clutter-free screen capture, it’s often a good idea to place an iPhone or iPad into Do Not Disturb mode first so that notifications, alerts, calls, and messages don’t appear on the display while you’re trying to capture something else
- Use the 3 second countdown to your advantage
- You can always edit the screen recording captured video with any regular video editor on the iPhone or iPad after the fact, even if it’s just trimming the video length in iOS Photos app, or using iMovie to add text captions in iOS or to zoom or crop the video in iOS iMovie as well
- Transferring or sending the video to a Mac or PC to edit there is also possible just like sending and sharing any other video file or movie (AirDrop works great for transferring from iOS to the Mac quickly and wirelessly)
- You can upload the screen recordings as screencasts to a cloud server, work network, any number of social sharing sites, or even to your own computer
* The native screen recording tool in iOS is not the only way to capture a screen recording of an iPhone or iPad. Nearly all versions of iOS, including the most recent releases, also support screen recording of iPhone and iPad with a Mac by using QuickTime and a USB cable, which is very similar to how the Mac screen recording in QuickTime works as well.
Help, I can’t find Screen Recorder in Control Center!
You must have iOS 11 or iOS 12 or later to have Screen Recording as an option. If you do, be sure Screen Recorder is enabled and added to Control Center following the instructions above.
If enabled successfully, iOS Screen Recording option will be in the ‘Included’ section of Control Center like so:
Why Record the Screen of iPhone or iPad?
Many people may want to record the screens of their iPhone or iPad performing various actions, but it is particularly common in technical circles, IT departments, tutorials and how-to guides and websites (like here on osxdaily.com!), artists, gamers, and with educators and teachers.
You can record a task being performed on a screen, screen record an app being used or a game being played, you could screen record a bug or an error and how you reproduce it, you can capture a walkthrough on how to perform a particular task, and much more.
Do you have any helpful tips or tricks about screen recording on iPhone or iPad with the native iOS Screen Recorder tool? Share with us in the comments below!

Thanks sir it’s very good and helpful
That’s an impressive resumé of recording facilities, Steve Steele. I will have to check out Screenflow and also the midi/audio setup menus. Thanks for sharing.
Great additional inputs from Steve Steele and Louie. Thank you.
BTW, can recording screen be used for Skype or with an ordinary telephone conversation? If it can, does it show any sign on the screen of the other person one is talking to?
Thanks
Freddy
You saved the day!
Btw, some third party apps can use the record button in iOS to trigger its app. For instance Switcher Studio uses the same red button in the Control Center to begin recording. To see if any other apps are using that button, hold down the record button like your waiting for the Microphone preference and any app that’s using the record button will show up there where you can pick the app you want to record with. I was a little suprised by that.
I record screen captures almost everyday or several times a day. They are useful for several reasons. It’s great for making:
App training videos, just like in macOS. I have a Shure laviler microphone that uses that TRRS 3.5mm jack to Lightening adapter for good results. If you want very professional results, get an audio interface that supports CoreMIDI, (MOTU, Focusright, and many others make very good I/O).
I connect the interface to the iPad Pro, and I can record with via a high end microphone and guitar (or bass or keyboard), listen through high end speakers or headphones, use any of the apps on the iPad while using screen capture to recorded the video and audio of what I’m doing.
I prefer to edit in FCPX but I have Luma Fusion and iMovie on my iOS devices if I want to edit there, and I can upload directly to YouTube. The Camera Conecton kit is good but the Belsen RockStar allows you to charge your iPad while streaming audio over a second Lightening port. With USB – C on the new iPad Pros, screen capturing and connectivity should be up the game quite a bit. Especially with that A12x SoC on board.
With Screen Recoedng I also:
Make music theory and composition videos for YouTube.
Log into my Mac or PC via VNC and record the actions I’m performing with the iPad. That’s really cool.
One trick I really like that I use in my videos a lot is to combine my iPad Pros screen recording abilities with macOS’ abilities. For instance I just made a video where I captured my iPad Pros’ screen, but recorded the voiceover on my Mac using Screenflow. Screenflow is a nice app to add to your workflow if you’re doing a lot of out of the ordinary recording.
Due to macOS almost hidden feature in Audio/MIDI setup, that “Enables” you to connect your iPad or iPhone to your Mac, other apps that tap into CoreAudio or CoreGraphics (or Metal, not sure), can see the iPad s screen or hear the iPads audio output.
Screenflow can capture your main macOS Monitor, an iOS devices screen, multichannel audio streams, your Mac’s internal sounds and use the camera of your iOS device as a video camera. And it can do this all at the same time!
I’ll often record both my Mac’s monitor and my iPad Pros screen, my iPhone’s camera and my voice via a microphone. Sometimes I’ll play musical instruments to.
I really like the addition of the red recording icon on the screen that I can press to record the screen. I almost wish it was there all of the time so I could start recording without having to swipe to the Control Center.
Have this ability in iOS is just another example of Apple ecosystem superiority. 👍🏻
I have trying to do it but it’s not going… before I could
do it without problem but now with Update of 12.1 it is
impossible. What do I wrong?
Thanks for sharing and advice, have a great day 🌹
Very nice Feature.
I’ve been using the simple Screenshot Feature for many years. I’m sure you will know, may be not?
In short :
Press off and home Buttons simultaniusly. Make sure to Press the off button a bit earlier. A small window appears AT the lower left corner. If you tap on that window it opens and you can edit the picture. Crop, add text and marks and finally save it to Photos.
Greetings from Germany, Ronald Hofmann
Yeah, that feature is for still images of the screen and has always been there in iOS. In 2017 iOS 11 added the thumbnail and editor features you mention, which did not exist before although it was possible to take screenshots. Also, on iPhone X and later as well as the latest iPads the screenshot is taken by holding the power and volume up buttons instead, since there is no home button anymore on those devices.
Now the feature described above is for recording videos, with or without sound, of what’s being done with the screen. That was a completely new feature introduced in iOS 11 last year and slightly improved this year in iOS 12.
It’s a great feature and I love it. It was introduced last year with iOS 11. Also, a quick note on the microphone: the article says “You can enable or disable Microphone recording (audio capture) to go along with the screen recording if desired by long-pressing on the Screen Record button while in Control Center and toggling that setting on or off”. While this is true, it is worth noting that the microphone can be enabled by long-pressing the Screen Record button EVEN WHEN NOT RECORDING. That means we can turn on the microphone before starting a screen recording and then the recording will have sound from the beginning, as opposed to enabling the microphone after a recording has already been started.
One more thing, the little red button shown at the top of the screen while recording is only part of iOS 12. In iOS 11 it was a red bar covering the whole status bar (just like there used to be a green bar at the top while on a phone or FaceTime call and now in iOS 12 the bar has been replaced with a little green button).