How to Access iCloud Photos from Windows PC
Have a Windows PC and want to access iCloud Photos? You can do that with ease as you’ll find out in this article.
Since Apple introduced iCloud eight years ago, the service has been widely used to store photos, as they take up a chunk of physical storage space. For many users this is more convenient as well, considering the data is synced automatically across all the Apple devices owned by the user. If you’re one of those iPhone and iPad users who utilize iCloud to store your pictures, but couldn’t figure out how to access them on your Windows PC, you’ve come to the right place. There’s a good chance you assumed you needed a Mac because its a service operated by Apple, but that’s not the case at all.
In this article, we’ll discuss two different ways to access all your iCloud photos right from your Windows machine. Depending on how you want to access it, you could either download the official iCloud desktop app for Windows PC, or just make use of iCloud.com website to download photos from any web browser.
How to Access iCloud Photos from Windows PC Using Desktop App
Apple has offered a desktop app that lets Windows users access iCloud for quite some time now. If you haven’t already done so, you’ll need to download, install, and setup iCloud for Windows. You can download and install the software from here. Alternatively, if your PC is running Windows 10, you could directly install it from the Microsoft store. Simply follow the steps below to set it up and access your photos from Windows:
- Once you run the iCloud application for the first time, you’ll be asked to sign in to your Apple account with your email and password. Once done, click on “Sign In” to continue.

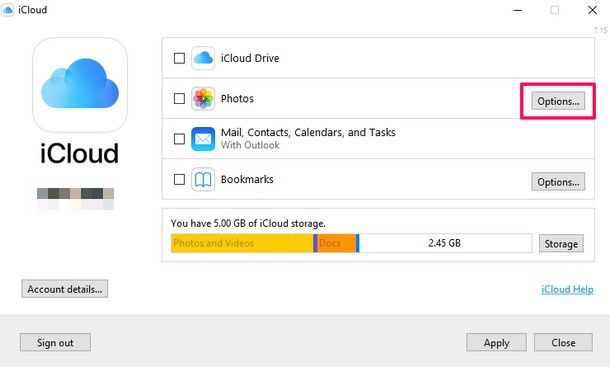
- Now, you need to enable iCloud Photo Sharing to access all your photos stored on the cloud. In order to do this, click on “Options” under the Photos section.
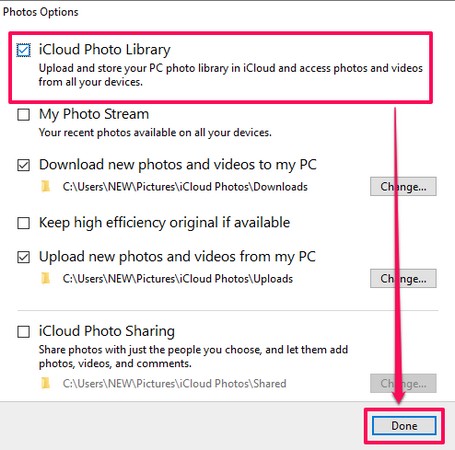
- A new window will pop up to display the options for setting up iCloud on your PC. Here, simply check the box next to iCloud Photo Library and click on “Done”.
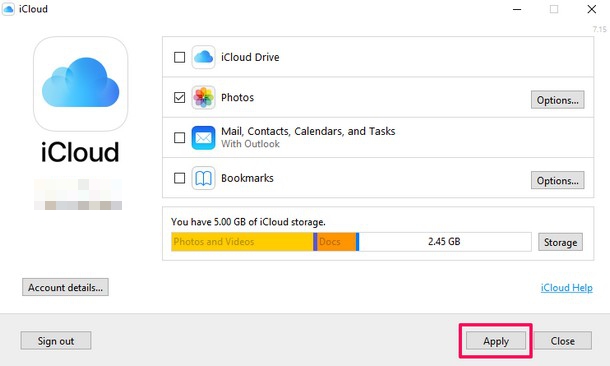
- Next, you’ll notice the Photos section has now been checked. This indicates that iCloud Photo Sharing is now enabled on your PC. Just click on “Apply” to confirm your settings.
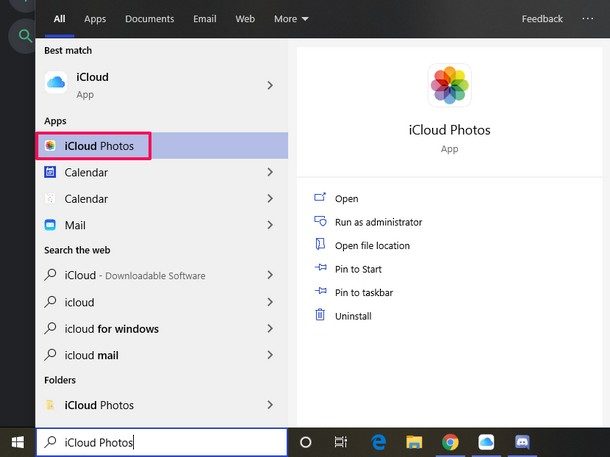
- Type “iCloud Photos” in the search bar and click on it, as shown in the screenshot below. This action will take you to the iCloud Photos section within “My Computer” in Windows.
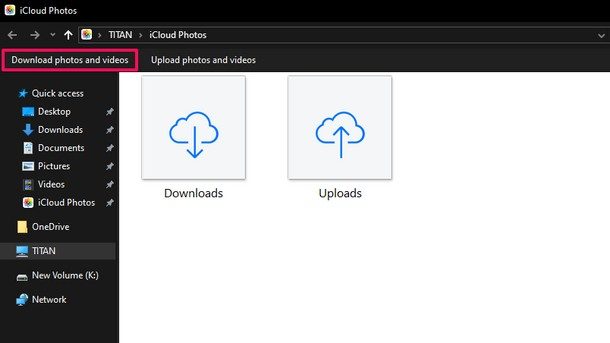
- Here, click on the “Download photos and videos” option located just above the left pane.
- You’ll now get a pop-up where you’ll have the option to download all your iCloud photos. This window shows the total count of photos stored on the cloud and all of them are neatly sorted by year. So, if you want to access just the photos from 2019, you could simply check the box next to it and click on “Download”.
- All of these photos are downloaded to your default Downloads directory on Windows as a zip file. Once that file has finished downloading, simply right-click on it and click “Extract Here” in order to access it normally like any other folder.


And that’s how you can download and access iCloud Photos directly from Windows PC, right from Windows Explorer.
This gives you direct file system access to iCloud Photos in Windows, which some may argue is even easier than accessing and downloading iCloud Photos on Mac.
How to Access iCloud Photos from Windows PC Using a Web Browser
Another way to access your photos stored on iCloud is to use a web browser to download them. The advantage to this approach is that it doesn’t require the installation of any additional software in Windows that runs in the background and consumes system resources. All you need is a web browser like Google Chrome, Mozilla Firefox or even Microsoft Edge that comes pre-installed on every Windows machine.
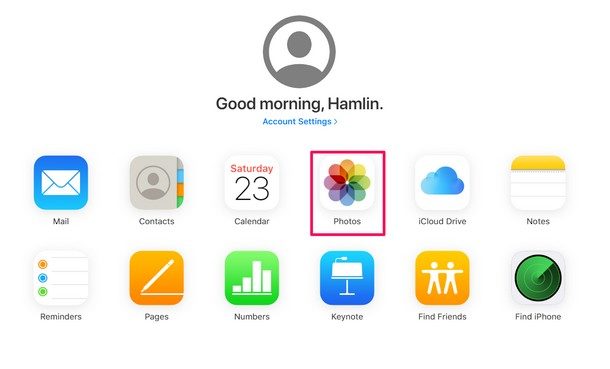
- Open your web browser and head over to iCloud.com. You’ll be asked to login with your Apple ID. Once you’ve typed in your e-mail and password, click on the “arrow” icon right next to the password.
- Now you’re in the iCloud main menu. Simply click on “Photos” to access them.
- All the cloud stored photos are immediately displayed here, and are neatly sorted by month. You can select multiple photos by holding the “Ctrl” key on your PC keyboard and perform various actions with it, which’ll be further discussed in the next step.
- If you check the top-right section of your browser, you’ll notice a bunch of different icons next to your name. These options allow you to upload and download pictures, move photos to a different album, share it with other users and even delete them from the cloud if you wanted to.


The web based approach to accessing iCloud Photos is easier for some users, while some other Windows users will likely prefer to use the native iCloud app for Windows on their PC.
That’s pretty much all you need to do in order to quickly access your iCloud photos without installing any additional software. If you want to download all the photos that are stored on the iCloud, it could be a hassle to select them one by one, since iCloud.com lacks a “Select All” option. That’s when the iCloud desktop app comes in handy, which lets you download all photos together at the click of a button.
Obviously these features will only be available to you if you use iCloud Photos on your iPhone and iPad, so if you don’t use those features than there won’t be these options available to you. Remember that simply backing up to iCloud does not enable iCloud Photos, even though your photos will be backed up in iCloud, they won’t be individually selectable as iCloud Photos allows. It’s all a matter of personal preference, and perhaps a matter of how much disk storage space and iCloud storage space you have.
Have you managed to successfully access and download your iCloud photos from your Windows PC? Do you have a method you prefer, or a different approach entirely? Let us know your experiences, and if you ran into any trouble during the process, by dropping remarks in the comments section down below and we’d be glad to help you out.

I follow your instructions in the first part until step 6. I doesn’t open the app. It opens a standard Windows explorer frame and I cannot see the popup box which offers me the ability to download by years
How can I see it?
By the way, when I view theiCloud photos on the PC they are not organized by anything (random, to say the least) and the names under them look like passwords created by a pswd manager. I find it a totally terrible system compared to the way it is organized on the iOs devices I have.
How can we configure simple sync option using windows 10 and iclouds photos.
For example I have Photos folder in my windows 10 D drive. and there are hundreds of photos from years. I just want that I configure the icloud and tell him my photo folder and it automatic upload my all photos to icloud photo and when ever I put any new photo from my digital cam or any source to my D drive photo folder, its sync automatically and the new pic available to my icloud photo and then available to my all apple devices.
Same like that when I took picture from my iPhone that picture also available at my windows 10 pc D drive photos folder.
Same functionally also provide the Microsoft OneDrive. Put I want this functionality with my icloud phots.
Thanks.
I have an old classic iPod that has photos on it. How can I copy the photos to the iCloud?
One way would be to transfer the photos off of the iPod (assuming iPod touch?) with either Windows or a Mac, then you’d upload those photo files manually to iCloud if you’d like, or put them in a photos album that uploads to iCloud Photo Library if you use that feature. You might need to use iTunes if the iPod is older.
The method you use depends on what the iPod is, if you’re on a Mac, PC, software versions, if you use iCloud Photos, and much more, there are many different ways and there’s not a universal answer to that sort of question.
Hi
Interested to know if/how to retain edited version (exposure, etc) of photos from iPad, as opposed to original. Have found photos copied from iPad lose the edits, but if I airdrop them to another iOS device and then copy them the edits are preserved/flattened into the airdropped file. I like to edit photos on the iPad and then move them to PC for permanent storage and use. (IPad quickly fills up…..)