How to Zip Files on iPhone or iPad
You can easily create zip archives on iPhone and iPad of any files or folders through the Files app. For example, if you have a folder or file you want to compress and archive, share, or upload somewhere, you can easily create a .zip of that data right from the iPhone or iPad, and without needing any additional software.
This approach to making a zip file archive works in Files app for data stored locally, on a remote server, external device, or on iCloud Drive, as long as it can be accessed through the Files app of iOS or iPadOS it can be made into a zip file.
This tutorial will walk through the steps of how to create a zip file on iPhone or iPad, which is the process of compressing a file, folder, or multiple files into a single zip archive.
How to Zip Files on iPhone or iPad to Compress into Archives
- Open the Files app on iPhone or iPad
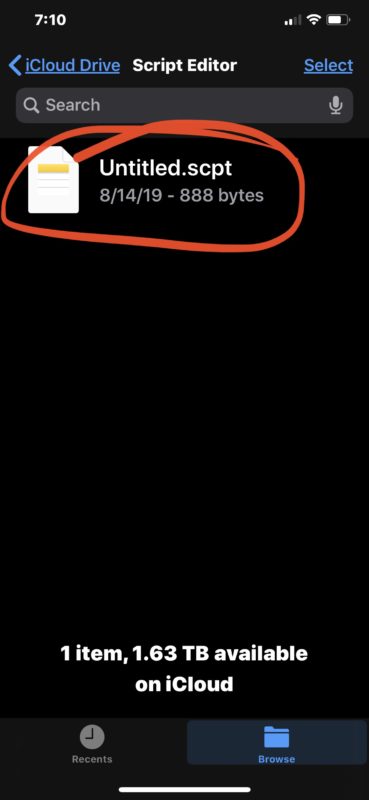
- Navigate to the file or folder you want to create a zip archive from in Files app, it can be locally or on iCloud Drive
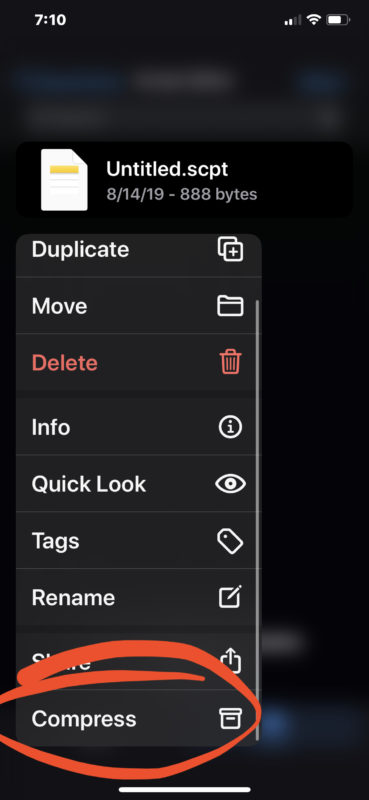
- Tap and hold on the file or folder you want make a zip, then choose “Compress” from the pop-up menu
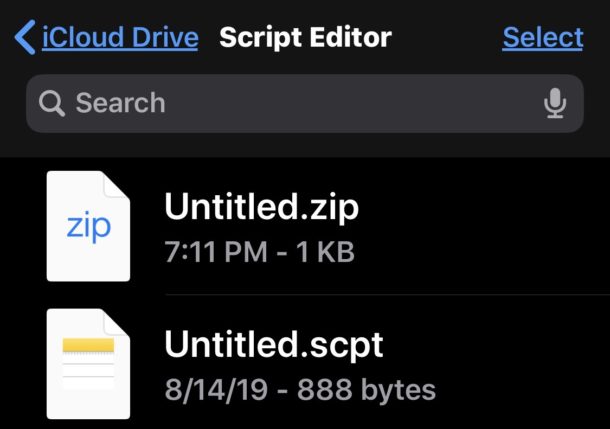
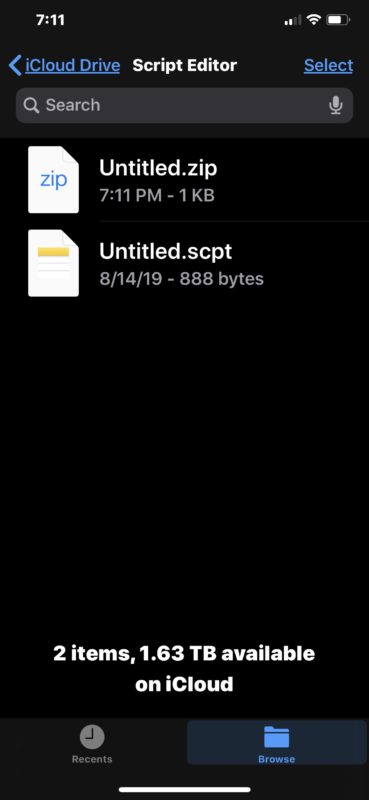
- Wait a moment or few and the freshly created zip archive will appear in the same folder of Files app
- Repeat with other items you wish to create a zip archive for if desired
![]()
Any zip archive can be shared, moved, uploaded, copied, or modified like any other file within the Files app on iPhone or iPad.
The screenshot examples above show a single file being compressed into a zip archive, but it works the same for multiple files stored in a folder. You can always create a new folder in Files app and put items to turn into a zip archive too.
This zip feature was introduced in in modern iOS and iPadOS releases, so you’ll need to be running 13 or later to have the compress and uncompress options for unzip and zip. Earlier versions of iOS could zip (and unzip) files and data through third party applications, whereas only the latest releases have the native compress and uncompress options in Files app.
Of course these capabilities are not limited to iPhone and iPad. If you’re a MacOS user, you’ll find that both making zip files on Mac and opening zip files on Mac is super easy, with the former being a simple contextual menu option, and the latter just being a matter of opening the file like any other in Finder.
And naturally you can also easily unzip zip archives on iPhone and iPad through the similar Files app contextual menu.
Files app is turning into a more powerful file system browser over time with a lot of features that have long existed on the desktop side of things. Don’t miss other tips about Files app and if you use iPadOS with an external keyboard then you’ll likely find these handy keyboard shortcuts for Files app on iPad to be worth knowing too.
For what it’s worth, if you don’t use the Files app or you don’t want to for some reason or another, then you can still use third party apps for zipping and unzipping files in iOS and iPadOS, it’s just that’s no longer necessary now that the compress and uncompress features are built natively into this software.
If you know of any other handy tips or tricks for working with zip files on iPhone and iPad, share in the comments!

You have to hit the select button first in order to have the compress option available to you