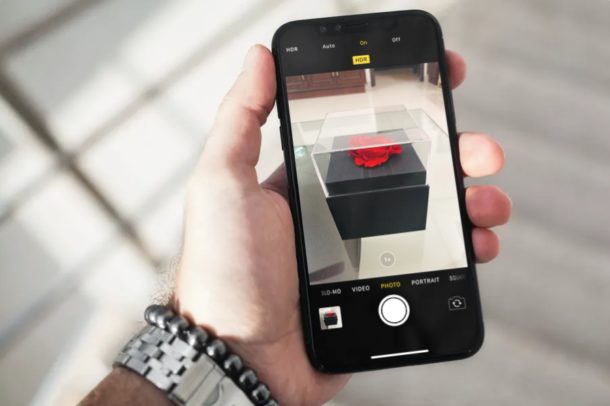
How to Use HDR on iPhone & iPad Camera
High Dynamic Range (HDR) is an imaging technique that has been available on smartphone cameras for a while now. Essentially, the HDR feature aims to make the photos you capture on your iPhone or iPad as realistic as possible.
You might already be aware of all the 4K TVs that are coming out with HDR capabilities, but although the ultimate goal remains the same, HDR in photography works in a different way compared to that of a television. When you use HDR on an iPhone or iPad camera, multiple photos are taken in quick succession. All of these photos are taken at different exposures and combined together to form the resultant HDR image with better color accuracy and detail, and this all happens automatically in the background on the device itself with no user involvement.
Interested in taking advantage of this technique to capture better pictures with iPhone or iPad? Read on to learn how you can use the HDR feature on an iPhone or iPad camera.
How to Use HDR on iPhone & iPad Camera
When you normally use the stock Camera app on your iPhone or iPad, you wouldn’t notice the HDR option. This is because all new devices are set to automatically capture HDR images by default. For most users, that’s fine to leave that way, and just enjoy the effects of HDR producing better color and lighting for your photos.
However, for users who want a bit more control or to have manual controls with HDR, you can change a camera setting to have full control over the HDR feature and use it only when you need it on an iPhone or iPad. Simply follow the steps below if that interests you.
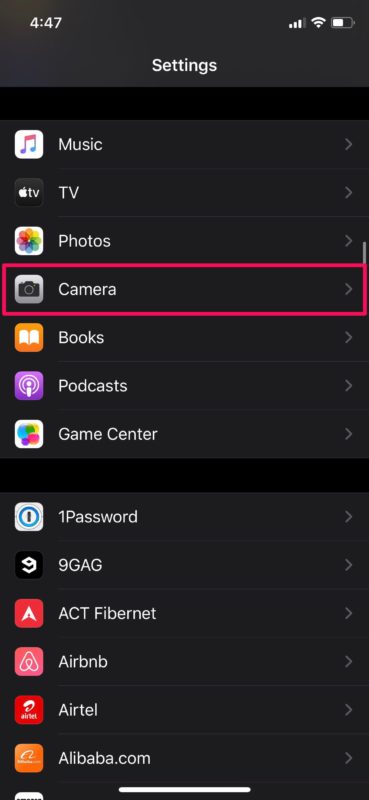
- Head over to “Settings” on your iPhone or iPad. Scroll down and tap on “Camera”.

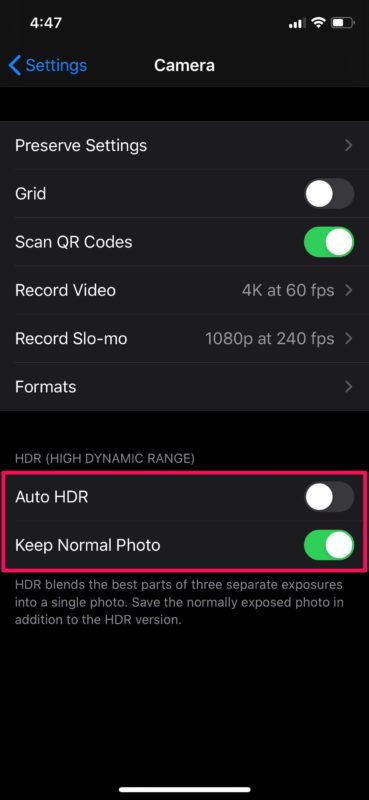
- Next, under the HDR section, turn off Auto HDR and set “Keep Normal Photo” to enabled. This allows you to compare the HDR image to the normal image, so you can have a better understanding of how this feature works.
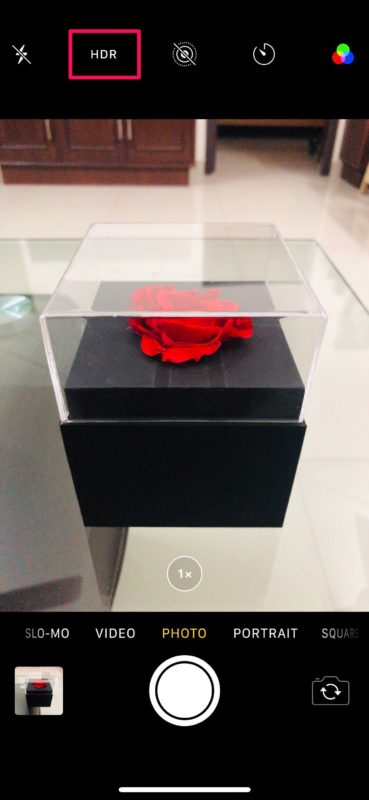
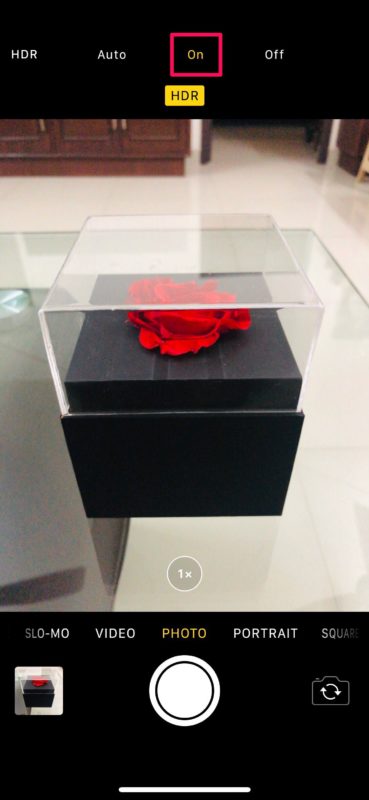
- Now, open the stock “Camera” app on your iPhone or iPad. Tap on the “HDR” option located at the top.
- You’ll notice that your Camera app is still set to automatically enable the HDR feature, Tap “On” to manually enable it and take a picture.
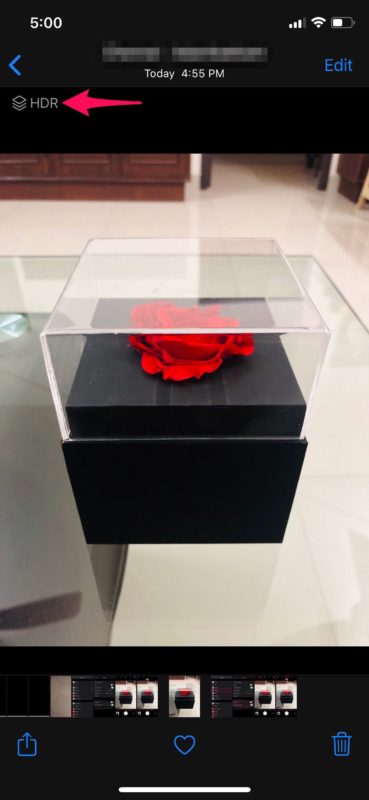
- As you can see here, a photo that’s captured in HDR will have the HDR icon when you view it within the default Photos app. Since you have “Keep Normal Photo” enabled, you can swipe right to view the same picture without HDR for comparison.
That’s it, now you can manually control when to capture HDR photos on your iPhone and iPad. Nice and easy, right?
When you compare the results side by side, you’ll notice that the HDR image is properly exposed and looks closer to real life with better detail & color accuracy.
Out of the three photos that are taken in rapid succession with HDR, one of them is taken at a normal exposure and the other two are underexposed & overexposed images. These are blended together to form the final image with an increased range between light and dark, also known as the contrast ratio.
By setting HDR to On, your iPhone or iPad device captures a HDR image every time you take a photo, but the feature is a hit or miss depending on your surroundings. However, by setting it to Auto, your iPhone or iPad automatically determines if a photo would look better with or without HDR. That being said, HDR generally works best outdoors for capturing landscapes, and it typically shines where there is mixed lighting that would otherwise produce an either over-exposed or under-exposed image.
If you own an iPhone 11, XS, XR, or newer iPhone, you can take advantage of the Smart HDR feature that Apple has to offer. It improves upon the existing HDR feature to bring out more details in the shadows and highlights of a photo. Smart HDR is an automatic process, but it can be disabled if you want manual control over your pictures on device that support the feature.
We hope you managed to capture some stunning photos and landscape images with HDR enabled. Were you able to understand the HDR imaging technique better, and why it’s useful? What other advanced imaging techniques do you use on your iPhone or iPad? Share your thoughts, comments, and experiences down below.

Are the three exposures kept as three layers that can be split out and manipulated separately in software? Or do they get amalgamated by the camera into one layer and a final image? Thanks.
I think you may be running an older or, at least, different iOS on your camera. On iOS 13.7, and I think before this too, the only setting for HDR is under “Smart HDR” which can be toggled Off or On.
What tells me that things are different, is that you appear to have no settings for “Composition” and its sub-sections.
What you nicely illustrate above is not what is available on the current iOS.
Some of HDR settings actually depends on the physical camera of the iPhone model, not the iOS version.
So this looks like on iPhone X if I had to guess, but iPhone 11 has what you describe and probably XS etc too.
Smart HDR is a newer feature on the latest iPhone models, HDR in general is available on all semi-new iPhone though