How to Add Widgets to iPhone Home Screen
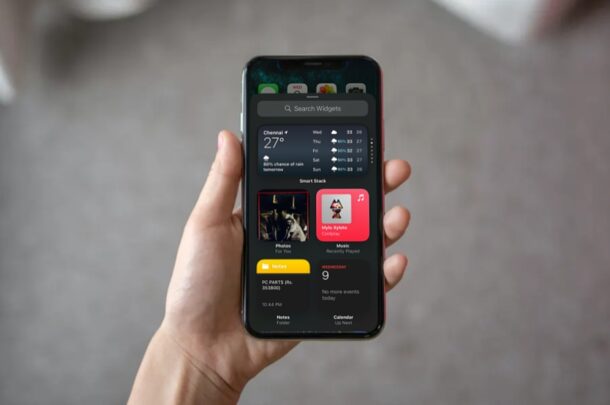
You can now add widgets to the home screen of iPhone. This is one of the biggest changes to iOS 14 visually, and the ability to bring custom widgets to your home screen is already quite popular, making it one of the best new features in iOS 14. If you see a widget on the home screen of an iPhone, you can be certain that it’s running iOS 14 or later.
For the longest time, the iPhone’s home screen has looked pretty much the same with grids of apps and folders, making it not just boring but also limiting in terms of functionality. If you’ve ever used an Android device before, you’ll understand how customizable the home screen is. However, Apple intends to change the game altogether by allowing users to add widgets to the home screen and resize them according to their preferences.
Are you looking to try out these widgets and change your home screen’s appearance? We’re here to help. In this article, we’ll guide you through the necessary steps to add widgets to your iPhone home screen as quickly as possible.
How to Add Widgets to iPhone Home Screen
Accessing all your widgets and adding them to the home screen is actually a lot easier than you may think. Make sure your device is running iOS 14 or later and simply follow the steps below to get started.
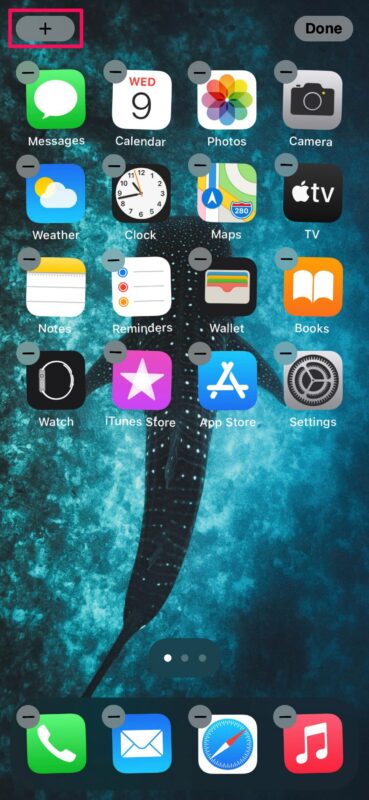
- Long-press anywhere on the home screen to enter jiggle mode. Now, tap on the “+” icon located at the top-left corner of your screen.

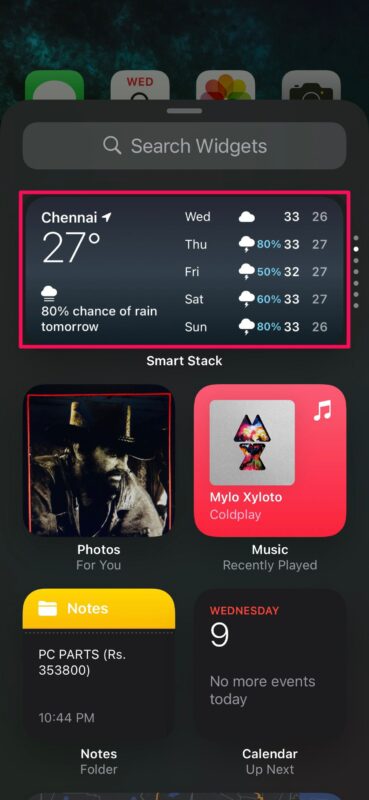
- This will take you to the Widgets gallery. You can either use the search bar or scroll through to find a specific widget. For this instance, we’ll be using Apple’s signature “Smart Stack” widget. Tap on the widget to access more options.

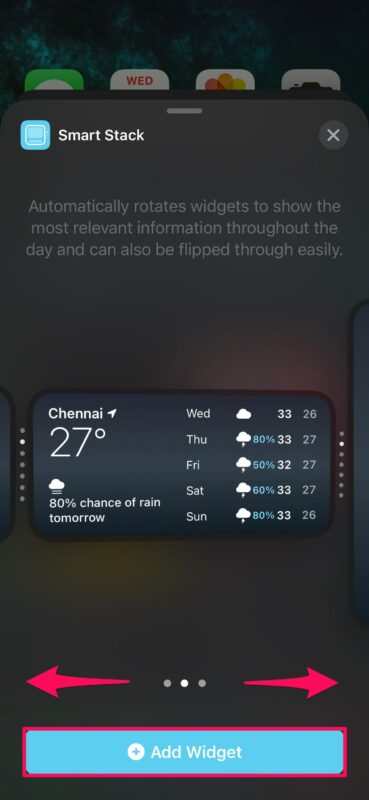
- Now, you’ll be able to customize the size of your widget. You can choose between 2×2, 2×4, and 4×4 grid styles for your widget. Once you’ve selected a preferred size, tap on “Add Widget” to add it to the home screen. Alternatively, you can drag and drop the widget anywhere you want on the home screen.

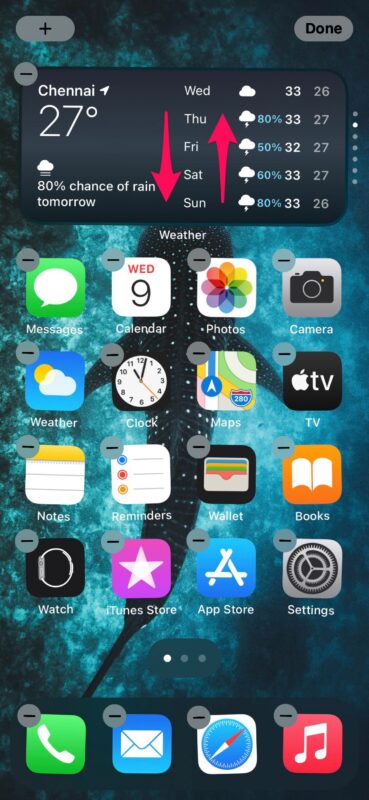
- You can skip this step if you’re using a regular widget. However, if you added Smart Stack to the home screen, you can swipe up or down on the Smart Stack to switch between various widgets. By default, it automatically rotates widgets to show you a variety of information throughout the day.

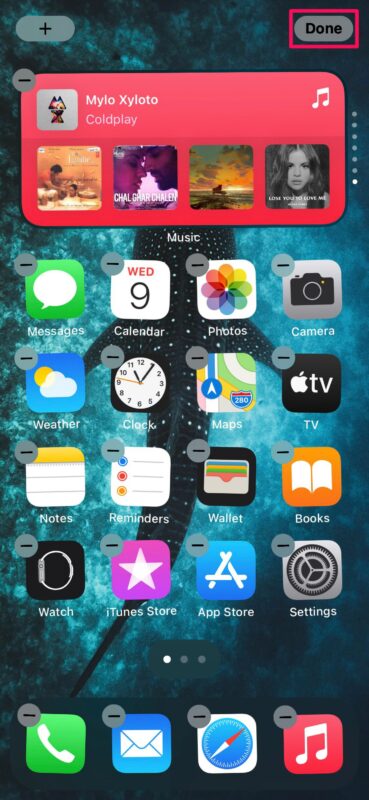
- Once you’ve decided the positioning of the widget, you can tap on “Done” to save the changes.

There you go. You’ve successfully learned how to add widgets to the home screen on your iPhone.
Until now, all the widgets were limited to the Today View section that’s accessible by swiping right from either the lock screen or home screen. Thanks to iOS 14, you don’t have to head over to a dedicated section just to view relevant information via widgets.
To delete or remove a widget at any time, just long-press on the widget and choose “Remove widget”. Certain widgets like “Weather” and “Smart Stack” also give you the option to edit the information displayed when you long-press on them.
App Library is another big visual as well as functional addition that was introduced with iOS 14. Users can take advantage of App Library to hide pages of apps and clean up the home screen. Not just that, you can automatically move the apps you install to this dedicated section where they are sorted based on the category.
We hope you managed to change the way your home screen looks by adding your favorite widgets. Have you been enjoying the new changes in iOS 14? What’s your favorite feature so far? Do share your valuable opinions and experiences in the comments section down below.


iOS 14 is almost as bad as OS Big Sur. It would be nice to have the option to disable useless features, like the App Library. I’m happy with being able to dismiss widgets. I’m also happy that someone came up with a way to disable that horrible Photos app that launched every time I tried to transfer pictures to work on them in Photoshop. Now, if I could only get Big Sur to not look like a 3-year-old designed the icons.
Doesnt seem to work on the new iphone SE. :(
All so good, but how does one get clock alarm displayed? Used to be in “up next” with Calendar, but not impossible now
Was one of the most useful things…