How to Enter & Exit DFU Mode on iPhone SE (2020 model)

Rarely, you may need to put an iPhone SE into DFU mode as a troubleshooting method or recovery method. This shouldn’t be necessary with any regularity, but if you have some particular difficulties with the device where it appears completely unusable (bricked), or fails during the middle of a software update and the device is no longer usable, even after forced restarting, then DFU mode may be a helpful solution.
Typically, putting your iPhone SE into recovery mode and restoring or updating it using iTunes or Finder should resolve most of the issues. However, if the problem persists after using Recovery Mode, then you can go a step further with DFU mode, which is a lower level restore capability than Recovery mode. DFU stands for Device Firmware Update and it’s used to get your iPhone to communicate with iTunes without the software automatically loading the latest version of iOS on to your device.
Unlike the traditional recovery mode, you can also choose the firmware you want to install on your device with DFU mode, assuming it’s still being signed by Apple anyway. So whether for troubleshooting or downgrading, read on to learn you can enter & exit DFU mode on the newest iPhone SE, the model released in 2020 and still available now.
How to Enter DFU Mode on iPhone SE (2020 model)
Before you go ahead with the following procedure, connect your iPhone SE to a Mac or Windows PC running the latest version of iTunes using a Lightning to USB cable. Also, make sure you have your data backed up to either iCloud or iTunes on the computer, in order to avoid permanent loss of data.
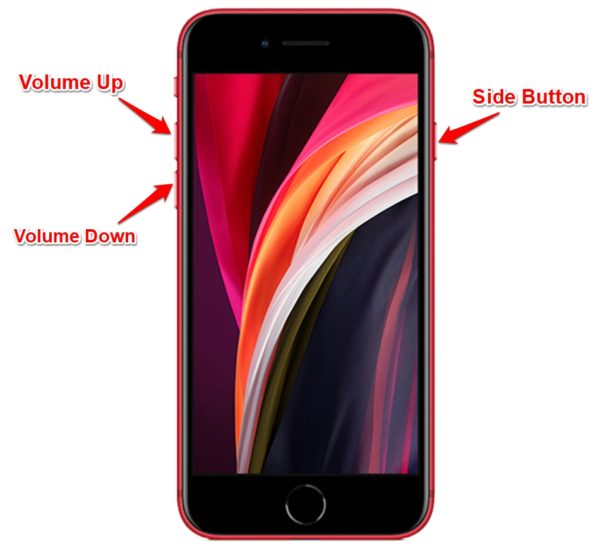
- First, press and release the Volume Up button on your iPhone. Immediately after, press and release the Volume Down button. Now, press and hold the side/power button for about 10 seconds until the screen turns black.

- Continue to hold the side button, but now, hold the Volume Down button too for 5 seconds. Now, take your finger off the side button and keep holding the Volume Down button for another 10 seconds. The screen will remain black.
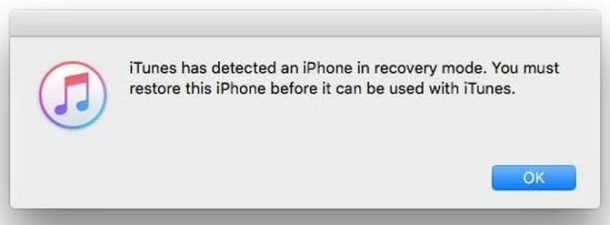
Once you open iTunes (or Finder on Mac) on your computer, you’ll get a pop-up with a message stating “iTunes has detected an iPhone in recovery mode. You must restore this iPhone before it can be used with iTunes”. At this point, you can choose to restore your iPhone SE’s software, or restore from a backup. It’s up to you.
Remember, you can lose all data on a device if you restore it as new, so don’t do that if you don’t have full backups and backups of all important data made.
How to Exit DFU Mode on iPhone SE (2020 model)
If you have no intention to restore your device or if there are no major issues, you can back out of the DFU mode by following these steps carefully.
- Press and release the Volume Up button on your iPhone.
- Immediately after, press and release the Volume Down button.
- Now, press and hold the side/power button until you see the Apple logo on the screen.
You must follow the above steps in quick succession to properly exit DFU mode on your iPhone.
Leaving DFU Mode puts the iPhone back to where it was before it entered the DFU mode. Therefore, if you were facing any serious issues to the point that your device wasn’t usable, you may need to restore it with DFU mode (or Recovery mode). However, there’s still a chance that your iPhone boots up normally as intended after exiting DFU mode, so you could get away without restoring it.
If you’re interested in learning about DFU mode beyond the new iPhone SE, then you can also learn about using DFU Mode on other iPhone models, as well as iPad devices:
- How to enter DFU mode on iPad Pro (2018 and later)
- How to enter DFU mode on iPad with Home buttons, including iPad, iPad mini, iPad Air, and older iPad Pro
- How to enter DFU mode on iPhone XS, iPhone XR, XS Max
- How to enter DFU mode on iPhone X, iPhone 8, iPhone 8 Plus
- How to enter DFU mode on iPhone 7, iPhone 7 Plus
- How to enter DFU mode on older iPhone models
- How to enter DFU mode on Apple TV
We hope you were able to familiarize with the way iOS devices like the iPhone SE handle recovery. Did the DFU mode help you resolve the software-related issues that were affecting your device? Do share your thoughts and experience in the comments section down below.
