How to Transfer Music from Windows PC to iPhone
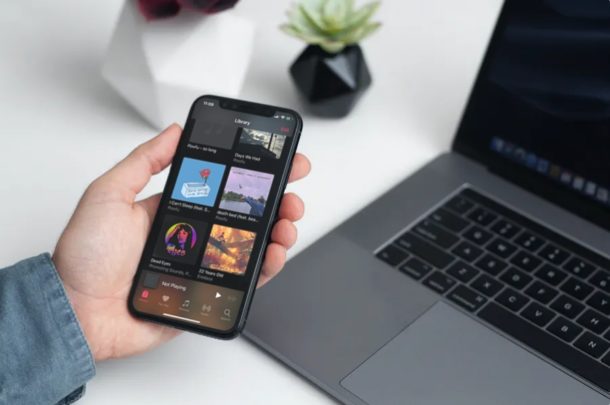
Have music on your Windows PC that you want to listen to on iPhone? Not everyone is an Apple Music subscriber or uses iCloud Music Library for managing their music. If you’re the kind of person who prefers to manually manage your song library, you’ll want to use iTunes to transfer music from your Windows PC to your iPhone.
Apple’s iTunes is a media library and device management utility software for use with iOS devices. It is available on both Windows and Mac. Until iCloud and Apple Music gained traction, most Apple users had to resort to iTunes in one way or the other, whether it’s to sync their apps and music, or to restore their devices from a backup.
Using iTunes might be a classic method, but if you’re not an Apple Music subscriber, and you have a music library you want to transfer to your iPhone (or iPad or iPod for that matter), this is certainly the way to go. In this article, we’ll be discussing exactly how you can transfer music from Windows PC to iPhone or even iPad.
How to Transfer Music from Windows PC to iPhone
Before you go ahead with the procedure, make sure you’ve installed the latest version of iTunes on your computer. Also, check if you have updated your iPhone drivers on your Windows PC to avoid running into connectivity issues. Now, without further ado, let’s take a look at the necessary steps.
- Open iTunes on your Windows PC.

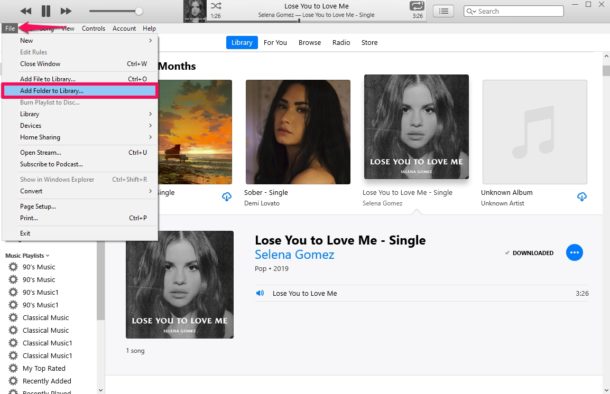
- Click on “File” located at the top-left corner of the iTunes window and choose “Add Folder to Library”.
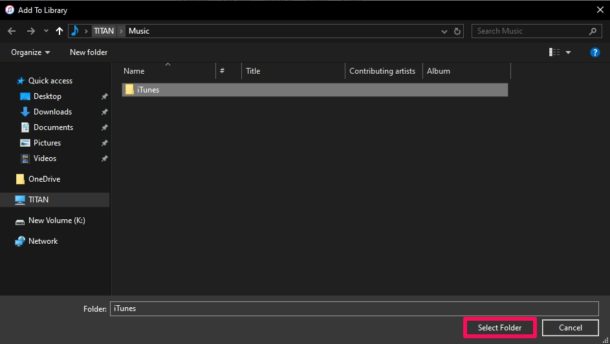
- This will open a Windows Explorer menu. Browse and select the folder where all the songs you want to transfer are stored. Click on “Select Folder”. This will add all the songs to your iTunes library. If you just have one or two songs to add, you can simply drag & drop the audio files into iTunes.
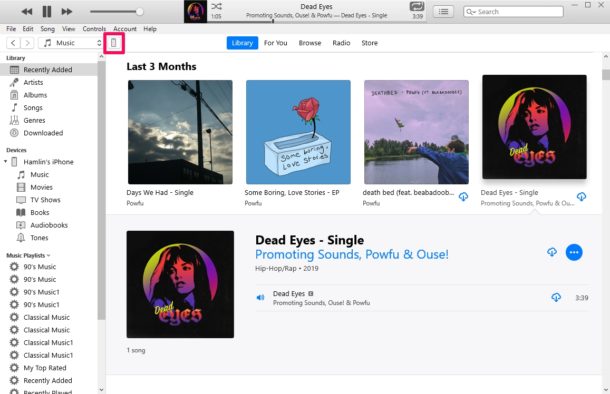
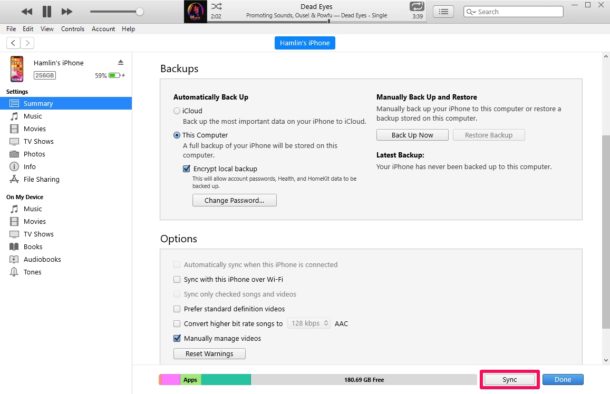
- Next, connect your iPhone or iPad to the computer using the included USB to Lightning/USB-C cable. Then, click on the iOS device icon located in the toolbar as shown in the screenshot below.
- Now, simply click on the “Sync” option located at the bottom to transfer all the songs you just added to your iTunes library, from your PC to iPhone. The syncing process could take a few minutes to complete, but you’ll be able to see its progression at the top.
That’s about it, pretty straight forward, right? As for iTunes, this is the way to transfer music from your Windows PC to an iPhone or iPad, though there are third party apps that will accomplish the same task too but that’s a topic for another article.
This is one way to transfer songs to your device using iTunes. You can also take advantage of the drag and drop method to quickly copy music to your iPhone, iPad or iPod Touch. However, you’ll need to disable iCloud Music Library before you’re able to use this feature.
Apple’s iCloud Music Library allows you to transfer songs that are stored on your computer to your iPhone without having to use cables. That’s right, the feature makes use of your Apple account to wirelessly sync the music you add to your iTunes library across all your Apple devices. However, you’ll either need to be an Apple Music subscriber or pay for iTunes Match, which costs an extra fee aside from the standard iCloud plan.
If you’re already subscribed to either of these services, make sure you’ve enabled the sync library feature on your iPhone or iPad and turn on iCloud Music Library within iTunes on your Mac or Windows machine to take advantage of this nifty feature.
Hopefully you managed to manually copy the songs stored on your Windows PC to your iPhone and iPad using iTunes. How does this procedure compare to the drag and drop method? Will you be subscribing to Apple Music or iTunes Match to access iCloud Music Library? Let us know your thoughts and opinions in the comments section down below.
