How to Enable Persistent Notifications on iPhone & iPad
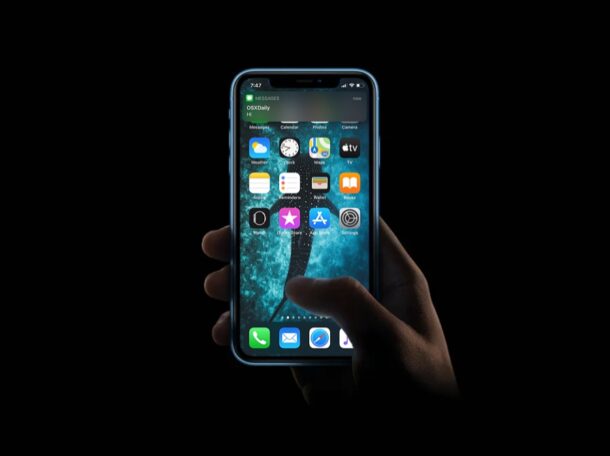
Have you ever been at a point where the notification pop-up disappeared before you could even finish reading the message? You’re not alone, but if this bothers you then it can be fixed by enabling Persistent Notifications on iPhone or iPad.
Typically, when you receive a notification on an iOS or ipadOS device, the preview lasts for a few seconds giving you just enough time to fully read the notification message. You’re more inclined to miss this if you’re busy working on something else. This is exactly where Persistent Notifications come in handy. Unlike regular previews, persistent notifications stay on the screen indefinitely unless you manually swipe it away or open another app.
How to Enable Persistent Notifications on iPhone & iPad
Turning on persistent notifications is a fairly simple and straightforward procedure on an iOS device. Just follow the steps below to get started.
- Head over to “Settings” on your iPhone or iPad.

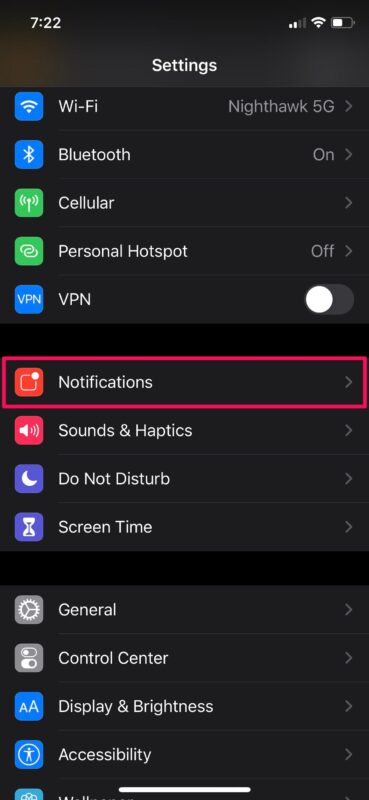
- In the settings menu, scroll down and tap on “Notifications”.

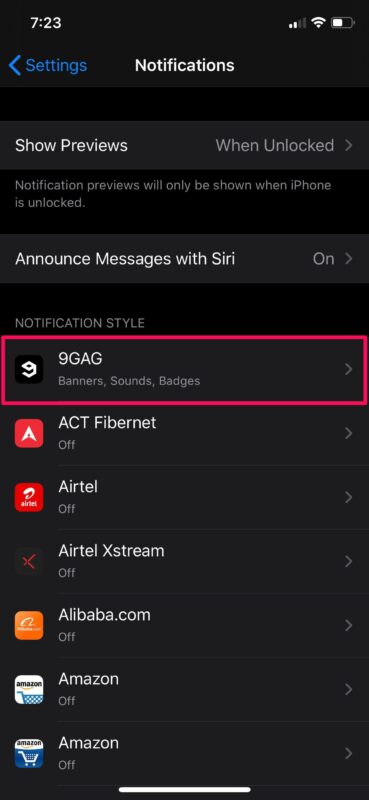
- Here, you’ll see a list of all the apps that are stored on your device. Simply choose the app that you want to enable Persistent Notifications for, as shown below.

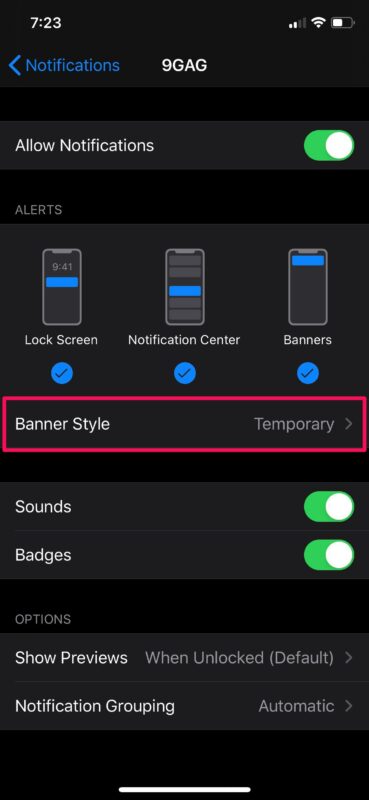
- Next, tap on “Banner Style” located under the Alerts section.

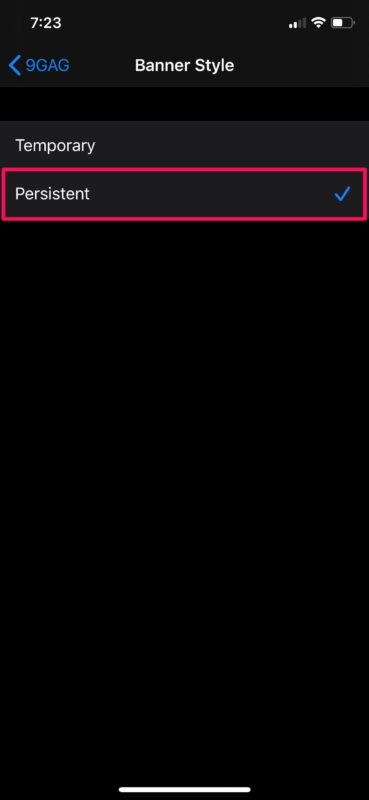
- Now, select “Persistent” to make sure the notifications you receive from this app stay at the top of your screen.

There you go. Now you know how to enable and use persistent notifications on your iOS device. Pretty easy, right?
Be mindful that you can only enable this banner style on a per-app basis for now, as iOS and iPadOS does not feature a global toggle to enable Persistent Notifications for all apps simultaneously. However, it’s possible Apple could add that functionality in future iterations of iOS at some point down the line, but who knows?
When you receive a notification from an app with persistent notifications enabled, it will stay at the top of the screen until you switch to a different app, exit to the home screen or simply just lock your iPhone or iPad. This makes it easier to get back to your messages, emails, or any other form of notifications whenever you’re ready to, without having to worry about missing them. These notifications are perhaps best suited for use with apps you frequently use for calls, messaging, emails, social networking, etc.
This feature isn’t exactly new, as it has been available on iPhone and iPad since the release of iOS 11. However, macOS devices have had access to this functionality for way longer. Feel free to try it out if you own a Mac too.
We hope you were able to enable persistent notifications for the apps that you mostly use on your iOS or iPadOS device. What are your thoughts on this handy feature? Did it help you to get back to your notifications and messages? Do let us know your thoughts and opinions in the comments.


What’s best way to back up and wipe a Mac Book Pro before trading it in for a new Mac Air – then uploading the backup into the new Mac Air?
Great question Rick!
1: Backup the Mac with Time Machine: https://osxdaily.com/how-to-backup-a-mac-with-time-machine/
2: Reset and erase the old Mac (only after a full backup, and personally I’d recommend only doing this after you’ve got the new Mac setup and configured too) to factory settings: https://osxdaily.com/howto-reset-mac-to-factory-settings/
3: When you get the new Mac, you can choose to transfer data directly from the Time Machine backup during the setup process.
It’s pretty easy with Time Machine!