How to Set Time Limits on Websites on Mac

Want to set a time limit for how long a specific website is usable on a daily basis from a Mac? Maybe you’d like to set time limits for a variety or websites for a kids Mac, for example, limiting YouTube.com to 30 minutes a day? If you’re interested in setting up time limits for web sites, read on!
Screen Time is a great feature that’s seamlessly integrated into macOS, iPadOS, and iOS devices by Apple, giving users a way to keep track of their device usage while doubling as parental control tools. The option to set time limits for websites is one such parental control tool that could prove to be handy if your kid is spending all day watching videos on YouTube, or chatting on Facebook. Fortunately, you have complete control over how long a website can be accessed from Safari on the Mac.
Read on and we’ll be covering using Screen Time to limit website usage on a macOS computer.
How to Set Time Limits on Websites on Mac
First of all, you need to make sure that your Mac is running macOS Catalina, Big Sur, or later, since Screen Time isn’t available on older versions. Assuming you meet the system requirements, let’s take a look at how this work:
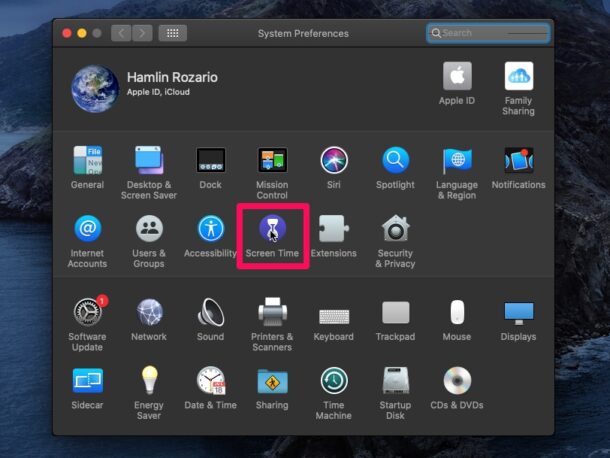
- Head over to “System Preferences” on your Mac from the Dock, or via the Apple menu

- This will open System Preferences on your Mac. Here, choose “Screen Time” to proceed further.

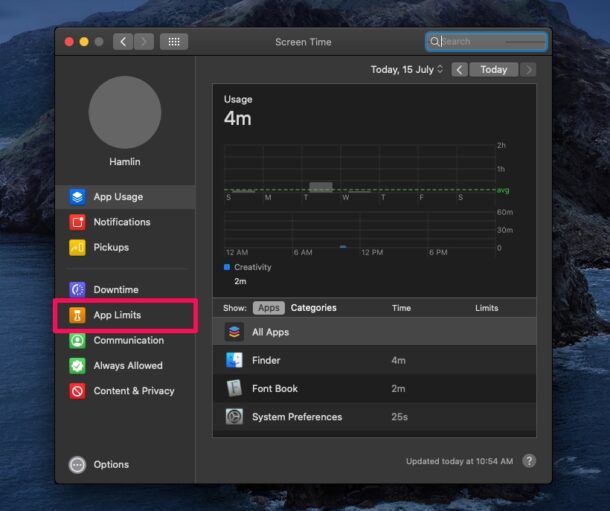
- This will take you to the app usage section in Screen Time. Click on “App Limits” located in the left pane.

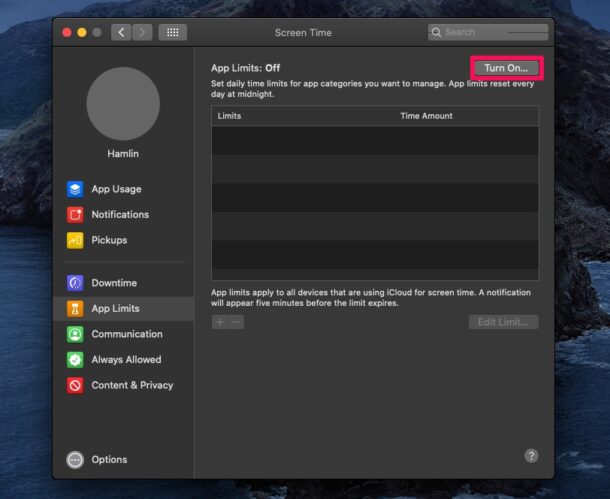
- You might notice that App Limits is turned off. Click on “Turn On” to start using this feature.

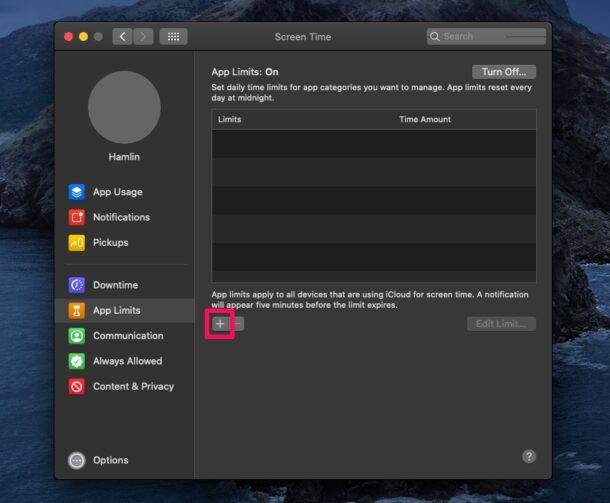
- Next, click on the “+” icon located in the right pane to add a limit to a specific website.

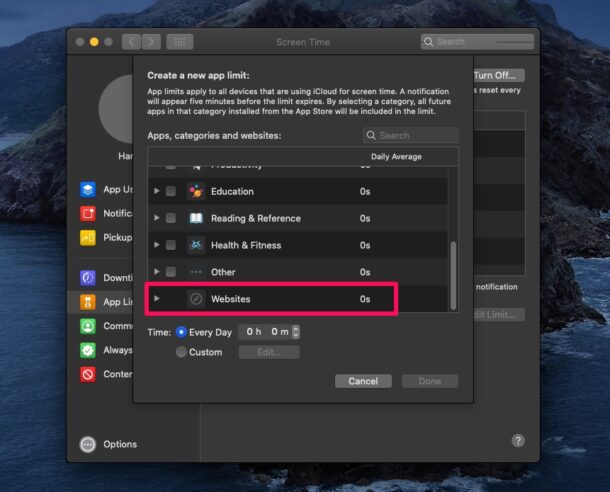
- Here, scroll down to the bottom and expand the “Websites” category.

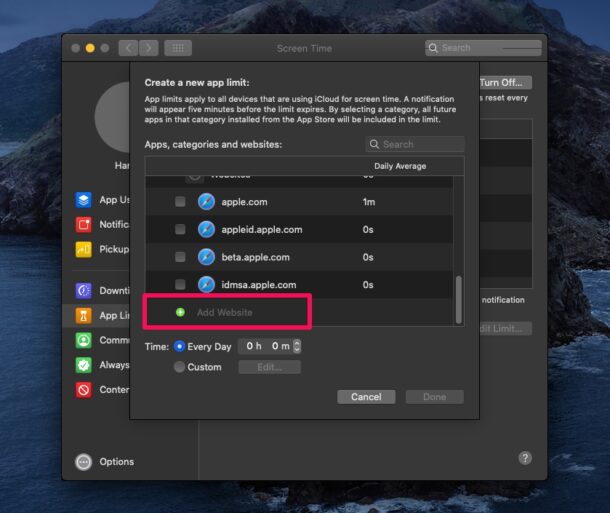
- Now, you’ll be able to view a bunch of websites that were accessed from the Mac. You can either select any of the websites listed here, or manually add a website at the bottom.

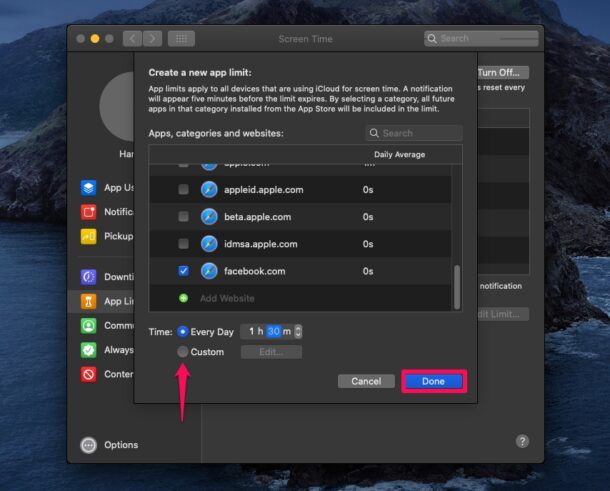
- Once you’ve selected a website, you can set a time limit on an everyday basis or use the custom option to set limits on specific days of the week. Click on “Done” to confirm your changes.

And there you have it, you have used Screen Time to time limit website access on your Mac.
Remember, this applies to Safari. Other web browser apps like Chrome, Firefox, Edge, and Opera would need to be limited separately, either by time-restricting those apps, blocking the app usage in Screen Time entirely, or through their own restriction features (assuming they’re available, this varies per browser).
Thanks to this feature, you don’t have to worry about your kid spending too much time on video-sharing and social networking websites, from the Mac anyway.
It’s a good idea to use a Screen Time passcode and keep updating it frequently to prevent other users from changing your Screen Time settings.
In addition to setting time limits on websites, Screen Time can also be used to add time limits on the apps installed on your machine in an identical way. Also, if you feel like setting time limits on websites isn’t enough, you also have the option to completely block access to specific websites that you don’t want your child to see.
If your kid uses other Apple devices like the iPhone, iPad, or even iPod Touch, you can use Screen Time on iPhone and iPad to set time limits on websites in a similar way too.
Another handy parental control trick; if you’re worried about unauthorized charges to your credit card, you can turn off in-app purchases on an iOS or iPadOS device with Screen Time too.
We hope you managed to set time limits for websites accessed from your Mac without much trouble. What are your overall thoughts on Apple’s Screen Time functionality? What other parental control features do you use to restrict Mac usage? Share your tips, thoughts, and experiences in the comments.



All good and well – but now how do you remove the websites?
I cannot find the option to remove the websites i’ve added.