How to Remove Audio from Video with iMovie on iPhone & iPad

Want to remove the audio track from a video using iPhone or iPad? Maybe the video you captured has too much background noise, or an unwanted conversation, or playing music that you’d like to remove. Or maybe you added background music that you now would rather not have in place, or maybe you just want to mute a video clip before you share it online. Whatever the case, you can easily remove audio from the video clip using iMovie for iOS and iPadOS.
iMovie offers more advanced video editing features than what’s available in the basic integrated Photos app. This makes iMovie perfect for performing more advanced video editing capabilities, like removing audio from clips, replacing audio with music, a voice over, and much more. Apple’s iMovie app is powerful but still a great tool for beginners, and the best part is that it’s free to download from the App Store.
So, if you’re interested in utilizing iMovie to meet some more advanced video editing requirements, we’re here to help. In this case, let’s check out how to remove the audio track from a video by using iMovie on your iPhone and iPad.
How to Remove Audio from Video with iMovie on iPhone & iPad
First of all, you need to install the latest version of iMovie from the App Store, since it doesn’t come pre-installed on iOS devices. Once you’re done, just follow the steps below carefully.
- Open the “iMovie” app on your iPhone or iPad.

- Tap on “Create Project” to start a new video editing project within the app.
- Next, choose the “Movie” option when you’re asked about the type of project you want to create.
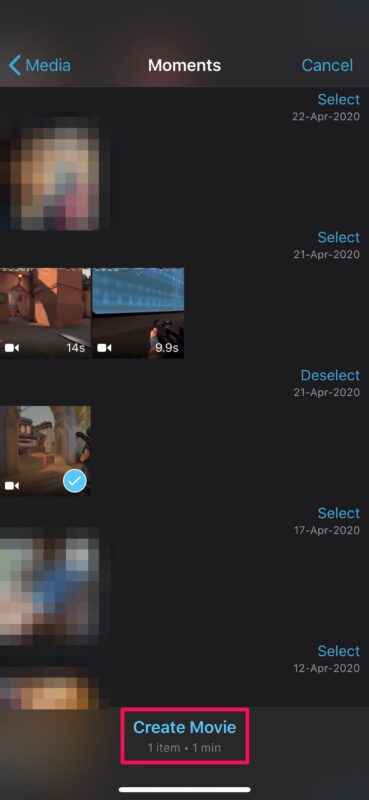
- This will open your Photos library. Now, scroll through your videos and select the clip you want to add to your project. Once you’re done with the selection, tap on “Create Movie” at the bottom of the menu.
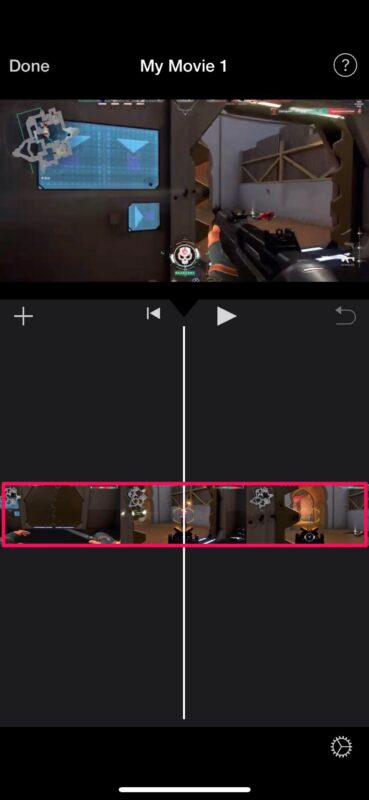
- The video you selected will be added to the iMovie timeline. Now, tap on the clip in your timeline to select it and access more options.
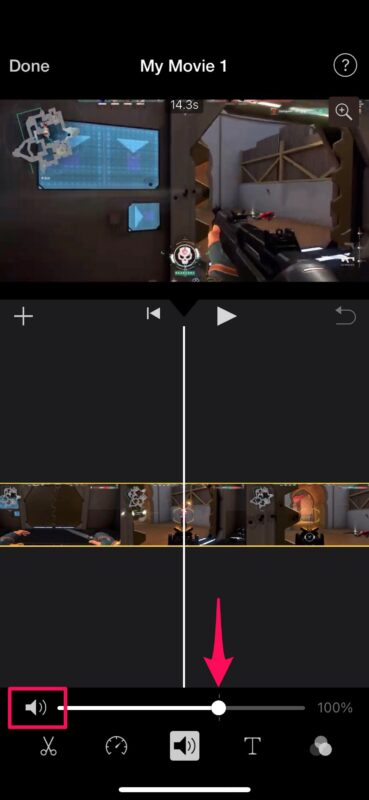
- This will give you access to some video editing tools. Here, at the bottom, you’ll see the volume slider. To mute or remove the audio, just tap on the Volume icon. Or, if you just want to reduce the volume, you can adjust the slider accordingly.
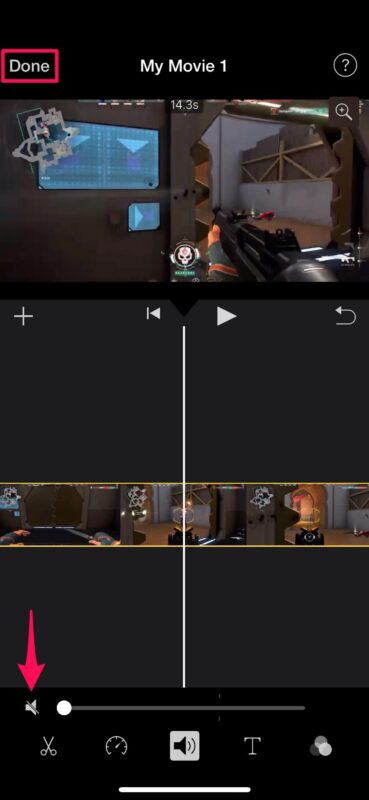
- The Volume icon will now change indicating that the audio has been muted. Now, tap on “Done” located at the top-left corner of the screen to save your project.
- In this step, you can export your project. Tap on the “share” icon located at the bottom, as shown in the screenshot below.
- This will bring up the iOS share sheet. Choose “Save Video” to save the final video clip without any audio in the Photos app.


There you have it. Once you learn how to do this, removing the background audio from a video clip isn’t too difficult.
Note that iMovie must be active in the foreground when the final video is being exported. Depending on the length of the video and the video quality, exporting can take seconds, minutes, or even hours.
Now that you’ve managed to remove the audio from a video, you may be interested in learning how to replace the audio by adding background music to the video in iMovie. This method can be used to add voiceovers as well, right from your iPhone.
In addition to these functionalities, iMovie can also be used of handling advanced video editing tasks like cutting and trimming the video, removing the middle section of a clip, or even combining multiple video clips for making that perfect montage.
While this is obviously focused on iMovie for iPhone and iPad, you can perform the same task on iMovie for Mac if you wish to remove audio tracks from video clips on a computer.
Were you able to remove the audio track from your video recording using the iMovie app? What do you think of using iMovie for video editing tasks? Don’t miss more iMovie tips, and as always be sure to let us know in the comments what your experiences, thoughts, and suggestions are.
