How to Restore HomePod Mini with Mac or PC
Is your HomePod Mini not working? Whether HomePod is not responding at all no matter what you’ve tried, or is apparently bricked, you can try restarting, resetting, or even restoring your HomePod Mini to get it to work.
Unlike the regular HomePod, the HomePod Mini comes with a USB-C charging cable, meaning you can potentially connect it to your computer’s USB-C port. While it cannot be used to transfer content, your computer can be used to restore your HomePod’s software to factory defaults, which may be useful if you’re not able to find your device in the Home app, or if it’s being unresponsive. Restoring the HomePod Mini should fix almost all user-serviceable issues encountered with HomePod, but it’s sort of a troubleshooting method of last resort, long after you’ve rebooted the device, updated HomePod software, reset, and confirmed network connectivity.
Here we will cover how you can restore a HomePod Mini with a Windows PC or Mac.
How to Restore HomePod Mini from Mac or Windows
The steps are pretty similar on both Windows PC and Mac, except for the fact that Windows users will be using iTunes, whereas Mac users will just need to open a Finder window instead. Here’s what you need to do:
- Unplug your HomePod Mini from the wall adapter and connect the USB-C cable to your PC or Mac. Open iTunes if you’re on PC or a new Finder window if you’re on Mac and wait for a few seconds.

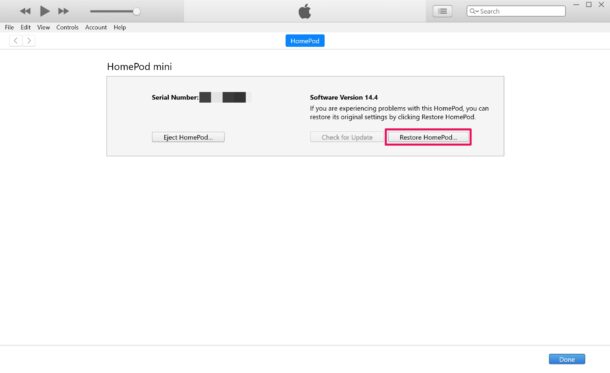
- Mac users will be able to see their connected HomePod Mini on the left pane. Select your device. Regardless of whether you’re using iTunes or Finder, you will see the following options on your screen. Simply click on “Restore HomePod” to begin.
- This will bring up a pop-up window prompting you to confirm your action. Click on “Restore” to proceed.
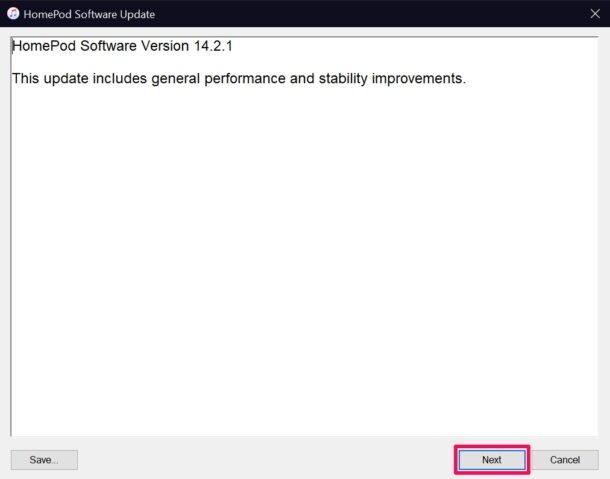
- Now, you’ll be shown the HomePod software version that iTunes/Finder will be installing during the restoration process. This is the firmware version that shipped with your device. Click on “Next” to continue.
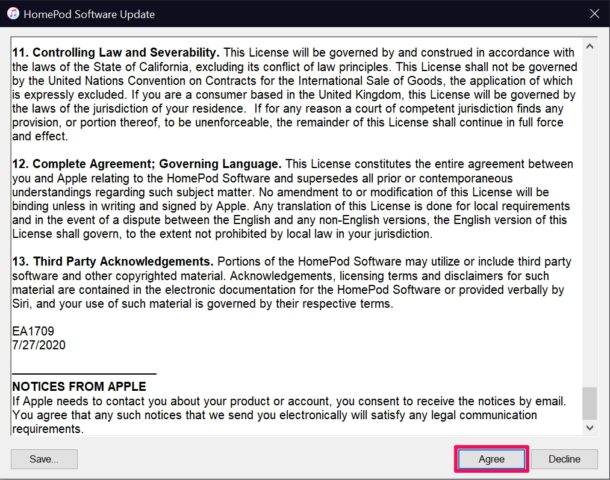
- Next, you’ll need to just “Agree” to the terms.
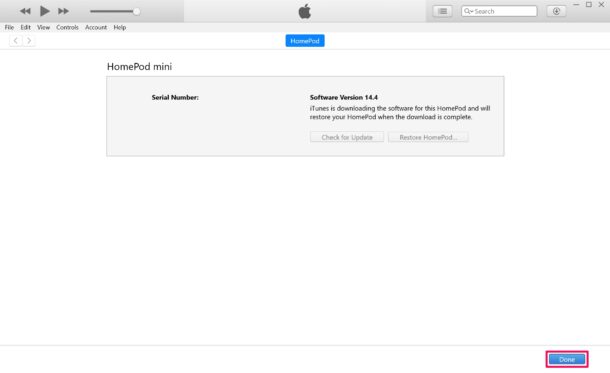
- Finder/iTunes will now start to download the software and once the download is complete, it will restore your HomePod. This could take several minutes, so you need to click on “Done” and wait patiently.
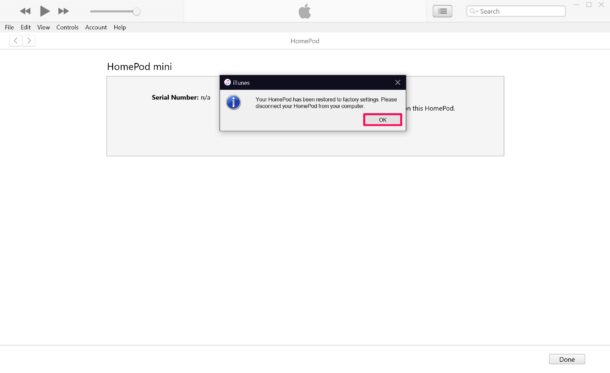
- Once the restoration process is complete, you’ll get a pop-up on your computer informing you of the same. Click on “OK” and exit out of iTunes/Finder.

That’s it. You can disconnect your HomePod Mini from the computer and plug it back into the wall adapter.
Once your HomePod boots up, it will be recognized as a new device by your iPhone or iPad if it’s nearby. You’ll need to go through the initial set-up process all over again.
We understand that a lot of people don’t own a Mac or PC with a built-in USB-C port to take advantage of this restore method. This doesn’t mean you’re completely out of luck. What you can do is purchase a cheap USB to USB-C dongle from Amazon and use it to connect your HomePod Mini.
Restoring your HomePod Mini using a computer should be your last-resort method to fix it. Only proceed with this if you’ve already tried restarting your HomePod/HomePod Mini using the Home app and resetting your unresponsive HomePod using the physical buttons. Of course, you can use this procedure if your HomePod Mini isn’t responding to your gestures and you can’t find it in your Home app too, and you’ve tried everything else.
Hopefully, you were able to get your HomePod Mini to work normally again by restoring the software to factory defaults. What specific issue were you facing with the HomePod that caused you to perform a restore? Share your experiences, tips, and thoughts in the comments.
