How to Change Subtitle Font Size on Mac
Are you not happy with the text size of your subtitles while watching movies and TV shows on your Mac? Don’t worry. Regardless of what app you’re using to watch video content, you can change your subtitle font size within a matter of seconds in macOS.
Although most people use the default setting for subtitles, some people prefer to have larger text sizes so that they’re not straining their eyes to read subtitles while watching a movie or binging a TV show on their Mac, whether through Apple TV+ or Netflix or whatever else you’re using.
If you’re looking to customize the size of subtitles on the Mac, then read along.
How to Change Subtitle Font Size on Mac
Changing the text size for subtitles is a pretty simple and straightforward procedure on macOS devices. This applies to any app that displays subtitles during video playback on your Mac. Just follow the steps below to get started.
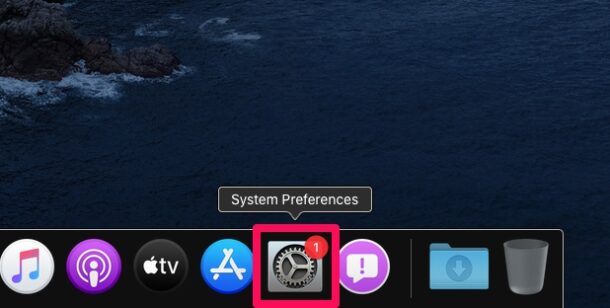
- Head over to “System Preferences” on your Mac from the Dock.

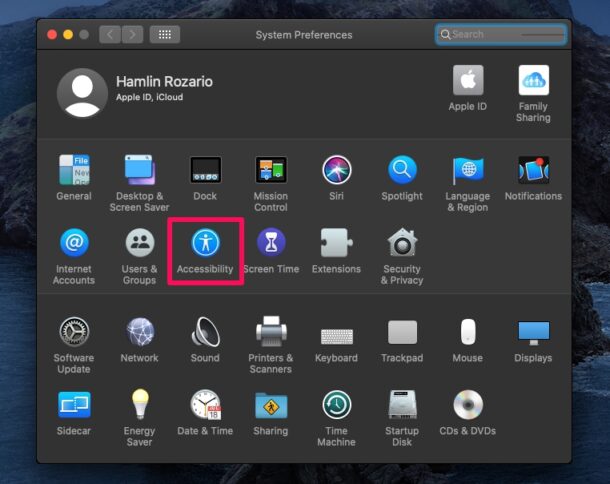
- This will open a new window on your screen. Click on “Accessibility” to proceed to the next step.
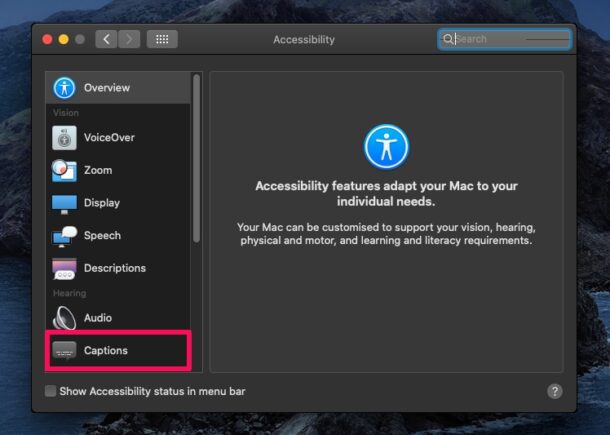
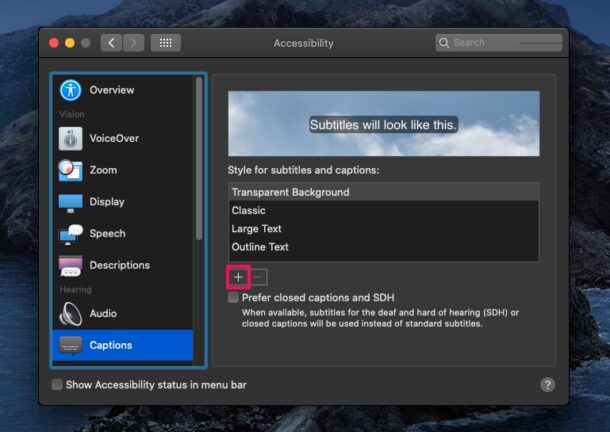
- Here, you’ll be shown a list of all the accessibility settings that are available in macOS. Scroll down and click on “Captions” as shown in the screenshot below.
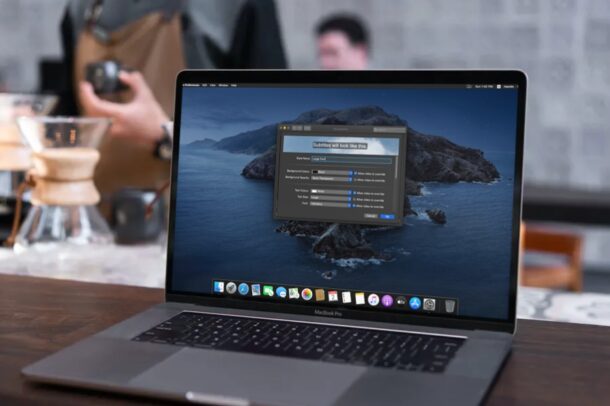
- Now, you’ll be able to see all the four existing subtitle styles. To change the font size, you’ll need to create a new custom subtitle. Click on the “+” icon as shown below to get started.
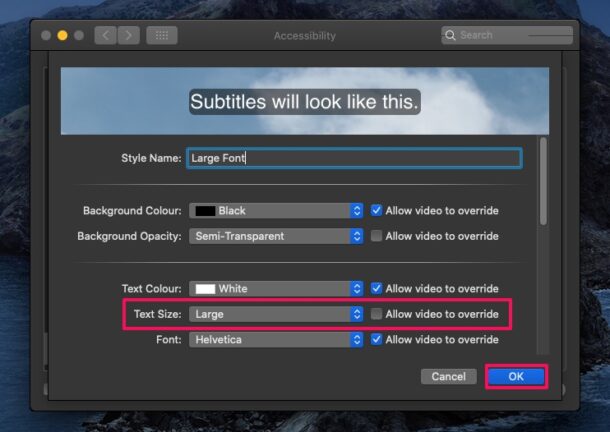
- In this menu, you’ll find the option to change the text size. Click on “Text Size” and use the dropdown menu to select your preferred font size. Make sure “Allow video to override” is unchecked and then click on “OK”.
There you go. Now you know how easy it is to change the text size for subtitles on your Mac.
In the same menu, you can also completely customize how the subtitles look. For example, you can change the background color, opacity, and even use a different color or font for the subtitle text. That being said, the ability to customize your subtitles is considered as an accessibility feature in macOS. These settings greatly help people with poor eyesight skim through subtitles without much strain, as they’re watching a video.
That being said, if you’re looking to take advantage of these customized subtitle styles, you need to make sure that subtitles & closed captions are enabled on your macOS device. If you use subtitles because you have trouble hearing, you need to choose “SDH” from the list of available subtitles. SDH stands for subtitles for deaf and hard of hearing, and they differ from regular subtitles.
Do you use other Apple devices like the iPhone or iPad? If so, you might be interested in learning how you can change the subtitle font size on iPhone, iPad, and Apple TV to make it larger. Just like on Mac, you’ll need to make sure that you’ve enabled subtitles and closed captions on your iOS device as well.
We hope you were able to change the text size of your subtitles on your Mac without any issues. What font size did you choose? Did you customize how your subtitles look in any other way? Do share your thoughts and experience in the comments section down below.
