How to Create File Templates on Mac with Stationery Pad

Do you want to make changes to a file or document without affecting the original file? In that case, you might be interested taking advantage of Stationery Pad to easily create file templates on your Mac.
This is a tool that has been available in macOS for years now, but most people aren’t exactly aware of this. Let’s say you’re supposed to work on a file. Instead of manually duplicating a file or making a copy of the file in question and editing that, you can enable Stationery Pad and use Finder to automatically open a template of that file for you which you can immediately start editing without worrying about the original document.
So, want to learn how you can make any document into a template by using the Stationery Pad feature? Let’s take a look at how it works on the Mac.
How to Use Stationery on Mac to Create File Templates
Enabling Stationery Pad for a particular file is actually a pretty simple and straightforward procedure in macOS that uses the Get Info panel. Here’s how it works:
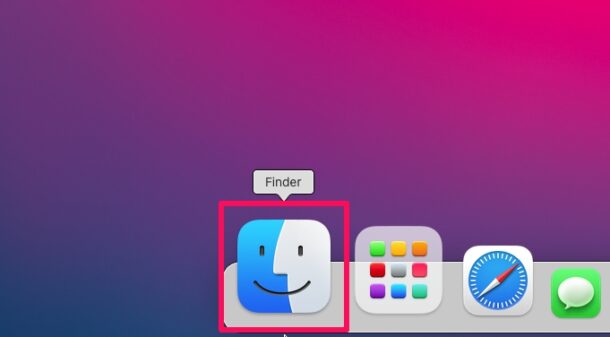
- Click on the Finder icon in the Dock to open a window and browse for the desired file.

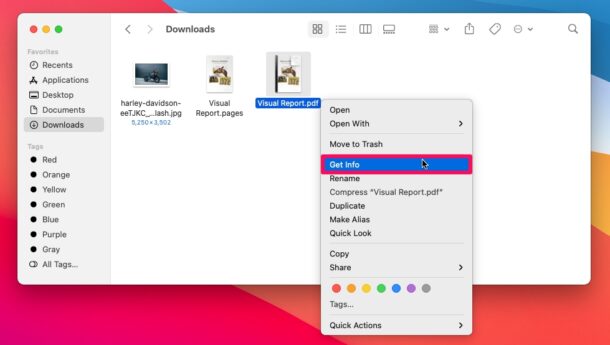
- Once you’ve found the file to work on, right-click or Control-click on the file and choose “Get Info” to get started.

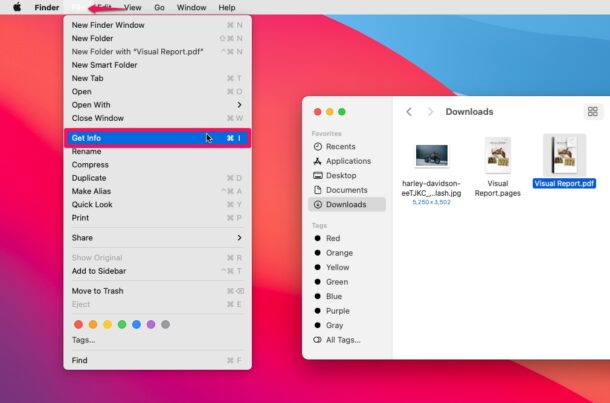
- Alternatively, you can select the file, click on “File” from the menu bar and choose “Get Info” from the dropdown menu to do the same.

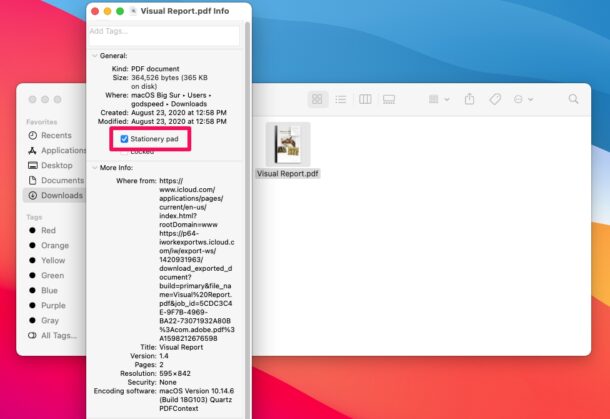
- This will give you access to all the file details. Here, check the box for “Stationery Pad” and close the window.

- Now, when you click on the file, a copy or template of the file will open up instead of the original file. You can start editing this particular document and save it without overwriting the original file.

There you have it, you’ve now created file templates using the Stationery Pad feature on your Mac.
Changes can be done as many times as you want, since every time you click on it, only the copy or template will be opened, as long as Stationery Pad is enabled. Of course, you can take the traditional route and make a copy of the file manually instead, but this Stationery approach is certainly more convenient if you’re going to be working on the file multiple times.
Making Edits to the Stationery Template
If you want to edit the original file later on at some point, make sure you follow the above steps and uncheck Stationery Pad. Then, simply click on the file, make the edits necessary and save it just like any other file.
Stationery Option isn’t Available?
Can’t find the Stationery Pad option in the file info section? In that case, you’ll need to make sure that you’ve selected an editable file and not a folder or alias. You can check if the file you’ve selected is an alias by looking for a curved arrow in the lower-left corner of its icon.
Did you create a stationery template of a document from your Mac with this feature? Do you think using Stationery Pad is easier than manually creating a copy of the file? Make sure to share your valuable opinions and experiences in the comments section down below, and drop any hints or tips of your own too!


Just looked and it doesn’t have to be an Apple app file. This is marvelous.
Does this work with any type of file, for example, Photoshop?
(I’m a few hundred miles away from my Mac, or I’d just try it and see!)