How to Connect USB Devices to macOS VirtualBox VM
Did you manage to set up a macOS virtual machine on your Windows PC only to realize that your USB devices aren’t showing up in it? While running macOS in a guest environment with a tool like VirtualBox is one thing, configuring it and making proper use of all the available features is another.
It’s no secret that a lot of Windows users are interested in trying out Apple’s operating system to some extent, but a few take that first step and use a tool like VirtualBox to actually install a macOS virtual machine and experience it first-hand. Having said that, most people who haven’t installed a virtual machine before run into problems while interacting with the guest OS, and connecting USB devices is one of them.
Therefore, if you’re having trouble hooking up your external USB devices to your macOS virtual machine, we’re here to help as long as you used VirtualBox to set it up. All you need to do is read along.
How to Connect USB Devices to macOS VirtualBox VM
Keep in mind that if you used VMWare Workstation or any software other than VirtualBox, the following procedure will be of no use. Now, without further ado, let’s get started:
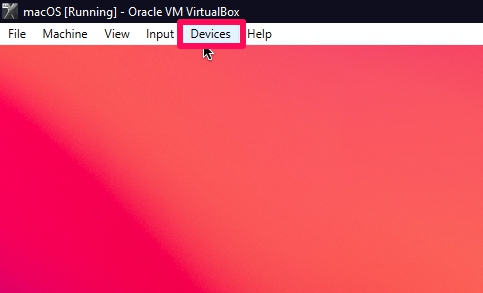
- First of all, launch VirtualBox and boot up your macOS Virtual Machine. Once you’re logged into macOS, click on “Devices” from the VirtualBox menu bar.

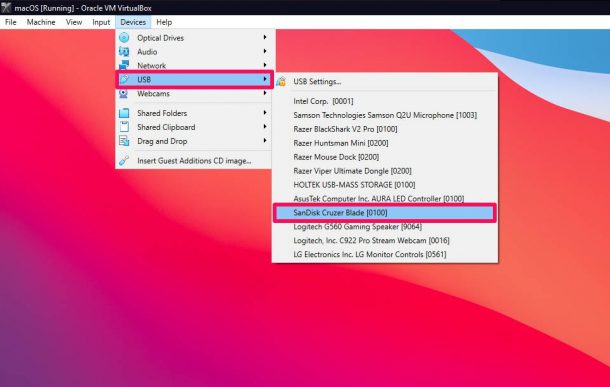
- Next, hover the cursor over “USB from the dropdown menu and choose the connected USB device that you want to mount in the virtual machine.
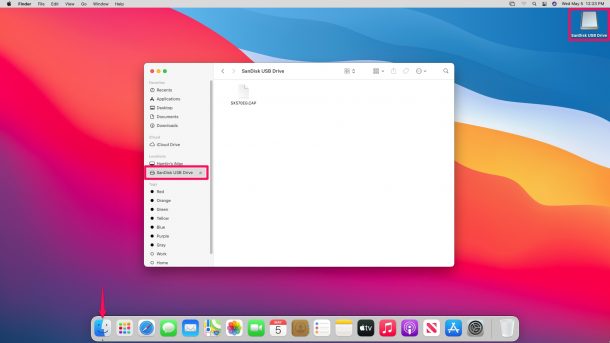
- Now, within a second or two, you should see the connected device on your desktop. You can also open Finder on your Mac and it will show up under Locations on the left pane.
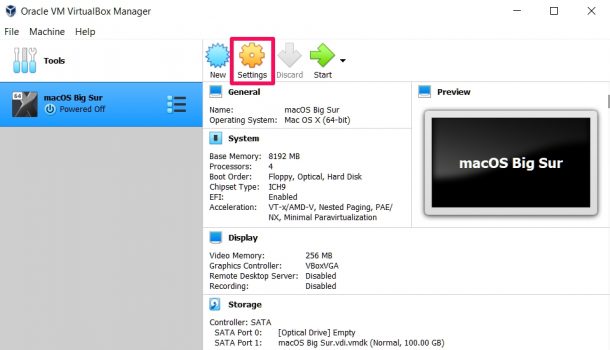
- Sometimes, the connected USB device may not show up under the Devices menu in VirtualBox. If this happens, you may need to add a filter for that USB device. Here’s how you can do that. Exit the virtual machine and head over to “Settings” from the VirtualBox main screen.
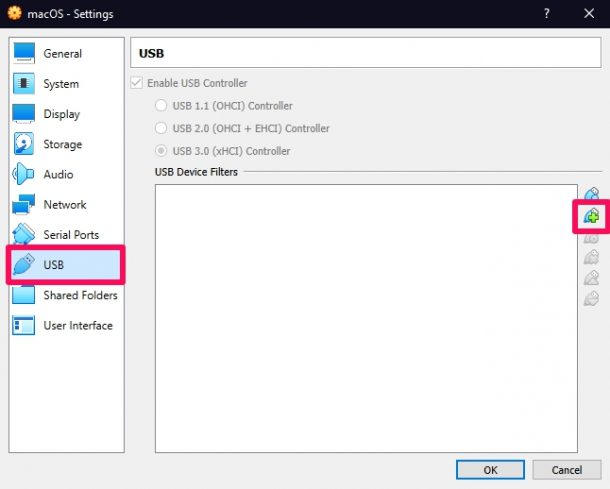
- In the settings menu, head over to the USB section from the left pane and then click on the USB icon with a plus (+) sign as shown below.
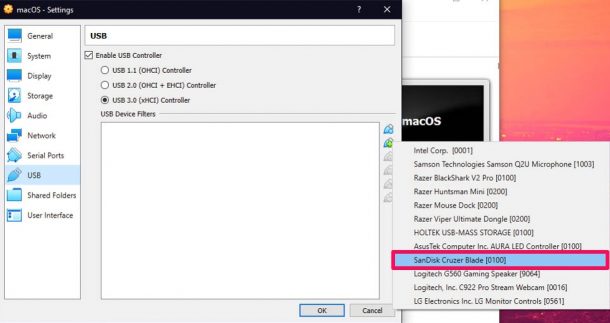
- Next, select the USB device that you want to use from the list of connected devices. Now, after you boot up your virtual machine, disconnect and reconnect the USB device and it will show up in macOS automatically.
There you go. Now, you’ve learned how to connect USB devices to your virtual machine directly.
From now on, you’ll be able to use your external hard drives, USB thumb drives, headphones, microphones, webcam any pretty much most USB devices with your macOS virtual machine. As a result of this, you’ll be able to unlock more features as you run macOS in a guest environment.
We tried out all sorts of different devices, but for some reason, we were unable to connect our iPhone to the macOS virtual machine. However, if you had any luck, please let us know, as we’d like to know if it’s a common problem.
Similarly, a lot of users who’re new to using VirtualBox for macOS installation don’t seem to get screen resolution right. By default after you set up a macOS VM, it won’t be in full-screen and it will run at a lower resolution than your display. This can be fixed with a command line which you can learn more about right here.
We hope you were successful in connecting all the USB devices that you wanted to. Were you able to try out anything new in the macOS virtual machine after connecting your external devices? Do share your experiences with us in the comments. Don’t forget to drop your valuable feedback as well.

Please enable IPv6 on this website.
Currently it is only available via legacy IPv4, which makes it slower. (this is because IPv6, being the current version of the Internet, is preferred.)