How to Make a Bootable MacOS Sonoma Beta USB Installer Disk

If you’re interested in creating a bootable macOS Sonoma beta USB installer drive, out of a USB flash drive or similar disk device, you can do so easily. Many Mac users like to use bootable USB installer drives to perform clean installations of MacOS Sonoma, to update multiple Macs easily, or just to have for troubleshooting purposes, amongst myriad other reasons.
To get started, you’ll need a USB flash drive that is at least 16GB in size, and you will need the full installer of MacOS Sonoma on your Mac in the /Applications folder.
Requirements for making a bootable MacOS Sonoma beta install drive
Before beginning, you will need the following to be able to create a boot installer for Sonoma beta:
- USB Flash drive that is 16GB or larger, this will be erased and become the USB boot disk for Sonoma beta
- Download the macOS Sonoma beta installer to the Mac and run the InstallAssistant.pkg file to place the installer into the /Applications folder
- Mac compatible with macOS Sonoma
You can create a bootable Sonoma installer out of any of the beta versions, but obviously it makes the most sense to choose the latest available release for most users.
Remember, the USB flash drive will be erased to become the installer drive, so you should use a drive you don’t mind dedicating to this purpose. Flash drives that have 128GB of storage are really quite cheap for around $15 so you can buy a few extras without breaking the bank.
How to Create a Bootable MacOS Sonoma Beta USB Install Drive
Assuming you have all the prerequisites met, here’s how you can create your Sonoma beta installer drive:
- Connect the USB flash drive to the Mac
- Open Disk Utility from the /Applications/Utilities/ folder or by using Spotlight
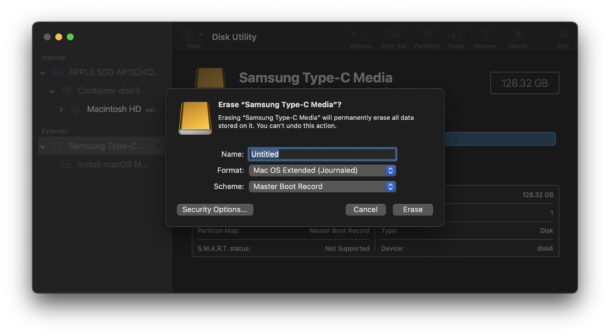
- Select the USB flash drive you just connected, and choose “Erase” from the toolbar options. Don’t worry about giving the flash drive a name, keep it as “Untitled” because it will be renamed automatically by this process
- When the USB Flash drive has been erased, quit out of Disk Utility
- Now open the Terminal application, also found in /Applications/Utilities/ or by using Spotlight and typing
“Terminal” and hitting return - Enter the following command string exactly as written into the terminal, the syntax assumes the USB flash drive is named ‘Untitled’:
- Hit return to execute the command, and then enter the administrator password as required by sudo, you won’t see the password typed in Terminal so just enter it and hit the Return key
- The macOS Sonoma beta boot installer drive will be created, you can watch the Terminal for progress, when finished you will see a message in Terminal stating ‘Install media now available at “/Volumes/Install macOS Sonoma beta”‘

For all MacOS Sonoma Public Beta’s, and Dev Betas 2 or newer:
sudo /Applications/Install\ macOS\ Sonoma\ beta.app/Contents/Resources/createinstallmedia --volume /Volumes/Untitled --nointeraction
For MacOS Sonoma Release Candidate, or Final Release:
sudo /Applications/Install\ macOS\ Sonoma.app/Contents/Resources/createinstallmedia --volume /Volumes/Untitled --nointeraction

Your MacOS Sonoma beta USB boot installer drive has been complete, and you’re ready to use it.
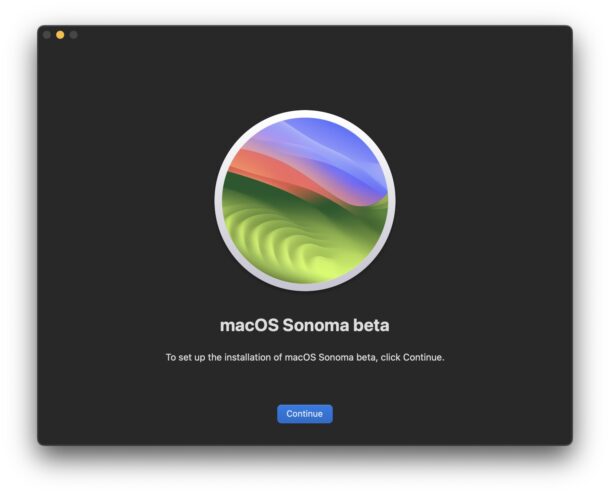
You can now eject the disk as usual, and use it to boot any Mac that is compatible with MacOS Sonoma, or simply connect it to a Mac and start the upgrade to Sonoma process.
You can use the MacOS Sonoma beta installer drive to perform clean installations of MacOS Sonoma, or to upgrade prior versions of MacOS, or to simply perform maintenance tasks. What you do with the disk is up to you.

How to Boot from the MacOS Sonoma USB Installer Drive
Booting from the MacOS Sonoma USB boot drive differs on whether the target Mac is running Apple Silicon, or Intel chips.
Boot from Sonoma USB Installer Drive on Mac with Apple Silicon (M1, M1 Pro, M2, M2 Pro, M2 Ultra, etc)
- Connect the USB boot drive to the Apple Silicon Mac
- Turn off the Mac by going to the Apple menu and choosing “Shut Down”
- Press and hold the Power button on the Apple Silicon Mac, then continue holding the Power button until you see a Startup Options screen appear
- Select the installer for macOS Sonoma from the boot options
Boot from Sonoma USB Installer Drive on Intel Mac (All Intel X86 Chips, Core i7, Core i5, etc)
- Connect the Sonoma USB boot install drive to the Intel Mac
- Restart the Mac from the Apple menu
- Immediately press and hold down the Option key as the Mac starts up, and continue holding Option key until you see the boot volumes menu
- Select the macOS Sonoma installer to boot from that disk
Now that you’re booted into the MacOS Sonoma installer, everything is the same regardless of whether you’re on an Apple Silicon Mac or an Intel Mac. You can use Disk Utility to perform disk related tasks, you can use the install application to upgrade an existing MacOS version to Sonoma beta, you can perform actions with Time Machine, and more.
If you wish to perform a clean install of Sonoma beta, you will need to erase the target Mac from this boot installer, then install Sonoma from the boot disk. We’ll cover that process in detail in another article, however.
There you have it, you’ve successfully created a USB installer drive for macOS Sonoma beta, and booted from it. Happy Sonoma!


As of 8 FEB 2024 [14.3.1]: …after asking for the password, as indicated in the article, I did have one popup asking for confirmation to “access removable media” within a minute or so of starting this process…so don’t walk away and it unattended until you confirm that last hurdle. :)
I used a 16GB stick fyi.
I am trying to create a bootable installer for MacOS Sonoma on a 32GB USB flash drive and I get the message that it still needs an extra 15.53GB of space. Have you seen this as I was sure I had enough space since the installer is just a bit less then 14GB?
A 32gb flash drive should be sufficient for the sonoma installer if it is erased and nothing else is on it
the same error when installing Sonoma 14.3 on the 15.7 GB reformating reduces more disk size needed from 199 MB to 59 MB trying the package installer downloading but i dont expect different results but Ventura installed
when trying to do this with my Mac I get command not found after entering the terminal text string. what gives?
The most likely explanation for ‘command not found’ errors when trying to create a Sonoma boot disk is either the command was entered incorrectly, or the installer application was not located in the /Applications/ folder
P:
when I log back into Ventura on the MBA somehow I need to renter my iCloud passport and TV home via a 4 number code every time. a hinderance but the extra space might be worth that when using an external dive.
I hope that cleared up everything!
have fun1
This is a better step not naming the thumb drive volume as in the past and this install Sonoma or Ventura process can make a MacBook Air with a 256GB reboot to an external drive with TB were the experience is still fast as the base system.
the only hinderance is when we log into the original drive, we need to retype some passwords for iCloud and apple air play as this can be annoying as the first thing one does in the morning. To avoid this, restart at night with any drive the chose then restart reenter password, then shut down for the day.
You’re saying to run macOS Sonoma from an external flash drive? Why does it log out of iCloud?