How to Store Voice Memos in Folders on iPhone & iPad
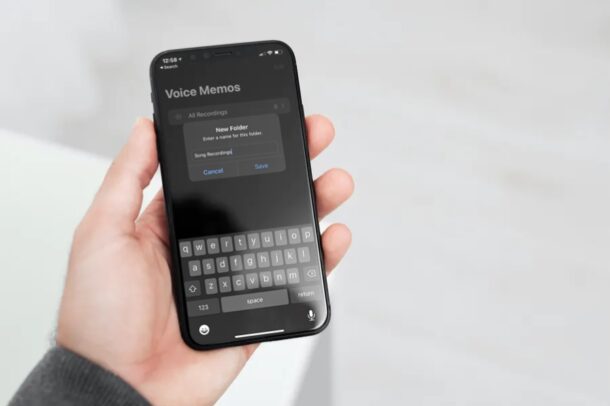
Do you frequently use the Voice Memos app to record audio on your iPhone or iPad? If you use the feature often, you may end up with many recorded files stored on your device, and you might want to organize your recordings by storing them within different folders.
The pre-installed Voice Memos app offers a free and convenient way to record anything from personal voice clips to even professional podcasts with the right audio equipment. It even features a built-in editor to handle post-production work to a certain extent. However, one thing that the app has lacked so far is the ability to neatly sort your voice recordings. This changes with the new iOS 14 software update as Apple has finally added folder support to the app.
Can’t wait to separate your audio recordings and group them into folders? You’re certainly not alone, and we’re here to help. In this article, we’ll be discussing exactly how you can store Voice Memos in folders on both the iPhone and iPad.
How to Use Folders for Voice Memos on iPhone & iPad
First and foremost, make sure your device is running iOS 14/iPadOS 14 or later since folder organization isn’t available on older versions.
- Launch the native Voice Memos app on your iPhone or iPad.

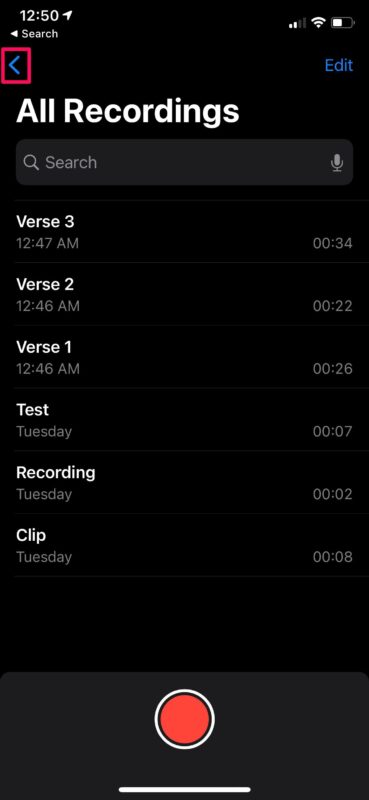
- Once the app opens up, you’ll be shown all your recordings. Tap on the back option located at the top-left corner of your screen.

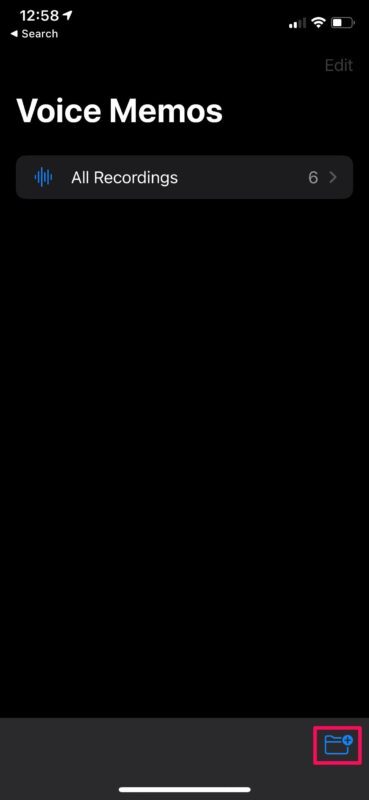
- Next, tap on the folder icon located at the bottom-right corner of the menu to start creating a new folder.

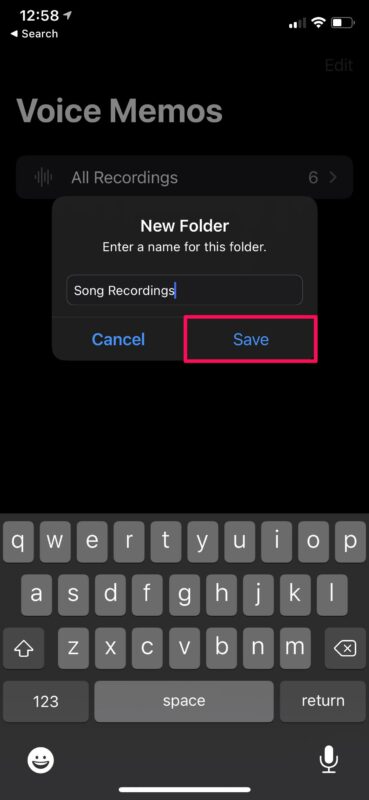
- Give a preferred name for the new folder and tap on “Save” to continue.

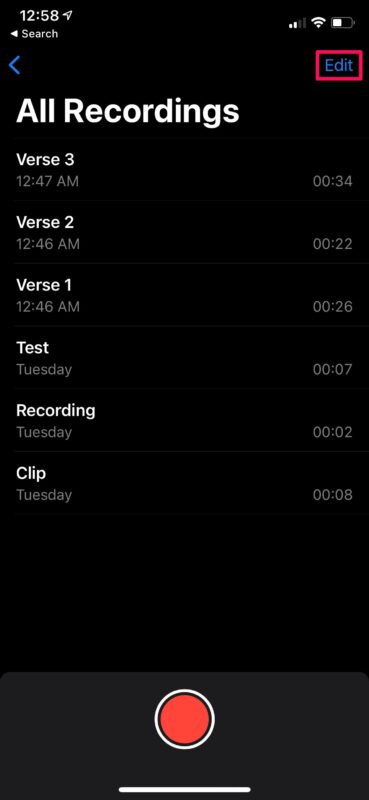
- Now, go back to the All Recordings section in the app. Tap on “Edit” located at the top as shown in the screenshot below.

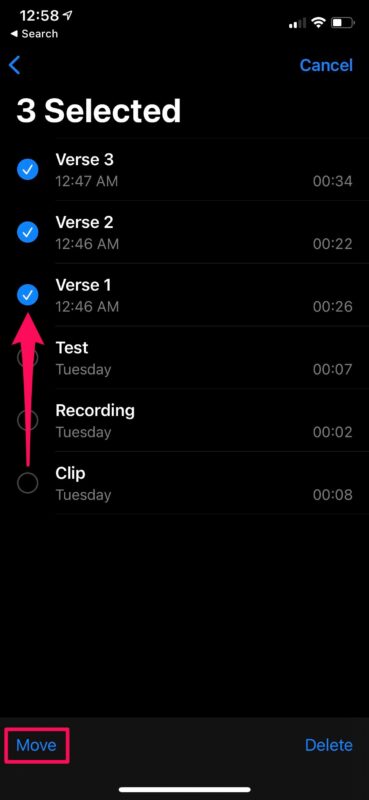
- Next, simply tap on the audio recordings to select the ones you want to move to the newly created folder. Once you’re done with the selection, tap on “Move” located at the bottom.

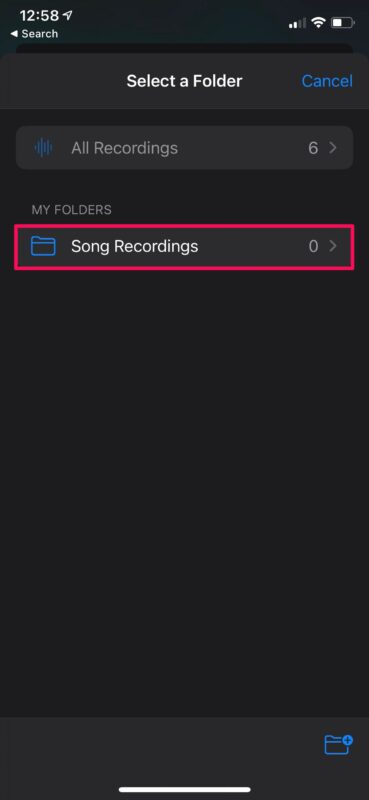
- In this step, you’ll be asked to choose the destination folder for moving these recorded files. Just tap on the folder and you’re good to go.

That’s pretty much all there is to it. Now you know how easy it is to store Voice Memos in folders on your iPhone or iPad.
You can repeat the above steps as many times as you want to create multiple folders and organize all the audio clips that you have recorded so far. You will also be given the option to create a new folder while moving the selected recordings.
You can have whatever folders you’d like, for any audio, be it conversations, appointments, music, voice memos to turn into ringtones, or anything else.
In addition to being able to manually create folders to store your audio recordings, the Voice Memos app is also capable of automatically grouping your Apple Watch recordings, recently deleted audio files, and favorites into Smart Folders.
Apart from this new handy feature, Voice Memos has received other notable improvements too with iOS 14. The app’s built-in editor can now be used to remove background noise and echoes from your voice recordings at the push of a button. You can also mark some of your recordings as favorites for quick access later on.
We hope you were able to organize all your homemade voice recordings and podcast clips with the help of folders. Do you use the folders feature in Voice Memos to organize your audio recordings on iPhone and iPad? Share your experiences, thoughts, and opinions in the comments section.


If I move my recordings into a folder please tell me how I can delete the previous recordings because I need to free up space for future recordings of my ministry
Question!
Once I moved all voice memos to a folder the same voice memos remained in the app’s main list as well. Do I have (2) copies of the same VMs? My intent was to move all VMs to the folder (iCloud)and delete off the IPhone to save storage space. Help!
You didn’t mention about where all these folders go after they are backed up to the computer.
They’re in iCloud, or on the device backup
How to move folder created in memo to a different location ?