Convert an Image into Black & White with Preview in Mac OS X

Want to convert a color picture to a beautiful black and white version? Believe it or not, you don’t need any fancy apps like Adobe Photoshop, Pixelmator, or even iPhoto to convert images into black and white, all you need is Preview, which is the preinstalled basic image viewing Mac app that comes with Mac OS X. That means there is no need to buy any additional apps or plugins, you can do it all for free right with the Macs built in tools, and you’ll get a surprising level of control with some impressive results, giving your images that Ansel Adams look in just a few moments.
How to Convert a Picture into Black and White on Mac using Preview
- Make a copy of the color photo you wish to edit, this is not necessary but it’s a good idea because of the auto-save feature in Mac OS X
- Open the copy of the color image you want to convert to black and white into Preview app (should be the default image viewer for Mac OS X, if not it’s always in /Applications/ or you can make a quick change to set it as the default again)
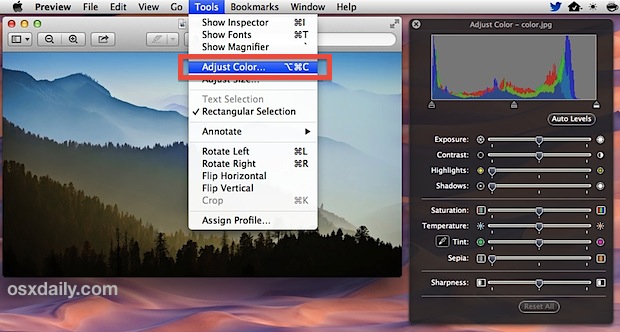
- Pull down the “Tools” menu and choose “Adjust Color” to bring up the adjustment tool panel
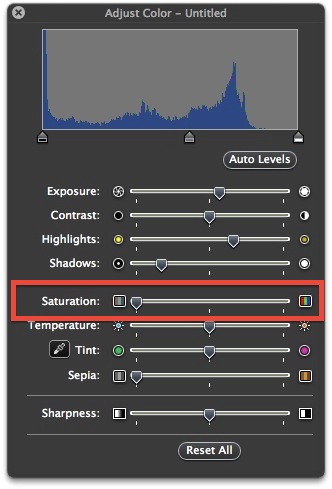
- Slide “Saturation” all the way to the left to remove all color from the image and turn it into black and white
- Optionally, adjust Exposure, Contrast, Highlights, Shadows, and Levels to improve the look of the black and white image
- When satisfied with the results, save as usual


If you just want to move quickly, slide “Saturation” all the way to the left and the picture will be stripped of all color and turned black and white. This is the setting that matters most for the conversion, with the other adjustments used to refine the appearance further. Saturation tool is highlighted here:

Though it’s a multistep process, once you get the hang of things the black and white conversion process can be done extremely quickly within Preview app. Here’s a brief video showing a color image being turned into black and white with some adjustments made to improve the appearance of the resulting picture, from start to finish takes about 20 seconds:
For some visual comparison, here is the original color picture used in this walkthrough (the base image is one of the wallpapers from OS X Mavericks collection):

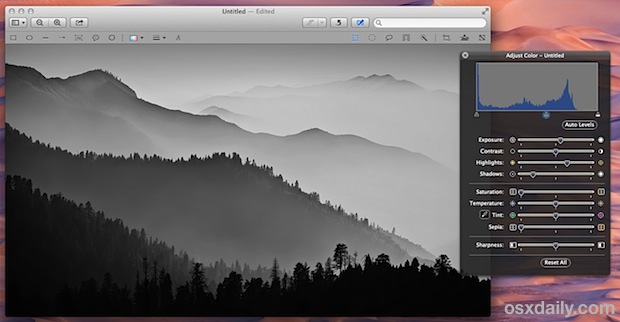
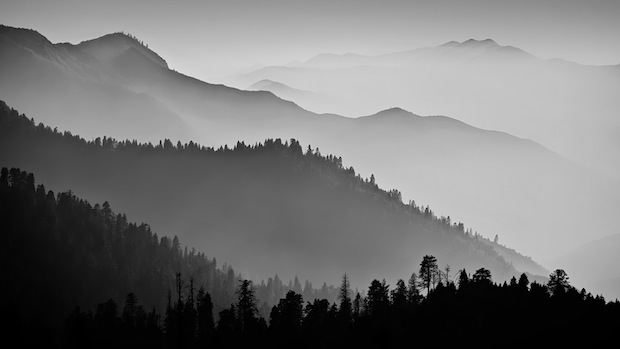
And here is the resulting black and white image with a few minor modifications to levels and other color settings:

Those are some pretty great results for just a few seconds in the often overlooked Preview app that is bundled directly into MacOS and Mac OS X. Give it a try yourself, and explore the results of tweaking the various adjustment sliders, you can make some pretty significant changes to images if you’re looking for a more dramatic look.
Preview app may be under appreciated, but it is actually a very fast and powerful image editor with some advanced features that are just barely behind the surface. From image editing and color adjustments like this, to adding cartoony captions or text to images, making transparencies, or performing batch resizing or even batch file type conversions, Preview is a gem of Mac OS X’s default app collection. Learn how to use it, and you just may find yourself rarely launching a more complex image editing app.


Thanks for that. The bw facility on GIMP is too washed out and this is much better.
Pedantry about bw or grey scale in the comments apart, full marks.
Aargh. This is gray scale not B&W. Misleading title. How to make it Black and White?
You can adjust the color settings to strip away all grayscale ranges, try adjusting exposure, contrast, etc
Also many printers have a black and white only option if you plan on printing something.
Totally agree with you, Erick. It’s greyscale and I’ve still no idea how to make an image black and white only – which is what I need for transparencies.
Not only that, but once closed after having been converted to ‘B&W’, the file is apparently saved automatically in the altered form, the original color file being lost!! SO, be careful!!! (I wish I could go back to the Preview of Lion for lots of reasons)
Yea, I wondered the same thing…desaturated RGB image ≠ greyscale. ;)
This process only gives the appearance of being “black & white” – All you’ve done is reduced the saturation levels. It’s still and RGB image, using a 16/24/32 bit RGB color space. Black & White uses a 2 bit color space, Grayscale is 8 bit. The file sizes, as well as the information under the “more info” section of the image properties will confirm this.
This is correct and not pedantic. A real black and white image is a much smaller file than the ersatz desaturated colour image this tip produces. This can be very significant.