How to Take a Screenshot on iPhone

Taking a screenshot on iPhone is pretty easy, but it is slightly different depending on the model of iPhone you have.
If you have a newer model iPhone that uses Face ID or without a Home Button, the screenshot method is one way, whereas if you have an older iPhone without Face ID but with a Home Button, it’s another way. Fortunately both are simple to learn and master.
How to Take Screenshots on iPhone (Newer iPhone with Face ID, No Home Button)
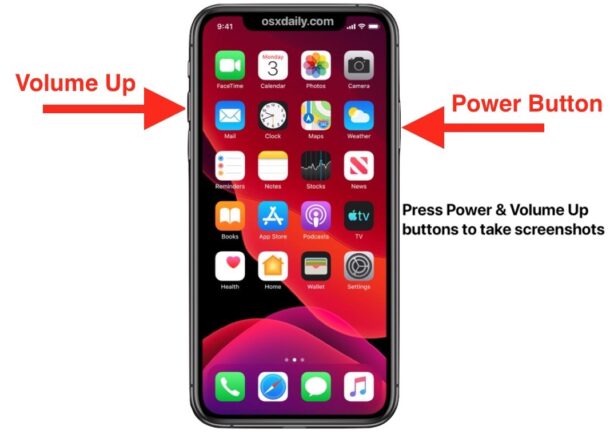
Taking screenshots on newer iPhone models, including all models of iPhone 14, iPhone 14 Pro, iPhone 13, iPhone 12, iPhone 11, iPhone XS, iPhone XR, iPhone X is as follows:
- Press on Volume Up and Power / Wake button at the same time

A brief quick concurrent press will take the screenshot. Don’t hold the button down because you may activate Siri or perform some other action. Just a quick concurrent press of both Volume Up and Power / Wake buttons is all you need to capture a screenshot of whatever is currently on screen.
You’ll know the screenshot is successful because the screen will flash, you’ll hear a quick sound effect of a shutter, and you’ll see a thumbnail show up in the corner (you can dismiss those with a swipe if you don’t want to interact with it right away).
All screenshots on iPhone then end up in the Photos app, specifically in the Screenshots photos album. They’ll also be in the general camera roll of your device.
How to Take Screen Shots on Older iPhone with Home Buttons
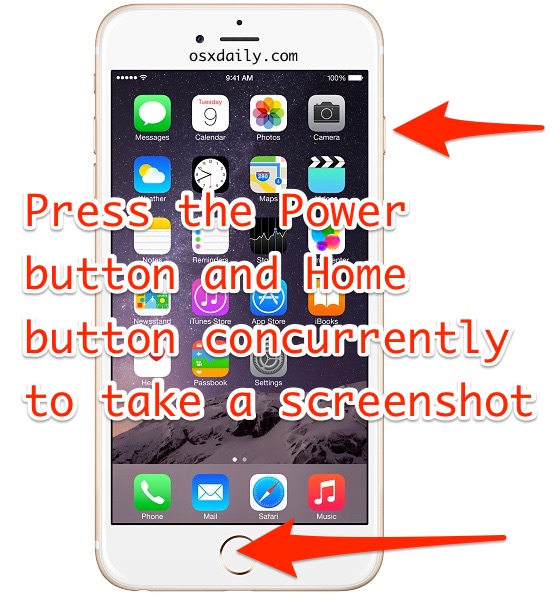
For screenshotting older iPhone models with a Home button, including all iPhone 8, iPhone 7, iPhone 6, iPhone SE, iPhone 5S, iPhone 4s, iPhone 4, and earlier, do the following:
- Press the Power button and Home button simultaneously

The screen flashes to demonstrate the screenshot was taken.
Going beyond simple screenshots, you can also capture videos of the screen by using Screen Recording as discussed here if you’d rather have a recording of activity on the iPhone screen.

