I carry my iPad around naked, that means no cases, no covers, no stands, just the iPad. But what if you’re on the go and quickly need an iPad stand? I was recently in this situation and discovered several different methods to concoct quick and dirty iPad stands for free using common items.
If you’re ever in a dire need of a quick and dirty iPad stand, that’s what we’re here to help you with. So I picked the four best choices based on the likelihood of encountering the required materials for the instant DIY iPad stand, you won’t win any design awards here, but if you’re in a pinch you should find one that works for you.
If you spend a lot of time switching between web browsers for development or for whatever other reason, you’ll find Switch useful.
Switch is a handy free menu bar utility that transfers all browser tabs and windows between web browsers in Mac OS X.
Whether you use Safari, Chrome, or Firefox, you can easily send whatever the active windows are to a different browser and back again just by pulling down the menu and selecting “Transfer to” that app.
You’ve probably noticed there isn’t an attachment button floating around when composing a new email message in iOS Mail app, so how do you attach pictures to emails on an iPhone, iPad, or iPod touch? It’s easy, and there’s actually two simple ways to attach images to your emails though you may not find them to be obvious right away, but we’ll cover both ways on how to do it.
Safari is the fast and lean default web browser bundled with every Mac and Mac OS X. You probably already know a keyboard shortcut or two, but there are tons of shortcuts in Safari worth remembering that can really improve your experience browsing the web.
We’ll cover 31 different keystrokes for Safari on Mac, they are grouped into different sections based on use case, and we’ve also included a few multi-touch gestures for those of us with multitouch capable Macs. You’ll get a grand total of 31 keyboard shortcuts for Safari on Mac, and 4 Safari gestures too!
Your iPad 3 can now act as a stunningly high quality HIDPI display for a Mac or PC with the help of a great iOS app called Air Display. A completely wireless solution, Air Display takes advantage of OS X Lion and Mountain Lion HIDPI display mode to turn the new iPad’s 2048×1536 display into an ultra-crisp 1024×768 retina display. Setting up Air Display to turn that new iPad into an external retina display for a Mac is a piece of cake, be sure to meet the requirements and get started.
The 15″ MacBook Pro (late 2008 and mid 2009) and 17″ MacBook Pro (early and mid 2009) are not supported due to their video cards. Other Macs should work fine, though there are some limitations with older hardware which you can read more about below.
Setting Up Air Display as an External HIDPI Mac Screen
Launch Air Display on the iPad
On the Mac, pull down from the AirDisplay menu item to activate the app, then select “iPad” from the devices list
Wait a second or two while the screens flicker blue and for Air Display to sync the Mac and iPad
After the iPad is found and displaying a Mac desktop, open Display Preferences to configure the display arrangement and to set the display as HIDPI (1024×768)
The iPad is now an amazingly crisp external display for the Mac. Drag windows over to the iPad to see just how gorgeous things are and to get a preview for what future Mac displays may look like, it really has to be seen to be believed just how nice it looks. When in HIDPI mode, the displays resolution is 1024×768 but displays extraordinarily sharp HIDPI assets and images.
Air Display respects the iPads screen orientation, allowing you to use the iPad as a screen in either horizontal or vertical mode. You may want to use orientation lock to prevent the screen from rearranging itself and flickering as you move it around during initial configuration.
This is a really nice app that comes highly recommended, but it won’t be a perfect solution for everyone and as I mentioned above there are some limitations. Less powerful Macs will be taxed hard by outputting to the external retina display and this makes the app not particularly practical on older hardware. In our testing, Air Display runs wonderfully on newer MacBook Pro, MacBook Air, and iMac models, but struggles on a 2010 MacBook Air where it consumed a constant 45% of CPU and spiked up to 90% CPU use when moving windows around the iPad screen. For this reason, I wouldn’t necessarily recommend Air Display for older or less powerful Macs, and Avatron would benefit from offering a limited 10 minute free trial version much like Reflection app so users can discover full compatibility before springing for the purchase. Another thing to keep in mind is that assets which aren’t optimized for the HIDPI display can look strange or display incorrectly because very few Mac apps and even parts of OS X just aren’t built for the HIDPI display yet, though this is no fault of Air Displays. Air Display also brings touch support to OS X, but you will quickly discover it’s a clunky experience due to Mac OS X not being designed for touch-based input. Turning a Mac into a touch device is a nice addition to the app, but it’s more fun than useful.
All in all this is a quality iOS app, and if you have an iPad 3 that goes unused during the day while you work on a Mac, get Air Display and turn that iPad into an amazingly crisp external monitor. It’s a great app and well worth the $9.99.
Signing up to use the App Store requires a credit card, right? Wrong. We showed you how to use iTunes without a credit card, and it turns out you can do the same thing with the iOS and Mac App Store too.
A credit card-free account is a perfect solution for setting up an iPhone, iPad, iPod, or Mac for a kid or for use in a public space, when you want to provide access to the free downloads and updates in the App Stores without the ability to make purchases through it. Even without a credit card attached to the Apple ID, you can add gift certificates and redeem codes through this account, making for an easy budgeting system should you wish to provide limited access to App Store purchases down the road.
Have you ever set a desktop wallpaper from Safari on Mac OS X, only to wish you had saved the file directly so you could access it later or do something else with it?
As long as the desktop picture is still set as the active wallpaper on a desktop, you can retrieve the original wallpaper image file easily by doing the following:
Beautiful. Alluring. Gorgeous. Perfection. Amazing. Exemplary. Smart. Revolutionary. Stunning. It’s everything you could dream of and more. This amazing iPad stand will be the envy of everyone who sees it, because who doesn’t want a toilet plunger resting on their desk? Featuring a handsome wooden handle and a ravishing lightly used black rubber cup (complete with mystery sediment stained around the rim), this gorgeous toilet plunger is easily the best toilet plunger to ever grace the iPad as a stand.
Typing on the iPad can be natural for some users, but unnatural or difficult for others. If you’re in the latter camp, you will appreciate this collection of typing tips for iPad which can help improve your typing on the device.
Personally I love the iPad but I really hate typing on it. Though touch screens are magnificent for some tasks, frankly typing just isn’t one of them. Maybe it’s my hands and fingers fault or maybe I’m just a grouchy old school tactile typer, but I struggle to get in any kind of real workflow that involves typing more than a sentence or two on touch screens. I’m probably not the only one to feel this way, so here are six helpful tips to improve the typing and writing experience on the iPad:
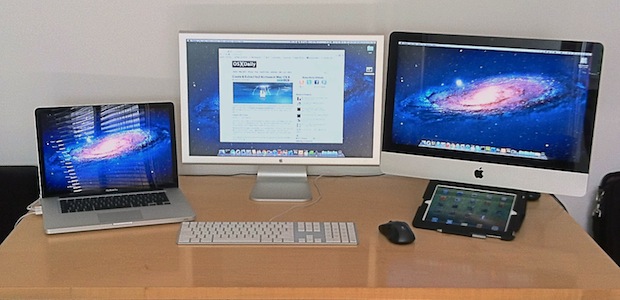
Developer John R. sent in this beautifully simple Mac setup, featuring a very clean desk area with some great Apple gear. The hardware is used primarily for iOS development and web development and design, and consists of the following:
• MacBook Air 11″ 1.6Ghz i5 4GB RAM 64GB SSD (2011)
• Thunderbolt Display 27″ (2011)
• iPad 3rd gen (2012) 64GB Wi-Fi & 4G LTE with a red Smart Cover
• Apple Wireless Keyboard
• Apple Magic Trackpad
• Apple Magic Mouse
• Desk (White Glass, IKEA)
Not shown in the picture, but elsewhere in the setup includes:
• iPhone 4S 16GB White, used to make the picture (2011)
• Airport Extreme Base Station (2011)
• Airport Express (2011)
• Apple TV 3rd gen (2012)
• Apple Remote
• Canon Network Laserprinter
• Western Digital 1TB External HD
I love these simple and clean setups and often wish my desk looked even half as elegant.
Want your Mac setup featured? Send in pictures of Apple & Mac setups to osxdailycom@gmail.com and include some brief hardware details and what you use it for. We get tons of submissions so we can’t post them all, yet at least.
Ever wanted to view source of a webpage from an iPad or iPhone? Unfortunately, mobile Safari doesn’t include the feature on it’s own and does not yet have a mobile web inspector toolkit built-in, but with the help of a custom bookmarklet you can view source of any web page right in iOS and iPadOS.
This article will show you how you can get set up so that you can view source in Safari for iPad and iPhone by using a bookmarklet and javascript trick. Read more »
Sending out multiple photos at the same time from an iPhone, iPad, or iPod touch is easy and intuitive. This basically means you can send out a group of pictures without having to constantly go back and forth from the Photos app. It’s a piece of cake to do with iOS, and here’s how to do it: Read more »
Activity Monitor can be used for more than just managing tasks and killing processes, it can also turn the Mac OS X Dock into a live system monitor where you can keep an eye on processor usage, CPU history, network activity, disk activity, or RAM use.
With the help of a buried menu item, we can lock the Mac OS X screen right from the Terminal. This does not log a user out, it just brings up the standard Mac OS X lock screen and login window, requiring a valid user and password before the Mac can be used again.
This is very simple to use, if you find yourself locking the Mac often with this trick you may want to make an alias for easier access. Read more »
Web developers and website owners pay attention: you need to set a retina-ready iOS bookmark icon. The bookmark icons are called an Apple Touch Icon, and these custom images become the icon that is displayed on a users home screen when they bookmark a website on an iPad, iPhone, or iPod touch in iOS, or the bookmarks panel of Safari for OS X. Without a custom apple-touch-icon file set, users will get a boring and often ugly thumbnail of the web page itself, and without using a retina-ready icon, the bookmarks icon will look pixelated and generally awful on the new iPad screen.
Here’s what you need to do to create a retina perfect Apple Touch Icon for any website in a few easy steps.
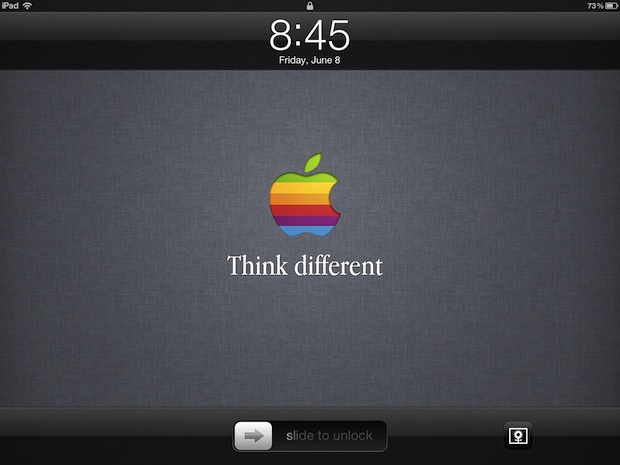
If you’re worried about losing an iPad or iPhone, you can greatly assist the chances of getting the iOS device returned to you by setting a custom “If Found” message as the lock screens wallpaper.
This only takes a minute or two to set up, and you can either use your camera or an app to help you create the lock screen message.
iTunes 10.6.1 has been released, the minor update includes a variety of bug fixes but otherwise provides no new features. The official list of changes is as follows:
• Fixes several issues that may cause iTunes to unexpectedly quit while playing videos, changing artwork size in Grid view, and syncing photos to devices.
• Addresses an issue where some iTunes interface elements are incorrectly described by VoiceOver and WindowEyes.
• Fixes a problem where iTunes may become unresponsive while syncing iPod nano or iPod shuffle.
• Resolves an ordering problem while browsing TV episodes in your iTunes library on Apple TV.
The update is recommended for all users of iTunes software, even if the aforementioned issues have not been encountered.
Users can download iTunes 10.6.1 through Software Update, from iTunes, or directly from Apple.
Want to change a user name that appears at the login screen of Mac OS X? It’s very easy to do:
Open System Preferences and click on “Users & Groups”
Select the users name you wish to change from the left side
Look for “Full Name” on the right side options and click in the box, enter the administrator password to authenticate the name change
Type the new name as you want it to appear at the login screen
Exit out of System Preferences
Confirm the login name change took place by logging out or by locking the screen, both of which will bring you to the standard OS X login window. This is the same for OS X 10.7 Lion and OS X 10.8 Mountain Lion.
The full name/login name is not to be confused with the short user name of an account, which controls the directory name and SSH logins.